Akuvox C319A Manual


Læs gratis den danske manual til Akuvox C319A (4 sider) i kategorien overvåge. Denne vejledning er vurderet som hjælpsom af 39 personer og har en gennemsnitlig bedømmelse på 4.6 stjerner ud af 20 anmeldelser. Har du et spørgsmål om Akuvox C319A, eller vil du spørge andre brugere om produktet?

Side 1/4
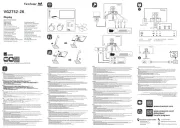
Product Overview
Loudspeaker
Rear Panel
10 Pin Terminals
11 Pin Terminals
Network Interface POE( )
Loudspeaker
Plastic wall anchors x 4 ST4x20 screw x 4 M4x30 screw x 4
M3x10.5 screw x 1 Allen Wrench x 1
Wall bracket x 110 Pin cable x 1 11 Pin cable x 1
C319X x 1
M3x6 screw x 1
Camera (Optional)
Touch Screen
MIC
Micro SD slot
Right SideFront Panel
C319X
Diode x 2
Without embedded box in the wall
According to the position
of the cable in the wall,
dig out a square
hole(height*width*depth
=66*50*50 mm) that can
accommodate all cables.
Align the square holes of
the wall bracket with the
holes previously dug,
and then mark the four
fixing holes of the wall
bracket on the wall.
Once the fixing holes
were made, insert plastic
wall anchors provided.
Take down the bracket
and drill the four marked
fixing holes on the wall
(5 mm drill bit required).
Twist M3x10.5 screw into the bottom hole of the
bracket until the tail of which align to the edge. Then
fix the wall bracket on the wall with four ST4x20
screws. If there is a ground wire to be connected,
use M3x6 screw to fix it on the wall bracket.
With embedded box in the wall
Make sure all cables in
the embedded box .
Twist M3x10.5 screw into the
bottom hole of the wall
bracket until the tail of which
align to the edge. Then fix
the wall bracket on the wall
with two/four M4x30 screws.
If there is a ground wire to be
connected , use M3x6 screw
to fix it on the wall bracket.
12
43
5
Step 1: Wall Bracket Installa
1 2


Produkt Specifikationer

Mærke: Akuvox
Kategori: overvåge
Model: C319A

Har du brug for hjælp?

Hvis du har brug for hjælp til Akuvox C319A stil et spørgsmål nedenfor, og andre brugere vil svare dig