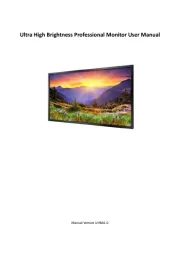
Allsee UHB55B Manual
Læs gratis den danske manual til Allsee UHB55B (43 sider) i kategorien overvåge. Denne vejledning er vurderet som hjælpsom af 13 personer og har en gennemsnitlig bedømmelse på 4.9 stjerner ud af 7 anmeldelser. Har du et spørgsmål om Allsee UHB55B, eller vil du spørge andre brugere om produktet?
Side 1/43

Ultra High Brightness Professional Monitor User Manual
Manual Version UHBA1.0

Ultra High Brightness Professional Monitor User Manual
Page 1
Safety Instructions
• Please keep the display away from any heat sources. Place the display in a
stable and well-ventilated place.
• Please handle with care as product contains glass.
• The holes or openings on the display are designed for ventilation. Do not
cover or block the ventilation holes or openings with any objects.
• Remove protective covering from the screen before you use the display.
• Shut off the power supply before cleaning. Use a soft lint-free cloth
instead of a tissue to wipe the screen.
• You may use a glass cleaner to clean the product as required. However,
never spray the cleaner directly onto the display surface.
• Do not attempt to repair this product yourself! Improper disassembly of
the product may invalidate the warranty and lead to possible danger
• If you have a problem that cannot be solved using the "Troubleshooting"
guidelines, please contact your supplier.

Ultra High Brightness Professional Monitor User Manual
Page 2
Quick Start Guide
This section of the guide is to allow swift set up and use of the unit. Please refer to the main part of
the User Guide for full information on use of the unit.
Please follow the steps detailed below:
1 Unpack unit and place in desired location.
2 Take the power lead from the accessories bag, connect power lead and plug into mains outlet.
The unit will power ON automatically (if it doesn’t please ensure the “AC Switch” is in the on
position). After powering up the screen will start to play some pre-loaded sample content.
3 Collect the files you wish to display and make sure they are supported by the unit (see Section
2.1)
4 On a PC copy the files you want to play onto an empty USB drive. These should be in the root
directory (without putting them into a folder). Remove USB from PC.
5 Insert USB drive into the one of the USB ports located on the rear of the unit (see Figure 1).
The screen should indicate that it is copying the files onto the unit. Please note that all files
currently stored in the unit will be deleted. Once completed, the screen will display a message
to remove the USB drive.
6 Remove the USB drive and the unit will reboot and play the stored files in a loop.
Figure 1 Position of USB ports

Ultra High Brightness Professional Monitor User Manual
Page 3
Contents:
1. Introduction ................................................................................................................................ 5
1.1 Box Contents ................................................................................................................... 5
1.2 Inputs Overview .............................................................................................................. 5
1.3 IR Remote Control Sensor Extension .............................................................................. 6
1.4 Remote Control ............................................................................................................... 7
1.5 Replacing the Remote Control Battery ........................................................................... 8
1.6 Home Screen ................................................................................................................... 9
1.7 System Menu Operation ............................................................................................... 10
1.7.1 System Settings ...................................................................................................... 10
1.7.2 System Control ....................................................................................................... 16
1.7.3 Date & Time ........................................................................................................... 19
1.7.4 Power On/Off ......................................................................................................... 21
1.7.5 Timer Strategy ........................................................................................................ 22
1.7.6 File Management ................................................................................................... 25
1.7.7 Exit .......................................................................................................................... 25
1.8 Display Settings ............................................................................................................. 26
2. System Operation ..................................................................................................................... 29
2.1 Supported Media Files ..................................................... Error! Bookmark not defined.
2.2 Steps to Load Media Files ............................................................................................. 29
3. Advanced Guide ........................................................................................................................ 31
3.1 Main Menu .................................................................................................................... 31
3.2 Creating Playlists ........................................................................................................... 31
3.2.1 Add Schedule .......................................................................................................... 32
3.2.2 Add Selected Items ................................................................................................. 32
3.2.3 Saving ..................................................................................................................... 35
3.3 Editing Playlists .............................................................................................................. 36
3.3.1 Deleting Items ........................................................................................................ 36
4. F.A.Qs and Troubleshooting Guide ........................................................................................... 37
4.1 How do I play PowerPoint presentations on my display? ............................................. 37

Ultra High Brightness Professional Monitor User Manual
Page 4
4.1.1 Option 1 (for plain slides with no animation): ....................................................... 37
4.1.2 Options 2 (for presentations with animation): ...................................................... 37
4.2 Video Format Conversion ............................................................................................. 38
4.2.1 Format Factory ....................................................................................................... 38
4.2.2 HD Video Converter Deluxe ................................................................................... 40
4.3 Connecting screen to PC ............................................................................................... 41
4.4 My media file does not fit properly on the screen ....................................................... 41
4.5 My media file will not display or is missing from the playlist ....................................... 42
4.6 My media files will not update ...................................................................................... 42
4.7 My moving GIF files will not move. ............................................................................... 42
Table of Figures
Figure 1 Position of USB ports ............................................................................................................. 2
Figure 2 Inputs Overview ..................................................................................................................... 5
Figure 3 Home Screen .......................................................................................................................... 9

Ultra High Brightness Professional Monitor User Manual
Page 5
1. Introduction
Congratulations on your purchase of our product. Please read carefully and follow all instructions
in the manual before first use.
The product should not be exposed to liquids dripping or splashing and no objects filled with
liquids, such as vases, should be placed on the product.
Attention:
1. Do not change any default setting when it is unnecessary.
2. Keep the product far away from water during installation and use.
1.1 Box Contents
1 x Ultra High Brightness Professional Monitor.
1 x Power Cable.
1 x CD (User Manual).
1 x Remote Control (with 2xAAA batteries).
1 x IR Remote Control Sensor Extension
1 x HDMI Cable
1.2 Inputs Overview
Figure 2 Inputs Overview

Ultra High Brightness Professional Monitor User Manual
Page 6
1.3 IR Remote Control Sensor Extension
The port marked “IR” is for the IR remote control sensor extension included. This is for applications
where you may find it difficult to access the main IR remote control sensor and should be
connected like so:

Ultra High Brightness Professional Monitor User Manual
Page 7
1.4 Remote Control

Ultra High Brightness Professional Monitor User Manual
Page 8
1.5 Replacing the Remote Control Battery
1. Slide the battery cover off, as shown below.
2. Remove the used batteries.
4. Insert the two new AAA batteries with their terminals corresponding to the indicators.
5. Put the cover back on.

Ultra High Brightness Professional Monitor User Manual
Page 9
1.6 Home Screen
Once your screen has powered up and begins to play content press the “STOP” button on the
remote control to go back to the Home Screen (pictured below).
Figure 3 Home Screen

Ultra High Brightness Professional Monitor User Manual
Page 10
1.7 System Menu Operation
From the Home Screen you can bring up the Main Menu by pressing the “SETUP” button the
remote control. The Main Menu includes following sub-menus: System Settings, System Control,
Date & Time, Power On/Off, Timer Strategy, File Management and Exit.
Press ↑ & ↓ to select the right item, press “PLAY” to confirm selection. To get back to the side
menu press the “LEFT” navigation button on the remote control.
1.7.1 System Settings
The sub-menus within this section are: Display Language, Screen Mode, Screen Resolution, On
Screen Clock, USB, Scrolling Text, Sync Settings, Restore to Factory Settings and Auto Start. To exit a
sub-menu please press the “LEFT” navigation button the remote control, you can now navigate
though the Main Menus sub-menus.

Ultra High Brightness Professional Monitor User Manual
Page 11
Display Language
The On Screen Display supports multiple languages, the default being English. As with all menu
operation press “DOWN” to access the sub-menu then use the navigation buttons to select the
right item, then “PLAY” to confirm selection.
Switch Screen Mode
Here you can set the screens orientation so as the OSD and content display correctly. There are 4
options as pictured below:
• 0° (default landscape) - Displays in landscape with the locker door on the left hand side.
• 90° - Displays in portrait with the locker door on the top.
• 180° - Displays in landscape with the locker door on the right hand side.
• 270° (default portrait) - Displays in portrait with the locker door on the bottom.

Ultra High Brightness Professional Monitor User Manual
Page 13
Play Log
This is a network function only and is disabled on this screen.
USB
This allows you to enable or disable the USB port. If you want to be able to update the screen
please ensure this is turned on (blue).

Ultra High Brightness Professional Monitor User Manual
Page 14
Scrolling Text
This allows you to enable or disable the scrolling text function. If you have included scrolling text in
your playlist (using the scheduling software) and want it to display please ensure this is turned on
(blue).
Sync Settings
This is a network function only and is disabled on this screen.

Ultra High Brightness Professional Monitor User Manual
Page 15
Restore To Factory Settings
Highlight “Yes” and press “PLAY” to restore factory settings; this will restore all system settings
back to default.
Auto Start
This feature allows your screen to start playing the pre-loaded content as soon as it has finished
booting up. If you want to enable this feature (recommended) please ensure this is turned on
(blue).

Ultra High Brightness Professional Monitor User Manual
Page 16
1.7.2 System Control
To exit a sub-menu please press the “LEFT” navigation button the remote control, you can now
navigate though the Main Menus sub-menus. The sub-menus within this section are: Work Mode,
Play Mode, Content Storage, Image Duration.
Work Mode
This feature allows you set the update method for your screen. It should be set to “STANDALONE”

Ultra High Brightness Professional Monitor User Manual
Page 17
Play Mode
This feature is only available if the screen is set to “STANDALONE” mode and should be set to
“Open”.

Ultra High Brightness Professional Monitor User Manual
Page 18
Content Storage
This feature allows you to display content directly from a USB stick should you want to. We
recommend that you set this feature to “Internal Memory” however if you want your content to
displays directly from your USB stick (and not copy over) please select “USB”.
Image Duration
This feature allows you to set default duration time for your images (when not using the scheduling
software).

Ultra High Brightness Professional Monitor User Manual
Page 20
Set the time using the same method, saving when complete.

Ultra High Brightness Professional Monitor User Manual
Page 22
1.7.5 Timer Strategy
This feature allows you to schedule your screen to play at different volumes at different times of
the day and switch to different AV inputs at different times of the day.
Volume Timer
To enable this feature turn the slider on (blue). New fields will now appear allowing you to set a
default volume level as well as timer fields for setting different volume levels for different periods
of the day.

Ultra High Brightness Professional Monitor User Manual
Page 23
Navigate to a timer field and press “PLAY” on your remote control. Activate the timer, set a volume
level and also a start and end time. Finally navigate to and select “SAVE”.
Port Timer
To enable this feature turn the slider on (blue). New fields will now appear allowing you to set
different AV inputs for different periods of the day.

Ultra High Brightness Professional Monitor User Manual
Page 24
Navigate to a timer field and press “PLAY” on your remote control. Activate the timer then set a
start and end time and an AV input. Finally navigate to and select “SAVE”.

Ultra High Brightness Professional Monitor User Manual
Page 25
1.7.6 File Management
Here, you can check storage information such as memory capacity, used space and free space. You
can also format the disk. You should be extremely careful here as formatting the disk will result in
a total loss of data.
1.7.7 Exit
Highlighting and selecting this section will exit the Main Menu. If you have made any changes the
system will ask to if you want to reboot the screen so that the changes can take effect, select “YES”.

Ultra High Brightness Professional Monitor User Manual
Page 26
1.8 Display Settings
As well as having a main system menu that can be accessed through your home screen, the unit
also has a display setting menu for changing which input source is being displays as well as altering
values such as brightness, contrast and saturation. This can be accessed at any time by pressing the
“MENU” button on your remote control.
Source
Here you can select which video signal the screen displays. As a default it is set to “Digital Signage”
as this plays from the internal media player. You can also select HDMI and VGA, to do so navigate
to your desired input source and press the “PLAY” button on your remote control. To go back to
the previous menu navigate to Return and press “PLAY” on your remote control.

Ultra High Brightness Professional Monitor User Manual
Page 27
System Setting
Here you can set the OSD Language to either English or Chinese using the “LEFT” and “RIGHT”
buttons on your remote control. We recommend that you do not change any of the other settings
in this menu. To go back to the previous menu navigate to Return and press “PLAY” on your remote
control.
Picture
Here you can alter the overall image settings of your screen. The default value for all the image
settings (apart from Sharpness) is 50. To adjust the Brightness, Contrast and Colour of your display
navigate to the setting and use the left and right navigation buttons to adjust the value accordingly.
Note: it is recommended not to change the image settings of your screen unnecessarily.

Ultra High Brightness Professional Monitor User Manual
Page 28
Exit
To exit from this Display Settings menu, navigate to Exit and press “PLAY”. If inactive for more than
10 seconds, you will automatically exit this menu.

Ultra High Brightness Professional Monitor User Manual
Page 29
2. System Operation
2.1 Supported Media Files
This unit does NOT support WMV or FLV video file types.
NOTE: Video and image files should be a maximum of 1920x1080 resolution (for Landscape
screens) and be a maximum of 1080x1920 resolution (for Portrait screens).
Video
Container
MP4, AVI, MPG
Codec
MPEG-1, MPEG-2, MPEG-4, XVID, H.264
Width
1920 (1080 for portrait)
Height
1080 (1920 for portrait)
Audio
AAC or MP3
Image
Container
JPEG
Compression
Baseline
Colour Mode
RGB
Width
1920 (1080 for portrait)
Height
1080 (1920 for portrait)
Maximum DPI
300

Ultra High Brightness Professional Monitor User Manual
Page 30
2.2 Steps to Load Media Files
1. Copy the files you want to play on to USB drive in the root directory (without putting them into a
folder).
2. Insert USB drive into the USB slot (see Figure 1).
3. This will automatically delete any files currently stored on the unit’s internal memory.
4. The files will then be copied to the internal memory and once completely loaded it will ask you
to remove USB drive.
5. Remove the USB drive.
6. The unit will now restart (if it doesn’t please turn off and back on via the mains or press the
reset button) and play the stored files in a loop.

Ultra High Brightness Professional Monitor User Manual
Page 31
3. Advanced Guide
Although this unit can operate without using any additional software, for more advanced
applications please copy the Playlist Editor scheduling software (on the CD provided) to your
computers’ hard drive. The software also allows you to edit existing
3.1 Main Menu
On opening the application you will be greeted by the main menu screen, giving you the options of
“Create New Playlist” and “Load Existing Playlist”.
3.2 Creating Playlists
Once you have selected “Create New Playlist” the playlist creator will be launched.
The Playlist Editor is laid out in a user friendly way with the primary functions on the left hand side
in easy to follow steps.

Ultra High Brightness Professional Monitor User Manual
Page 32
3.2.1 Add Schedule
The schedule functions as a timer for the playlists, so you can have between one and eight
playlists scheduled to start and end at different times of the day, with up to 50 files in each
playlist.
Note: If you enter more than one schedule ensure that the consecutive schedule times do not
overlap.
Click on the “Add Schedule” Button
> Type a Schedule name
> Select preferred start time
> Select preferred end time
> Click “OK”
> Schedule will appear in the playlist.
To add more schedules simply follow the whole process again for the preferred number of
schedules, ensuring you select unique schedule names and times.
3.2.2 Add Selected Items
Note: For compatible file formats please refer to 2.2 Supported Media Files.
Adding Images
Note: Before adding image files please ensure that it has a file name of 11 characters or less
and contain no special characters (!ӣ$%^&* etc.) only .
Click the “Add Image” button
> Select appropriate Schedule
> Click “Browse” and locate and select files
> Enter a duration time

Ultra High Brightness Professional Monitor User Manual
Page 33
> Select Image switch mode
> Click “OK”
> Image appears in Schedule.
You can select multiple image files at once to add to a schedule, you can also move each item up
or down in the playlist by using the arrow buttons on the right hand side.
Adding Audio
Note: Before adding audio files please ensure that it has a file name of 11 characters or less and
contain no special characters (!ӣ$%^&* etc.).
Click the “Add MP3” button
> Select Schedule
> Click “Browse” and select MP3 file
> Enter volume level
> Click “OK”
> MP3 Appears in Schedule.
Note: You must add audio files after all image files.
Adding Video

Ultra High Brightness Professional Monitor User Manual
Page 34
Note: Before adding video files please ensure that it has a file name of 11 characters or less and
contain no special characters (!ӣ$%^&* etc.).
Click the “Add Video” button
> Select Schedule
> Click “Browse” and locate Video file
> Enter preferred repeat
> Enter preferred volume
> Click “OK”
> Video appears in playlist.
Note: You cannot add Videos and MP3 audio files in the same schedule.
Adding Scrolling Text
Note: you must ensure that the scrolling text function is activated on your display, you can do this
by accessing the System Settings of the Main Menu (see 1.5.1 System Settings)
Click the “Add Scroll Message” button
>Enter the message you would like to run across the bottom of the screen
Or if you have a pre-existing .txt document containing your message:
>Highlight the “Import from file” checkbox and click “Browse”
>Locate .txt file and highlight
>Click “OK”
>Message appears at the bottom of the playlist.

Ultra High Brightness Professional Monitor User Manual
Page 35
3.2.3 Saving
Note: Before saving please ensure location drive is empty.
Click “Save to Disk”
> Click “Browse” and select the top level of the USB drive as the location of the playlist and files
> Click “Save”.

Ultra High Brightness Professional Monitor User Manual
Page 36
3.3 Editing Playlists
From the main menu click “Load Existing Playlist”
> Locate and select playlist to edit
> Playlist appears in playlist creator
> Select item to edit and click “Edit” button located on the top right hand side of the application.
Note: You can also add items to the playlist and add further schedules.
3.3.1 Deleting Items
To delete items within a playlist, select the item and click “Delete” - located on the right hand side
of the application. The item will be removed from the playlist.

Ultra High Brightness Professional Monitor User Manual
Page 38
• Aspect Ratio: 16:9 (widescreen);
• Encode Size: Width 720, Height 480.
4.2 Video Format Conversion
There are two possible tools for converting video
4.2.1 Format Factory
This is a free multipurpose convertor that can be used for normal definition
Standard Definition
1. Download a free convertor (Windows) called Format Factory which can be found at
https://format-factory.en.softonic.com/
2. Start the Software (picture 1).
3. On the left hand window pane select the ‘Video’ conversion options.
4. Select the ‘All to AVI’ conversion
5. Click the ‘Add File’ button and locate the file to be converted.

Ultra High Brightness Professional Monitor User Manual
Page 39
6. Click the ‘Output Setting’ button and modify it to look like the image shown below. A number of
important settings have been highlighted.
7. Select ‘OK’ to save these changes and then Press ‘OK’ button to goto main screen
8. Press the ‘Start’ button along the top to start the conversion. Once completed, press the ‘Output

Ultra High Brightness Professional Monitor User Manual
Page 41
4.3 Connecting screen to PC
If your PC has a HDMI output then this is ideal. Simply connect one end of a HDMI cable to the
screens HDMI input (see Figure 4) and the other to your PCs HDMI output port. Using this method
will carry both your PCs visual and audio signals. If your PC does not have a HDMI output, connect
it to the screen using a VGA cable instead, this carries the video signal. If you wish the audio signal
from your PC to be sent to the screen as well, this can be achieved by using a male-to-male 3.5mm
audio jack cable. To change the input source of your screen press the SOURCE button located on
the top right hand corner of your remote control. Next, navigate to your desired source and press
“PLAY” on your remote control.
4.4 My media file does not fit properly on the screen
If your media is being displayed with black edges please refer to section 2.11. This has happened
because the file does not have a 16:9 aspect ratio (1920x1080). Please resize file to 1920x1080
pixels and try loading the media onto the display once again.

Ultra High Brightness Professional Monitor User Manual
Page 42
4.5 My media file will not display or is missing from the playlist
In this situation the first step to take is to start with a blank USB drive. Copy one supported picture
file (2.1 Supported Media Files) onto the blank USB drive and insert this into the unit. If this works
there are most likely one or more unsupported files or folders on your original playlist.
If this does not work please check first that the media file is the correct size to fit the screen
–1920x1080 pixels. If it is any bigger than this it is likely the media file will not display.
Finally make absolutely sure that your media is a supported file type as the screen will not
recognise unsupported file types.
4.6 My media files will not update
If you are have problems updating your display follow these steps to ensure it is not a technical
issue.
1) Ensure that there are no additional unsupported files or folders stored on the USB drive.
2) Make sure the USB drive is firmly inserted into USB slot
3) Before contacting your supplier try another USB drive to be certain this is not the fault.
4.7 My moving GIF files will not move.
As the screen recognises any .gif file as an image it will display the first frame of a moving gif for
the allocated image display time.
Produkt Specifikationer
Mærke: | Allsee |
Kategori: | overvåge |
Model: | UHB55B |
Vekselstrømsindgangsspænding: | 110 - 240 V |
Vekselstrømsindgangsfrekvens: | 50 - 60 Hz |
Bredde: | 1272.6 mm |
Dybde: | 132.8 mm |
Højde: | 734.4 mm |
Vægt: | 36000 g |
Brugervejledning: | Ja |
Produktfarve: | Sort |
Pakkevægt: | 44150 g |
Pakkedybde: | 295 mm |
Pakkebredde: | 1420 mm |
Pakkehøjde: | 891 mm |
Skærm diagonal: | 55 " |
Skærmopløsning: | 1920 x 1080 pixel |
Berøringsskærm: | Ingen |
Wi-Fi: | Ja |
USB-port: | Ja |
HD-type: | Fuld HD |
Skærmteknologi: | LED |
Naturligt aspektforhold: | 16:9 |
Skærmens lysstyrke: | 2500 cd/m² |
Responstid: | - ms |
Synsvinkel, horisontal: | 178 ° |
Synsvinkel, vertikal: | 178 ° |
Indbyggede højttaler(e): | Ja |
Opbevaringstemperatur (T-T): | -30 - 60 °C |
Relativ luftfugtighed ved drift (H-H): | 10 - 80 % |
Relativ luftfugtighed ved opbevaring (H-H): | 5 - 95 % |
Udgangseffekt (RMS): | 4 W |
Antal HDMI-porte: | 1 |
Ethernet LAN-porte (RJ-45): | 1 |
Ethernet LAN: | Ja |
Processorkerner: | 4 |
Understøttede videoformater: | AVI, MP4, MPG, RM, RMVB, TS |
Understøttede lydformater: | MP3, WMA |
VESA montering: | Ja |
Panel montering grænseflade: | 600 x 400 mm |
Strømforbrug (standby): | - W |
Strømforbrug (typisk): | 440 W |
Driftstemperatur (T-T): | 0 - 50 °C |
Ethernet LAN-datahastigheder: | 10, 100 Mbit/s |
Intern hukommelse: | 2 GB |
Operativsystem installeret: | Android 5.1.1 |
Understøttede billedformater: | BMP, GIF, JPG, PNG |
Fjernbetjening inkluderet: | Ja |
Impedens: | 5 ohm (Ω) |
Antal indbyggede højttalere: | 2 |
Pc lydindgang: | Ja |
USB version: | 2.0 |
Understøttet placering: | Indendørs |
Antal USB-porte: | 2 |
Processorfrekvens: | 1.61 GHz |
Processorserie: | ARM Cortex |
Formål: | Universel |
Processormodel: | A17 |
Intern lagerkapacitet: | 6 GB |
Vis antal farver: | 16,78 millioner farver |
Kontrastforhold (typisk): | 4000:1 |
Aktiv skærmområde (B x H): | 1210 x 680.8 mm |
Produktdesign: | Digital fladpaneldisplay |
VGA (D-Sub) indgangsporte: | 1 |
Computersystem: | Ja |
Har du brug for hjælp?
Hvis du har brug for hjælp til Allsee UHB55B stil et spørgsmål nedenfor, og andre brugere vil svare dig
overvåge Allsee Manualer
22 August 2024
22 August 2024
22 August 2024
22 August 2024
22 August 2024
22 August 2024
22 August 2024
22 August 2024
22 August 2024
22 August 2024
overvåge Manualer
- Approx
- Honeywell
- IStarUSA
- Elite Screens
- Akuvox
- NZXT
- Genelec
- Legamaster
- Cooler Master
- HELGI
- Continental Edison
- Caliber
- Palmer
- Mirai
- Sunny
Nyeste overvåge Manualer
8 April 2025
8 April 2025
8 April 2025
7 April 2025
4 April 2025
2 April 2025
1 April 2025
30 Marts 2025
30 Marts 2025
30 Marts 2025