Amica OME6115I Manual
Læs nedenfor 📖 manual på dansk for Amica OME6115I (108 sider) i kategorien Emhætte. Denne guide var nyttig for 23 personer og blev bedømt med 4.7 stjerner i gennemsnit af 12 brugere
Side 1/108

IO-HOO-0110/7
(06.2018)
SIO 61 AX / OME 615 I /
OME6115I / OME7135I
Kitchen extractor hood / Kaminhaube / Okap
nadkuchenny / Kuchyňského odsavače /
Kuchynského odsávača / Hotă de bucătărie /
Tűzhely feletti páraelszívó / Кухненски аспиратор /
Campana extractora de cocina / Exaustor de cozinha
OPERATING INSTRUCTIONS EN
GEBRAUCHSANWEISUNG DE
INSTRUKCJA OBSŁUGI PL
NÁVOD K OBSLUZE CS
NÁVOD NA OBSLUHU SK
INSTRUCŢIUNE DE DESERVIRE RO
HASZNÁLATI UTASÍTÁS HU
ИНСТРУКЦИЯ ЗА ОБСЛУЖВАНЕ BG
MANUAL DE INSTRUCCIONES ES
MANUAL DE INSTRUÇÕES PT

- 2 -
NOTES ON SAFETY 7
UNPACKING 10
DISPOSAL OF OLD APPLIANCE 10
OPERATION 11
KITCHEN HOOD CONTROLS 11
OTHER IMPORTANT INFORMATION CONCERNING THE OPERATION OF THE HOOD 12
CLEANING AND MAINTENANCE 13
MAINTENANCE 13
GREASE FILTER 13
ACTIVATED CHARCOAL FILTER 13
LIGHT 13
WARRANTY AND AFTER SALES SERVICE 14
WARRANTY 14
SICHERHEITSHINWEISE 16
AUSPACKEN 20
ENTSORGUNG VON ALTGERÄTEN 20
BEDIENUNG 21
STEUERUNG DER DUNSTABZUGSHAUBE 21
ANDERE WICHTIGE INFORMATIONEN ZUR BEDIENUNG DER DUNSTABZUGSHAUBE 22
REINIGUNG UND WARTUNG 22
WARTUNG 22
FETTFILTER 23
AKTIVKOHLEFILTER 23
BELEUCHTUNG 23
GARANTIE, NACHVERKAUF-SERVICE 24
GARANTIE 24
EN- Table of contents
DE- Inhaltsverzeichnis
WSKAZÓWKI DOTYCZĄCE BEZPIECZEŃSTWA 26
ROZPAKOWANIE 30
USUWANIE ZUŻYTYCH URZĄ DZEŃ 30
OBSŁUGA 31
STEROWANIE OKAPEM 31
INNE WAŻNE INFORMACJE DOTYCZĄCE OBSŁUGI OKAPU 32
CZYSZCZENIE I KONSERWACJA 33
KONSERWACJA 33
FILTR PRZECIWTŁUSZCZOWY 33
FILTR WĘGLOWY 33
OŚWIETLENIE 33
GWARANCJA, OBSŁUGA POSPRZEDAŻOWA 34
GWARANCJA 34
PL- Spis treści

- 3 -
BEZPEČNOSTNÍ POKYNY 36
VYBALENÍ 39
LIKVIDACE OPOTŘEBOVANÝCH ZAŘÍZENÍ 39
OBSLUHA 40
OVLÁDÁNÍ ODSAVAČE 40
JINÉ DŮLEŽITÉ INFORMACE O OBSLUZE ODSAVAČE 41
ČIŠTĚNÍ A ÚDRŽBA 42
ÚDRŽBA 42
PROTITUKOVÝ FILTR 42
UHLÍKOVÝ FILTR 42
OSVĚTLENÍ 42
ZÁRUKA, POPRODEJNÍ SERVIS 43
ZÁRUKA 43
BEZPEČNOSTNÉ POKYNY POUŽÍVANIA 45
ROZBALENIE 49
LIKVIDÁCIA ZARIADENÍ 49
OBSLUHA 50
OVLÁDANIE ODSÁVAČA 50
INÉ DÔLEŽITÉ INFORMÁCIE TÝKAJÚCE SA POUŽÍVANIA ODSÁVAČA 51
ČISTENIE A ÚDRŽBA 52
KONZERVÁCIA 52
PROTITUKOVÝ FILTER 52
UHLÍKOVÝ FILTER 52
OSVETLENIE 52
ZÁRUKA, POPREDAJNÝ SERVIS 53
ZÁRUKA 53
INDICAȚII PRIVIND SIGURANȚA 55
DESPACHETARE 59
ÎNDEPĂRTAREA DISPOZITIVELOR UZATE 59
OPERARE 60
CONTROL HOTĂ 60
ALTE INFORMAȚII IMPORTANTE PENTRU OPERAREA HOTEI 61
CURĂŢAREA ŞI ÎNTREŢINEREA 62
ÎNTREŢINERE 62
FILTRUL ÎMPOTRIVA GRĂSIMILOR 62
FILTRUL DE CARBON 62
SISTEM DE ILUMINARE 62
GARANŢIE, SERVICII POSTVÂNZARE 63
GARANŢIA 63
CS- Obsah
SK- Obsah
RO - Cuprins

- 4 -
HU - Tartalomjegyzék
BG - Съдържание
BIZTONSÁGI UTASÍTÁSOK 65
KICSOMAGOLÁS 69
A HASZNÁLT KÉSZÜLÉKEK ELTÁVOLÍTÁSA 69
HASZNÁLAT 70
PÁRAELSZÍVÓ VEZÉRLÉSE 70
A PÁRAELSZÍVÓ MŰKÖDÉSÉVEL KAPCSOLATOS EGYÉB FONTOS INFORMÁCIÓK 71
TISZTÍTÁS ÉS KARBANTARTÁS 72
KARBANTARTÁS 72
ZSÍRSZŰRŐ 72
SZÉNSZŰRŐ 72
VILÁGÍTÁS 72
GARANCIA ÉS VÁSÁRLÁS UTÁNI SZERVIZ 73
GARANCIA 73
ПРЕПОРЪКИ ОТНОСНО БЕЗОПАСНОСТТА 75
РАЗОПАКОВАНЕ 79
ОБЕЗВРЕЖДАНЕ НА ИЗНОСЕНИ УРЕДИ 79
ОБСЛУЖВАНЕ 80
УПРАВЛЕНИЕ НА АБСОРБАТОРА 80
ДРУГИ ВАЖНИ ИНФОРМАЦИИ ЗА ОБСЛУЖВАНЕТО НА АБСОРБАТОРА 81
ПОЧИСТВАНЕ И ПОДДРЪЖКА 82
ПОДДРЪЖКА 82
ФИЛТЪР ЗА МАЗНИНИ 82
ВЪГЛЕН ФИЛТЪР 82
ОСВЕТЛЕНИЕ 82
ГАРАНЦИЯ, СЛЕД ПРОДАЖБЕНО ОБСЛУЖВАНЕ 83
ГАРАНЦИЯ 83
ES- Tabla de contenidos
INDICACIONES RELACIONADAS CON SEGURIDAD 85
DESEMBALAJE 89
ELIMINACIÓN DE APARATOS USADOS 89
USO 90
CONTROL DE CAMPANA 90
OTRA INFORMACIÓN IMPORTANTE RELATIVA AL USO DE LA CAMPANA 91
LIMPIEZA Y CONSERVACIÓN 92
MANTENIMIENTO 92
FILTRO DE GRASA 92
FILTRO DE CARBÓN 92
ILUMINACIÓN 92
GARANTÍA, ATENCIÓN DE POST VENTA 93
GARANTÍA 93

- 5 -
PT- Índice
CONSELHOS DE SEGURANÇA 95
DESEMPACOTAMENTO 99
ELIMINAÇÃO DE APARELHOS GASTOS 99
UTILIZAÇÃO 100
CONTROLO DO EXAUSTOR 100
OUTRAS INFORMAÇÕES IMPORTANTES SOBRE A UTILIZAÇÃO DO EXAUSTOR 101
LIMPEZA E MANUTENÇÃO 102
MANUTENÇÃO 102
FILTRO DE GORDURA 102
FILTRO DE CARVÃO 102
ILUMINAÇÃO 102
GARANTIA, SERVIÇO PÓS-VENDA 103
GARANTIA 103

- 6 -
Dear customer,
From now on, your daily housework will be easier
than ever before. Your appliance is excepon-
ally easy to use and extremely ecient. Aer reading
these Operang Instrucons, operang the appliance
will be easy.
Before being packaged and leaving the manufacturer,
the appliance was thoroughly checked with regard to
safety and funconality.
Before using the appliance, please carefully read
these Operang Instrucons. By following these
instrucons carefully you will be able to avoid any
problems in using the appliance. It is important to
keep these Operang Instrucons and store them in a
safe place so that they can be consulted at any me.
Follow these instrucons carefully in order to avoid
possible accidents.
Sincerely,

- 7 -
NOTES ON SAFETY
• Before using the appliance, please carefully read
this manual!
• The appliance is designed for household use only.
• The manufacturer reserves the right to introduce
changes, which do not aect operation of the ap-
pliance.
• The manufacturer shall not be liable for any dam-
age or re caused by the appliance resulting from
failure to follow instructions in this manual.
• Cooker hood is designed to remove cooking
odours. Do not use cooker hood for other pur-
poses.
• Connect the cooker hood operating in extraction
mode to a suitable ventilation duct (do NOT con-
nect the cooker to smoke or ue gas ducts, which
are in use). It requires installation of the air ex-
traction duct to the outside. The length of the
duct (usually a pipe of Ø 120 or 150 mm) should
not be longer than 4-5 m. An air extraction duct
is also required for telescopic and furniture hoods
in absorption mode.
• Cooker hood operating in air recirculation mode
requires the installation of an activated charcoal
lter. In this case, installing an extractor duct is
not required, however it is recommended to in-
stall an air guide vane (Mainly in chimney cooker
hoods).
• The cooker hood features independent lighting
and exhaust fan that can be operated at one of
several speeds.
• Depending on the type, the hood is designed to
be permanently attached to a vertical wall over
a gas or electric stove (chimney and universal
hoods); on the ceiling over a gas or electric stove
(island hoods); on the vertical built in furniture

- 8 -
over a gas or electric stove (telescopic and built-
in hoods). Before installing, make sure that the
wall/ceiling structure is strong enough to suspend
the hood. Some hoods are very heavy.
• For details of the installation distance above an
electric hob please refer to product technical
sheet If the installation instructions of the gas
cooker specify a greater distance, this must be
taken into account (Fig. 1).
• Do not leave an open ame under the hood.
When the pots are removed from the burner, set
the minimum ame. Always make sure that the
ame does not extend outside the pot, because it
causes unwanted loss of energy and a dangerous
concentration of heat.
• -When cooking on fat, supervise the pans con
stantly, because overheated fat can ignite.
• Unplug the appliance before any cleaning, replac-
ing the lter or repair work.
• Cooker hood grease lter should be cleaned at
least once a month, because the lter saturated
with fat is ammable.
• Ensure adequate ventilation (air ow) if other
equipment such as liquid fuel stoves or heaters
are operated in the room in addition the cooker
hood. When the cooker hood is simultaneously
operated with burning appliances requiring ade-
quate fresh air from the room to work properly,
their safe operation is possible if under pressure
around these appliances is a maximum of 0.004
mbar (this does not apply when the cooker hood
is used as an odour lter)
• Do not lean on the hood.
• The hood should be cleaned regularly both inside
and out (AT LEAST ONCE A MONTH, following the
indications concerning maintenance provided in
this manual)..Failure to adhere to the rules con-
cerning cleaning the hood and replacing lters

- 9 -
results in a re risk.
• -If the power cord is damaged it should be re
placed by a specialised service centre.
• -Ensure that it is possible to disconnect the ap
pliance from the mains by removing the plug or
switching o the bi-polar switch.
• This appliance is not intended for use by persons
(including children) with physical, mental or sen-
sory handicaps, or by persons inexperienced or
unfamiliar with the appliance, unless under su-
pervision or in accordance with the instructions
as communicated to them by persons responsible
for their safety.
• Particular attention should be paid not to allow
unaccompanied children to use the appliance.
• Make sure voltage indicated on the nameplate
corresponds to the local mains supply voltage.
• Before use, extend and straighten the power cord.
• Packaging materials (bags, polyethylene, poly-
styrene, etc.) should be kept away from children
during unpacking.
• Before connecting the hood to the mains power
supply always check that the power cord is prop-
erly installed and is not trapped by the appliance.
Do not connect the appliance to the mains until
assembly is complete.
• Do not operate your kitchen hood without the al-
uminium grease lters.
• It is strictly forbidden to cook dishes under on an
open ame (ambé) under your kitchen hood.
• Always strictly adhere to regulations issued by the
competent local authorities regarding the techni-
cal and safety requirements for fume extraction.
• Failing to tighten bolts and fasteners in accord-
ance with these instructions may endanger life
and health.
• -Hanging kitchen hoods operate only in air circu
lation / odour absorber mode

- 10 -
UNPACKING
During transportation, protective
packaging was used to protect the
appliance against any damage. Af-
ter unpacking, please dispose of all
elements of packaging in a way that
will not cause damage to the environ-
ment.
All materials used for packaging the
appliance are environmentally friendly; they are
100% recyclable and are marked with the appropri-
ate symbol.
Important! Packaging materials (bags, polyethyl-
ene, polystyrene, etc.) should be kept away from
children during unpacking.
DISPOSAL OF OLD APPLIANCE
In accordance with European Directive
2012/19/EU and Polish legislation re-
garding used electrical and electronic
goods, this appliance is marked with
the symbol of the crossed-out waste
container. This marking indicates that
the appliance must not be disposed of
together with other household waste
after it has been used.
The user is obliged to hand it over to waste collec-
tion centre collecting used electrical and electron-
ic goods. The collectors, including local collection
points, shops and local authority departments pro-
vide recycling schemes.
Proper handling of used electrical and electronic
goods helps avoid environmental and health haz-
ards resulting from the presence of dangerous com-
ponents and the inappropriate storage and process-
ing of such goods.

- 11 -
OPERATION
Kitchen hood controls
Control Panel is shown in Figure 4, for reference it is also shown below:
The control panel is equipped with two sliders:
Use the fan speed slider to adjust fan speed:
1- Low speed. Use this speed when cooking a little food with hardly any
fumes.
2- Medium speed. Use this speed when cooking multiple dishes at the
same time with moderate amount of fumes.
3- High speed. Use this speed when frying or grilling, with large
amount of fumes.
0- Set the slider in this setting to turn o the fan
Use lighting slider - to turn lighting on (1) / o (0). The lighting op
erates independently of hood fan.

- 12 -
Other important information concerning the operation of
the hood
Operation in air circulation / odour lter mode. In this mode, the ltered
air returns to the room through the outlets. Install activated charcoal
lter in this setting. It is recommended to install the air guide (available
depending on the model, mainly in chimney cooker hoods).
Air extraction operation: When cooker hood operates in extraction mode,
air is discharged outside through an extraction duct. Remove activated
charcoal lter in this setting. The cooker hood is connected to the air
outlet opening using a rigid or exible extraction duct with a diameter of
150 or 120 mm, and the appropriate clamps, which must be purchased
at a hardware store. The appliance should be installed by a qualied
installer.
Fan speed: Lowest and medium fan speed is used in normal conditions
and less intense odours, while the highest speed is used only when cook-
ing odours are very intense, such as during frying or grilling.
Note (applies to universal hoods only): Due to the design of universal
hoods you need to manually change the mode of operation. See Figure
8 for instructions on how to change the mode.
Note (only applies to telescopic and in-built kitchen hoods): Furniture
and telescopic cooker hoods operating in air recirculation mode require
installation of the exhaust duct. The other end of the duct should be di-
rected to the room as it will discharge ltered air.
Note: Hanging kitchen hoods operate only in air circulation / odour ab-
sorber mode

- 14 -
WARRANTY AND AFTER
SALES SERVICE
Warranty
Warranty service as stated on the warranty card. The manufacturer shall
not be held liable for any damage caused by improper use of the product.
The manufacturer recommends that all repairs and adjust-
ments be carried out by the Factory Service Technician or the
Manufacturer's Authorized Service Point. Repairs should be
carried out by a qualied technician only.
Manufacturer’s Declaration
The manufacturer hereby declares that this product meets the re-
quirements of the following European directives:
• Low Voltage Directive 2014/35/EC
• Electromagnetic Compatibility (EMC) Directive 2014/30/EC
• ErP Directive 2009/125/EC
• Directive RoHS 2011/65/EC
and has thus been marked with the symbol and been issued with
a declaration of compliance made available to market regulators.

- 15 -
Sehr geehrter Kunde,
Von heute an werden Ihre alltäglichen Pichten einfa-
cher denn je. Dieses Gerät ist eine Verbindung
einer außergewöhnlich leichten Bedienung und einer
perfekten Ezienz. Nachdem Sie diese Bedienungsan-
leitung gelesen haben, ist die Bedienung des Gerätes
kein Problem mehr.
Bevor das Gerät das Herstellerwerk verlassen konnte,
wurde er vor dem Verpacken gründlich auf deren Si-
cherheit und Funkonalitäten an Prüfständen über-
prü.
Bevor das Gerät in Betrieb genommen wird, lesen Sie
bie die Bedienungsanleitung aufmerksam durch. Be-
folgen Sie die darin stehenden Hinweise, vermeiden
Sie verschiedene Bedienfehler. Diese Bedienungsan-
leitung ist zu erhalten und so aufzubewahren, dass sie
jederzeit bei der Hand ist.
Zur Vermeidung möglicher Unfälle befolgen Sie die
in der Bedienungsanleitung stehenden Hinweise
genau.
Mit freundlichen Grüßen

- 16 -
SICHERHEITSHINWEISE
• -Bitte lesen Sie diese Anleitung vor der Installati
on des Kaminhaube durch!
• Das Gerät ist ausschließlich für den Einsatz im
Haushalt bestimmt.
• Der Hersteller behält sich das Recht vor, Änderun-
gen vorzunehmen, die die Gerätefunktion nicht
beeinträchtigen.
• Der Hersteller übernimmt keine Haftung für even-
tuelle Schäden oder Brände, die durch das Gerät
verursacht wurden und sich aus der Nichtbeach-
tung der in dieser Gebrauchsanweisung angege-
benen Hinweise ergeben.
• Die Dunstabzugshaube dient zur Abführung von
Gerüchen und Dämpfen. Verwenden Sie die
Dunstabzugshaube nicht zu anderen Zwecken.
• Beim Abluftbetrieb muss die Dunstabzugshaube
an einen entsprechenden Lüftungskanal ange-
schlossen werden (nicht an betriebsaktive Ka-
min-, Rauch- oder Abgaskanäle anschließen!). Es
ist dabei erforderlich, eine Leitung zur Abführung
der Abluft nach außen zu installieren. Diese Ab-
luftleitung (meistens ein Rohr mit einem Durch-
messer von Ø 120 oder 150 mm) sollte maximal
4-5 m lang sein. Die Abluftleitung ist auch bei
Teleskop-und Möbeldunstabzugshauben bei Um-
luftbetrieb erforderlich.
• -Beim Umluftbetrieb muss der Aktivkohlelter in
stalliert werden. In diesem Fall ist es nicht mehr
erforderlich, die Leitung zur Abführung der Ab-
luft zu installieren. Zu empfehlen ist dagegen die
Montage des Umlenkblechs für die Abluft (nur bei
Kaminabzugshauben).
• Die Dunstabzugshaube verfügt über eine unab-

- 17 -
hängige Beleuchtung sowie einen Abluftventila-
tor mit der Möglichkeit der Einstellung einer der
mehreren Leistungsstufen.
• Je nach der Version des Gerätes ist die Dunst-
abzugshaube für eine dauerhafte Anbringung
an einer vertikalen Wand über einem Gas- oder
Elektroherd (Kaminabzugshauben und Univer-
salabzugshauben); unter der Decke über einem
Gas- oder Elektroherd (Inselabzugshauben); an
einer vertikalen Wand in einem Möbelstück über
einem Gas- oder Elektroherd (Teleskop-und Mö-
beldunstabzugshauben) bestimmt. Vergewissern
Sie sich vor der Montage, ob die Wand- oder De-
ckenkonstruktion für die Montage der Dunstab-
zugshaube geeignet ist und standhalten kann.
Manche Modelle der Dunstabzugshauben sind
sehr schwer.
• Die Montagehöhe über dem Elektroherd ist im
Produktdatenblatt (in der technischen Spezika-
tion des Gerätes) angegeben. Sollte in der Mon-
tageanleitung für Gasherde ein größerer Abstand
angegeben sein, so muss dies berücksichtigt wer-
den (Abb. 1).
• Vermeiden Sie oene Flammen unter der Dunst-
abzugshaube. Wenn Sie das Kochgeschirr von
der Gaskochstelle nehmen, stellen Sie die Flam-
me zuvor auf Minimum. Sorgen Sie immer dafür,
dass die Flamme keinesfalls über das Kochgeschirr
hinausragt, sonst kommt es zu unerwünschten
Energieverlusten und zur gefährlichen Konzent-
ration von Wärme.
• Die Zubereitung der Gerichte mit Fetten muss
stets unter Aufsicht erfolgen, da das überhitzte
Fett sich schnell selbst entzünden kann.
• Vor jeder Reinigung, Filterwechsel oder vor Durch-
führung von Reparaturen trennen Sie das Gerät
von der Stromversorgung, indem Sie den Stecker
aus der Steckdose ziehen.

- 18 -
• Der Fettlter der Dunstabzugshaube ist mindes-
tens einmal monatlich zu reinigen, denn er ist
leicht entzündlich, wenn er überfettet ist.
• Sollten im Raum gleichzeitig sowohl die Abzugs-
haube als andere nicht mit Strom gespeiste Ge-
räte (z.B. Öfen für üssige Brennstoe, Durch-
lauferhitzer, Thermen) betrieben werden, muss
für eine ausreichende Belüftung des Raumes
(Luftzufuhr) gesorgt werden. Ein sicherer Betrieb
der Abzugshaube ist nur dann möglich, wenn
bei gleichzeitigem Betrieb der Dunstabzugshau-
be und anderer, luftverbrauchender Geräte, der
Unterdruck in ihrer direkten Nähe den Wert von
max. 0,004 mB erreicht (dieser Wert gilt nicht bei
Umluftbetrieb der Dunstabzugshaube).
• Die Dunstabzugshaube darf nicht als Stützäche
für Personen, die sich gerade in der Küche ben-
den, genutzt werden.
• -Die Dunstabzugshaube sollte sowohl von au
ßen als auch von innen oft (MINDESTENS EIN-
MAL PRO MONAT, unter Beachtung der in dieser
Gebrauchsanweisung angegebenen Hinweise
zur Wartung des Gerätes) gereinigt werden. Bei
Nichtbeachtung der Grundsätze, die die Reini-
gung der Dunstabzugshaube und den Filterwech-
sel betreen, entsteht Brandgefahr.
• Wird das Netzkabel beschädigt, muss es in einer
Fachwerstatt neu besorgt werden.
• Die Möglichkeit der Trennung des Gerätes vom
Stromnetz durch Ziehen des Steckers aus der
Steckdose oder durch Ausschalten des bipolaren
Schalters muss gewährleistet werden.
• Dieses Gerät darf nicht von Personen (einschließ-
lich Kindern) bedient werden, die unter geistigen
oder körperlichen Behinderungen leiden oder die
nicht über ausreichende Erfahrungen in der Be-
dienung solcher Geräte verfügen. Eine Ausnahme
kann gemacht werden, wenn solche Personen un-

- 20 -
AUSPACKEN
Das Gerät wird gegen Transportschä-
den geschützt. Nach dem Auspacken
sind die Verpackungsmaterialien so
zu entsorgen, dass dadurch kein Risi-
ko für die Umwelt entsteht.
Alle Materialien, die zur Verpackung
verwendet werden, sind umweltver-
träglich, können hundertprozentig
wiederverwertet werden und sind mit entsprechen-
dem Symbol gekennzeichnet.
Hinweis! Die Verpackungsmaterialien (Polyethylen-
beutel, Styroporstücke usw.) sind beim Auspacken
außer Kinderreichweite zu halten.
ENTSORGUNG VON
ALTGERÄTEN
Dieses Gerät wurde gemäß der Eu-
ropäischen Richtlinie 2012/19/EG
sowie dem polnischen Gesetz über
verbrauchte elektrische und elektro-
nische Geräte mit dem Symbol eines
durchgestrichenen Abfallcontainers
gekennzeichnet. Eine solche Kenn-
zeichnung informiert darüber, dass
dieses Gerät nach dem Ablauf des Nutzungszeitrau-
mes nicht zusammen mit anderen Hausabfällen ge-
lagert werden darf.
Der Benutzer ist verpichtet, das Gerät an einem
Sammelpunkt für verschlissene elektrische und
elektronische Geräte abzugeben. Die die Sammlung
durchführenden Einheiten, darunter lokale Sam-
melpunkte, Geschäfte und gemeindeeigene Einhei-
ten, bilden ein entsprechendes System, welches die
Abgabe dieses Gerätes ermöglicht.
Die richtige Vorgehensweise mit Elektro- und Elek-
tronikschrott trägt zur Verhinderung schädlicher
Folgen für die menschliche Gesundheit und die na-
türliche Umwelt bei, die aus der Anwesenheit von
Schadstoen sowie einer falschen Lagerung und
Weiterverarbeitung solcher Materialien folgen.

- 22 -
Andere wichtige Informationen zur Bedienung der Dunstabzugs-
haube
Umluftbetrieb: In dieser Betriebsoption kehrt die gelterte Luft über die
daran angepassten Sonderönungen in den Raum zurück. Bei dieser
Einstellung ist ein Aktivkohlelter zu installieren und es ist empfehlens-
wert, das Umlenkblech für die Abluft zu montieren (verfügbar je nach
dem Modell, vor allem in den Kamindunstabzugshauben vorhanden).
Abluftbetrieb: Bei Abluftbetrieb der Dunstabzugshaube wird die Luft
über eine spezielle Leitung hinausgeleitet. Vor der Inbetriebnahme die-
ses Modus muss der eventuelle Aktivkohlelter aus dem Gerät entfernt
werden. Die Dunstabzugshaube ist an die Lüftungsönung mit Hilfe ei-
ner steifen oder elastischen Leitung mit einem Durchmesser von 150
mm oder 120 mm und mittels entsprechender Klemmen angeschlossen,
die in den Fachgeschäften mit Installationszubehör erhältlich sind. Mit
den Anschlussarbeiten ist ein qualizierter Installateur zu beauftragen.
Geschwindigkeit der Lüfters: Unter normalen Bedingungen und bei ge-
ringer Konzentration der Dämpfe wird geringe und mittlere Geschwin-
digkeit empfohlen. Die höchste Geschwindigkeit sollte dagegen nur bei
hoher Konzentration der Dämpfe, z.B. beim Braten oder Grillen, genutzt
werden.
Hinweis (dies gilt nur für Universal-Dunstabzugshauben): die Konstruk-
tion der Universal-Dunstabzugshauben erfordert einen manuellen Wech-
sel der Betriebsart der Dunstabzugshaube. Die Art, wie die Betriebsart
gewechselt wird, ist der Abbildung Nr. 8 zu entnehmen.
Hinweis (dies gilt nur für Möbel- und Teleskopabzugshauben): Beim Um-
luftbetrieb muss im Falle der Möbel- und Teleskopabzugshauben ein Rohr
zur Abführung der Abluft montiert werden. Das andere Rohrende ist in
den Raum zu richten, dadurch erfolgt die Abführung der gelterten Luft.
Hinweis: Die hängenden Dunstabzugshauben arbeiten nur im Umluftbe-
trieb.
REINIGUNG UND WARTUNG
Wartung
Durch eine regelmäßige Wartung und Reinigung wird ein guter und stö-
rungsfreier Betrieb sowie eine optimale Lebensdauer des Gerätes ge-
währleistet. Bei der Reinigung und beim Wechsel der Fett- und Kohle-
aktivlter sind insbesondere die Hinweise der jeweiligen Hersteller zu
beachten.
• Verwenden Sie weder nasse Reinigungstücher noch Schwämme noch
Wasserstrahl.

- 23 -
• Verwenden Sie weder Lösemittel noch Alkohol, weil die lackierten
Oberächen dadurch matt werden können.
• Verwenden Sie keine ätzenden Stoe, insbesondere bei der Reini-
gung von Oberächen aus nichtrostendem Stahl.
• Verwenden Sie keine harten, rauen Reinigungstücher
• Zur Reinigung wird feuchtes Tuch sowie neutrale Reinigungsmittel
empfohlen.
Hinweis: Nachdem der Aluminiumlter mehrmals im Geschirrspüler ge-
spült worden ist, kann sich der Farbton des Filters ändern. Die Änderung
des Farbtons ist kein Hinweis darauf, dass es unrichtig ist und der Filter
gewechselt werden muss.
Fettlter
Der Aluminiumfettlter sollte bei einem üblichen Betrieb der Dunstab-
zugshaube jeden Monat im Geschirrspüler oder per Hand mit einem fei-
nen Reinigungsmittel oder üssiger Seife gereinigt werden.
Die Demontage des Aluminiumfettlters wurde in der Abbildung 5 ge-
zeigt.
In manchen Modellen wurde ein Akryllter eingesetzt. Dieser ist min-
destens alle zwei Monate oder häuger bei einem durchaus intensiven
Gebrauch zu wechseln.
Aktivkohlelter
Der Kohlelter wird nur dann eingesetzt, wenn die Dunstabzugshaube
an die Lüftungsleitung nicht angeschlossen ist. Der Aktivkohlelter kann
die Gerüche bis zur vollen Sättigung des Filters aufnehmen. Der Aktiv-
kohlelter ist weder fürs Waschen noch für die Regeneration geeignet
und sollte mindestens einmal pro 5 Monate oder im Falle einer intensiven
Beanspruchung öfter gewechselt werden.
Die Demontage des Aktivkohlelters wurde in der Abb. 6 gezeigt.
Beleuchtung
Setzen Sie Leuchten / Halogenleuchten / Diodenmodule mit denselben
Parametern, wie sie im Gerät werkseitig montiert wurden, ein. Der Wech-
sel der Beleuchtung wurde in der Abbildung 7 gezeigt. Wenn die Abbil-
dung in dieser Anleitung nicht vorhanden ist, darf das Beleuchtungsmo-
dul nur durch eine autorisierte Servicestelle durchgeführt werden.

- 24 -
GARANTIE, NACHVERKAUF-
SERVICE
Garantie
Garantieleistungen laut Garantieschein. Der Hersteller übernimmt keine
Haftung für Schäden, die durch einen unsachgemäßen Betrieb des Pro-
duktes entstehen.
Der Hersteller empehlt, dass alle Reparaturen und alle Ein-
stellmaßnahmen durch den Werkskundendienst oder durch
Autorisierten Servicedienst des Herstellers. Die Reparaturen
sollen ausschließlich durch Personen mit entsprechenden
Qualikationen durchgeführt werden.
CE-Konformitätserklärung
Der Hersteller dieses Produktes erklärt hiermit in alleiniger Verantwortung,
dass dieses Produkt den einschlägigen, grundlegenden Anforderungen der
nachfolgenden EU-Richtlinien entspricht:
• Niederspannungsrichtlinie 2014/35/EG
• Elektromagnetische Verträglichkeit 2014/30/EG
• ErP – Richtlinie 2009/125/EG
• Richtlinie RoHS 2011/65/EG
Das Gerät ist mit dem Zeichen gekennzeichnet und verfügt über eine
Konformitätserklärung zur Einsichtnahme durch die zuständigen Marktüberwa-
chungsbehörden.

- 25 -
Szanowny
Kliencie
Od dziś codzienne obowiązki staną się prostsze niż
kiedykolwiek. Urządzenie to połączenie wy-
jątkowej łatwości obsługi i doskonałej efektywności.
Po przeczytaniu instrukcji, obsługa nie będzie proble-
mem.
Sprzęt, który opuścił fabrykę był dokładnie sprawdzo-
ny przed zapakowaniem pod względem bezpieczeń-
stwa i funkcjonalności na stanowiskach kontrolnych.
Prosimy Państwa o uważną lekturę instrukcji obsłu-
gi przed uruchomieniem urządzenia. Przestrzeganie
zawartych w niej wskazówek uchroni Państwa przed
niewłaściwym użytkowaniem. Instrukcję należy zacho-
wać i przechowywać tak, aby mieć ją zawsze pod ręką.
Należy dokładnie przestrzegać instrukcji obsługi
w celu uniknięcia nieszczęśliwych wypadków.
Z poważaniem

- 26 -
WSKAZÓWKI DOTYCZĄCE
BEZPIECZEŃSTWA
• Okap należy używać dopiero po przeczytaniu tej
instrukcji
• Urządzenie przeznaczone jest wyłącznie do użyt-
ku domowego.
• -Producent zastrzega sobie możliwość dokonywa
nia zmian niewpływających na działanie urządze-
nia.
• Producent nie ponosi żadnej odpowiedzialności
za ewentualne szkody lub pożary spowodowane
przez urządzenie wynikające z nieprzestrzegania
zaleceń podanych w niniejszej instrukcji.
• Okap nadkuchenny służy do usuwania oparów
kuchennych. Nie należy go używać do innych ce-
lów.
• -Okap pracujący w trybie wyciągu należy podłą
czyć do odpowiedniego kanału wentylacyjnego
(nie podłączać do kanałów kominowych, dymo-
wych lub spalinowych, będących w eksploatacji).
Okap wymaga zainstalowania przewodu odpro-
wadzającego powietrze na zewnątrz. Długość
przewodu (najczęściej rura Ø 120 mm lub 150
mm) nie powinna być dłuższa niż 4-5 m. Przewód
odprowadzający powietrze jest również wymaga-
ny przy okapach teleskopowych i meblowych w
trybie pochłaniacza.
• Okap pracujący w trybie pochłaniacza wymaga
zainstalowania ltra z węglem aktywnym. W tym
przypadku nie wymaga się instalowania przewo-
du odprowadzającego powietrze na zewnątrz, za-
leca się natomiast montaż kierownicy wydmuchu
powietrza (występuje głównie w okapach komi-
nowych).
• Okap posiada niezależne oświetlenie oraz wenty-

- 27 -
lator wyciągowy z możliwością ustawienia jednej
z kilku prędkości obrotowych.
• W zależności od wersji urządzenia, okap jest prze-
znaczony do trwałego zamocowania na pionowej
ścianie ponad kuchenką gazową lub elektryczną
(okapy kominowe i uniwersalne); na sucie ponad
kuchenką gazową lub elektryczną (okapy wyspo-
we); na pionowej ścianie w zabudowie meblowej
ponad kuchenką gazową lub elektryczną (okapy
teleskopowe i do zabudowy). Przed montażem
należy się upewnić czy konstrukcja ściany / sutu
jest odpowiednia do utrzymania okapu. Niektóre
modele okapów są bardzo ciężkie.
• Wysokość montażu urządzenia nad płytą elek-
tryczną podana jest w karcie produktu (specy-
kacji technicznej urządzenia). Jeżeli w instruk-
cjach instalowania urządzeń gazowych podano
większą odległość, należy to uwzględnić (Rys. 1).
• Pod okapem kuchennym nie wolno pozostawiać
odkrytego płomienia, podczas zdejmowania na-
czyń znad palnika, należy ustawić minimalny pło-
mień. Zawsze należy sprawdzać czy płomień nie
wykracza poza naczynie, gdyż powoduje to nie-
pożądane straty energii i niebezpieczną koncen-
trację ciepła.
• Potrawy przygotowywane na tłuszczach powinny
być stale nadzorowane, gdyż przegrzany tłuszcz
może się łatwo zapalić.
• Przed każdą operacją czyszczenia, wymianą ltra
lub przed podjęciem prac naprawczych, należy
wyjąć wtyczkę urządzenia z gniazdka.
• Filtr przeciw tłuszczowy do okapu kuchennego
należy czyścić, co najmniej, raz na 1 miesiąc,
gdyż nasycony tłuszczem jest łatwopalny.
• -Jeżeli w pomieszczeniu, oprócz okapu, eksploa
tuje się inne urządzenia o zasilaniu nieelektrycz-
nym (np. piece na paliwa ciekłe, grzejniki prze-
pływowe, termy), należy zadbać o wystarczającą

- 28 -
wentylację (dopływ powietrza). Bezpieczna eks-
ploatacja jest możliwa, gdy przy jednoczesnej
pracy okapu i urządzeń spalających, zależnych od
powietrza w pomieszczeniu, w miejscu ustawie-
nia tych urządzeń panuje podciśnienie najwyżej
0,004 milibara (ten punkt nie obowiązuje, gdy
okap nadkuchenny jest użytkowany jako pochła-
niacz zapachów).
• -Okap nie powinien służyć jako płaszczyzna pod
parcia dla osób znajdujących się w kuchni.
• Okap powinien być często czyszczony zarówno
na zewnątrz jak i od wewnątrz (PRZYNAJMNIEJ
RAZ W MIESIĄCU, z zachowaniem wskazówek
dotyczących konserwacji podanych w niniejszej
instrukcji).Nieprzestrzeganie zasad dotyczących
czyszczenia okapu oraz wymiany ltrów powodu-
je powstanie zagrożenia pożarem.
• Jeżeli przewód zasilający ulegnie uszkodzeniu, to
powinien być wymieniony w specjalistycznym za-
kładzie naprawczym.
• -Należy zapewnić możliwość odłączenia urządze
nia od sieci elektrycznej, poprzez wyjęcie wtyczki
lub wyłączenie wyłącznika dwubiegunowego.
• Niniejszy sprzęt nie jest przeznaczony do użytko-
wania przez osoby (w tym dzieci) o ograniczonej
zdolności zycznej, czuciowej lub psychicznej,
lub osoby o braku doświadczenia lub znajomo-
ści sprzętu, chyba że odbywa się to pod nadzo-
rem lub zgodnie z instrukcją użytkowania sprzę-
tu, przekazaną przez osoby odpowiadające za ich
bezpieczeństwo.
• Należy zwrócić szczególną uwagę, aby z urządze-
nia nie korzystały po zo sta wio ne bez opieki dzieci.
• Sprawdzić, czy napięcie podane na tabliczce zna-
mionowej odpowiada miejscowym parametrom
zasilania.
• -Przed montażem rozwinąć i wyprostować prze
wód sieciowy.

- 29 -
• Materiały opakowaniowe (woreczki polietyleno-
we, kawałki styropianu itp.) należy w trakcie roz-
pakowywania trzymać z dala od dzieci.
• -Przed podłączeniem okapu do zasilania sieciowe
go należy zawsze skontrolować czy kabel zasi-
lania został prawidłowo zainstalowany i NIE zo-
stał przygnieciony przez okap w trakcie czynności
montażowych. Nie podłączać urządzenia do sieci
elektrycznej przed ukończeniem montażu.
• Zabrania się użytkować okap bez zamontowanych
aluminiowych ltrów przeciwtłuszczowych.
• Surowo zabrania się przygotowywania pod oka-
pem potraw z użyciem otwartego ognia (ambi-
rowanie).
• W zakresie koniecznych do zastosowania środ-
ków technicznych i bezpieczeństwa dotyczących
odprowadzania spalin należy ściśle przestrzegać
przepisów wydanych przez kompetentne władze
lokalne.
• Niedokręcenie śrub oraz elementów mocujących
zgodnie z niniejszymi instrukcjami może spowo-
dować zagrożenia zdrowia i życia.
• Okapy wiszące działają tylko w trybie pochłania-
cza zapachów

- 30 -
ROZPAKOWANIE
Urządzenie na czas trans por tu zostało
za bez pie czo ne przed uszko dze niem.
Po roz pa ko wa niu urzą dze nia pro si-
my Pań stwa o usu nię cie ele men tów
opa ko wa nia w spo sób nieza gra ża ją cy
śro do wi sku.
Wszystkie materiały za sto so wa ne do
opa ko wa nia są nie szko dli we dla śro-
dowiska na tu ral ne go, w 100% nadają się do odzy-
sku i oznakowano je od po wied nim symbolem.
Uwaga! Materiały opa ko wa nio we(wo recz ki po li ety-
le no we, kawałki sty ro pia nu itp.) na le ży w trakcie
rozpakowywania trzy mać z dala od dzieci.
USUWANIE ZUŻYTYCH URZĄ
DZEŃ
To urządzenie jest oznaczone zgodnie z
Dyrektywą Europejską 2012/19/UE oraz
polską Ustawą o zużytym sprzęcie elek-
trycznym i elektronicznym symbolem
przekreślonego kontenera na odpady. Ta-
kie oznakowanie informuje, że sprzęt ten,
po okresie jego użytkowania, nie może
być umieszczany łącznie z innymi odpa-
dami pochodzącymi z gospodarstwa domowego.
Użytkownik jest zobowiązany do oddania go prowa-
dzącym zbieranie zużytego sprzętu elektrycznego i
elektronicznego. Prowadzący zbieranie, w tym lo-
kalne punkty zbiórki, sklepy oraz gminne jednostki,
tworzą odpowiedni system umożliwiający oddanie
tego sprzętu.
Właściwe postępowanie ze zużytym sprzętem elek-
trycznym i elektronicznym przyczynia się do unik-
nięcia szkodliwych dla zdrowia ludzi i środowiska
naturalnego konsekwencji, wynikających z obecno-
ści składników niebezpiecznych oraz niewłaściwego
składowania i przetwarzania takiego sprzętu.

- 31 -
OBSŁUGA
Sterowanie okapem
Panel sterowania okapu jest przedstawiony na rysunku 4, dla przypo-
mnienia znajduje się on również poniżej:
Panel sterowania wyposażony jest w dwa suwaki:
Suwak oznaczony jako służy do zmiany poziomu mocy silnika oka-
pu:
1- Bieg najniższy. Stosuj ten bieg przy niezbyt dużej ilości oparów.
2- Bieg średni. Stosuj ten bieg przy średniej ilości oparów, przykładowo
podczas gotowania wielu potraw jednocześnie.
3- Bieg najwyższy. Stosuj ten bieg przy największej ilości oparów, przy-
kładowo podczas smażenia czy grillowania.
0- Ustaw suwak na tej pozycji by wyłączyć silnik okapu
Suwak oznaczony jako służy do włączenia (pozycja 1) lub wyłącze-
nia (pozycja 0) oświetlenia. Oświetlenie w okapie działa niezależnie od
silnika.

- 32 -
Inne ważne informacje dotyczące obsługi okapu
Praca jako pochłaniacz: W tej opcji pracy przeltrowane powietrze wraca
z powrotem do pomieszczenia poprzez otwory do tego przystosowane.
Przy tym ustawieniu należy zamontować ltr węglowy oraz zaleca się
zamontować kierownicę wydmuchu powietrza (dostępność w zależności
od modelu, występuje głównie w okapach kominowych).
Praca jako wyciąg: W trakcie wyciągowego trybu pracy okapu powietrze
odprowadzane jest na zewnątrz specjalnym przewodem. Przy tym usta-
wieniu należy usunąć ewentualny ltr węglowy. Okap jest podłączony do
otworu odprowadzającego powietrze na zewnątrz za pomocą sztywnego
lub elastycznego przewodu o średnicy 150 mm lub 120 mm i odpowied-
nich zacisków do przewodów, które należy nabyć w placówkach z ma-
teriałami instalacyjnymi. Podłączenie należy zlecić wykwalikowanemu
instalatorowi.
Prędkość wentylatora: Prędkości najniższą i średnią stosuje się przy nor-
malnych warunkach oraz małym natężeniu oparów, natomiast prędkość
najwyższą stosować tylko przy dużym stężeniu oparów kuchennych, np.
podczas smażenia, czy grillowania.
Uwaga (dotyczy tylko okapów uniwersalnych): Konstrukcja okapów uni-
wersalnych wymaga ręcznej zmiany trybu pracy okapu. Sposób zmiany
tego trybu zobrazowany jest na rysunku 8.
Uwaga (dotyczy tylko okapów meblowych i teleskopowych): Okapy meb-
lowe i teleskopowe pracujące w trybie pochłaniacza wymagają montażu
rury odprowadzającej powietrze. Drugi koniec rury należy skierować na
pomieszczenie, przez nią będzie odprowadzane przeltrowane powietrze.
Uwaga: Okapy wiszące pracują tylko w trybie pochłaniacza.

- 33 -
CZYSZCZENIE I
KONSERWACJA
Konserwacja
Regularna konserwacja i czyszczenie urządzenia zapewni dobrą i bez-
awaryjną pracę okapu oraz przedłuży jego żywotność. Należy zwracać
szczególną uwagę, aby ltr przeciwtłuszczowy i ltr z węglem aktywnym
były czyszczone i wymieniane zgodnie z zaleceniami producenta.
• Nie używać namoczonych szmatek lub gąbek ani strumienia wody.
• Nie stosować rozpuszczalników ani alkoholu, ponieważ mogą one
zmatowić lakierowane powierzchnie.
• Nie stosować substancji żrących, zwłaszcza do czyszczenia po-
wierzchni wykonanych ze stali nierdzewnej.
• Nie używać twardej, szorstkiej szmatki
• Zaleca się stosowanie wilgotnej szmatki oraz obojętnych środków
myjących.
Uwaga: Po kilku myciach w zmywarce, kolor ltra aluminiowego może
ulec zmianie. Zmiana koloru nie oznacza nieprawidłowości oraz koniecz-
ności jego wymiany.
Filtr przeciwtłuszczowy
Aluminiowy ltr przeciwtłuszczowy powinien być czyszczony co jeden
miesiąc podczas normalnej pracy okapu, w zmywarce lub ręcznie przy
użyciu delikatnego detergentu lub mydła w płynie.
Demontaż aluminiowego ltra przeciwtłuszczowego pokazany jest na ry-
sunku 5.
W niektórych modelach zastosowany jest ltr akrylowy. Należy go wy-
mieniać co najmniej raz na 2 miesiące lub częściej w wypadku wyjątko-
wo intensywnego użycia.
Filtr węglowy
Filtr węglowy stosuje się wyłączenie wtedy, kiedy okap nie jest podłączo-
ny do przewodu wentylacyjnego. Filtr z węglem aktywnym posiada zdol-
ność pochłaniania zapachów aż do swego nasycenia. Nie nadaje się także
do mycia ani do regeneracji i powinien być wymieniany, co najmniej raz
na 2 miesiące lub częściej w wypadku wyjątkowo intensywnego użycia.
Demontaż ltra węglowego pokazany jest na rysunku 6.
Oświetlenie
Należy stosować żarówki / halogeny / moduły diodowe o takich sa-
mych parametrach jak fabrycznie zamontowane w urządzeniu. Wymiana
oświetlenia jest pokazana na rysunku 7. Jeżeli rysunek nie występuje w
niniejszej instrukcji, wymiany modułu oświetlenia może dokonać jedynie
autoryzowany serwis.

- 34 -
GWARANCJA, OBSŁUGA
POSPRZEDAŻOWA
Gwarancja
Świadczenia gwarancyjne wg karty gwarancyjnej. Producent nie odpo-
wiada za jakiekolwiek szkody spowodowane nieprawidłowym po stę po-
wa niem z wyrobem.
Producent sprzętu sugeruje, by wszelkie naprawy i czyn no
ści re gu la cyj ne były wy ko ny wa ne przez Serwis Fabryczny
lub Serwis Autoryzowany producenta. Napraw powinna do-
konywać jedynie osoba posiadająca stosowne kwalikacje.
Oświadczenie producenta
Producent deklaruje niniejszym, że wyrób ten spełnia zasadnicze wymagania
wy mie nio nych poniżej dyrektyw europejskich:
• dyrektywy niskonapięciowej 2014/35/UE
• dyrektywy kompatybilności elek tro ma gne tycz nej 2014/30/UE
• dyrektywy ekoprojektowania 2009/125/UE
• dyrektywy RoHS 2011/65/UE
i dlatego wyrób został oznakowany oraz została wystawiona dla niego
deklaracja zgodności udostępniana organom nadzorującym rynek.

- 35 -
Vážený
kliente,
počínaje dnešním dnem jsou každodenní povinnos
jednodušší než kdykoli jindy. Zařízení je spoje-
ním výjimečně snadné obsluhy a vynikající efekvity.
Po přečtení návodu nebudete mít problém s obslu-
hou.
Zařízení, které opuslo továrnu, bylo důkladně zkon-
trolováno před zabalením z hlediska bezpečnos a
funkčnos na kontrolních stanovišch.
Před uvedením zařízení do provozu si pozorně přečtě-
te návod k obsluze. Dodržováním pokynů uvedených
v návodu předejdete nesprávnému používání. Návod
si ponechejte a uschovejte tak, abyste jej měli vždy při
ruce.
Dodržujte přesně návod k obsluze, abyste zabránili
nešťastným událostem.
S úctou

- 36 -
BEZPEČNOSTNÍ POKYNY
• Odsavač používejte teprve po přečtení tohoto ná-
vodu!
• Zařízení je určeno výlučně pro domácí použití.
• Výrobce si vyhrazuje možnost provádění změn,
které nemají vliv na funkčnost zařízení.
• -Výrobce nenese žádnou odpovědnost za even
tuální škody nebo požár způsobené zařízením,
vyplývající z nedodržování pokynů uvedených
v tomto návodu.
• Kuchyňský odsavač slouží k odstraňování kuchyň-
ských výparů. Nepoužívejte jej pro jiné účely.
• Odsavač pracující v odtahovém režimu napoj-
te na příslušný ventilační kanál (nenapojujte na
komínové, kouřové nebo spalinové kanály, které
jsou v provozu). Odsavač musí mít namontova-
né potrubí odvádějící vzduch ven. Délka potru-
bí (nejčastěji roura Ø 120 nebo 150 mm) nesmí
být delší než 4–5 m. Potrubí odvádějící vzduch se
rovněž vyžaduje u teleskopických a nábytkových
odsavačů v režimu pohlcovače.
• Odsavač pracující jako pohlcovač vyžaduje l-
tr s aktivním uhlím. V tomto případě není nutná
montáž potrubí odvádějícího vzduch ven, zato se
doporučuje namontovat zpětnou klapku vzduchu
(pouze komínové odsavače).
• Odsavač má nezávislé osvětlení a odtahový venti-
látor s možností nastavení jedné z několika rych-
lostí otáček.
• V závislosti na verzi zařízení je odsavač určen pro
trvalé připevnění na svislou stěnu nad plynový
nebo elektrický sporák (komínové a univerzální
odsavače); na strop nad plynový nebo elektrický
sporák (ostrůvkové odsavače); na svislou stěnu
v kuchyňské lince nad plynový nebo elektrický
sporák (teleskopické a vestavné odsavače). Před
Produkt Specifikationer
Mærke: | Amica |
Kategori: | Emhætte |
Model: | OME6115I |
Bredde: | 524 mm |
Dybde: | 289 mm |
Vægt: | 5850 g |
Produktfarve: | Rustfrit stål |
Antal hastigheder: | 3 |
Ledningslængde: | 1.5 m |
Tilsluttet belastning: | 286 W |
Lampetype: | Halogen |
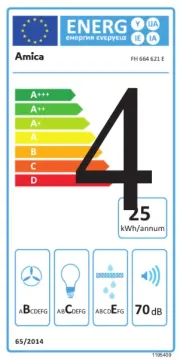
Energieffektivitetsklasse: | E |
Maksimal ekstraktionseffekt: | 336 m³/t |
Udsugningsforbindelse, diameter: | 120 mm |
Fedtfilter type: | Aluminium |
Ekstraktionstype: | Ledet |
Støjniveau (høj hastighed): | 68 dB |
Antal filtre: | 1 stk |
Minimum afstand fra elektrisk komfur: | 650 mm |
Minimum afstand fra gaskomfur: | 650 mm |
Har du brug for hjælp?
Hvis du har brug for hjælp til Amica OME6115I stil et spørgsmål nedenfor, og andre brugere vil svare dig
Emhætte Amica Manualer
7 Marts 2025

4 Februar 2025

4 Februar 2025

4 Februar 2025

4 Februar 2025

4 Januar 2025

4 Januar 2025

4 Januar 2025

6 December 2024

5 December 2024
Emhætte Manualer
- Emhætte OK
- Emhætte Hotpoint
- Emhætte GE
- Emhætte Russell Hobbs
- Emhætte Bielmeier
- Emhætte EAS Electric
- Emhætte Tecnolux
- Emhætte Fagor
- Emhætte Airone
- Emhætte Thermex
- Emhætte Mora
- Emhætte Robinhood
- Emhætte Rosieres
- Emhætte Dimplex
- Emhætte Unox
Nyeste Emhætte Manualer

4 Juni 2025

4 Juni 2025

4 Juni 2025

3 Juni 2025

1 Juni 2025

1 Juni 2025

1 Juni 2025

1 Juni 2025

1 Juni 2025

1 Juni 2025