Ariete 560 Manual


Læs nedenfor 📖 manual på dansk for Ariete 560 (92 sider) i kategorien Blender. Denne guide var nyttig for 41 personer og blev bedømt med 4.6 stjerner i gennemsnit af 21 brugere

Side 1/92
Mod. 560
Cod. 6015104700 Rev. 1 del 06/04/2009
Via San Quirico, 300
50013 Campi Bisenzio FI - Italy
E-Mail: info@ariete.net
Internet: www.ariete.net
825440
Fig. 1
Fig. 2
Fig. 3
Fig. 4 Fig. 5
Fig. 6
A
B
C
D
E
I T
- 1 -
AVVERTENZE IMPORTANTI
LEGGERE QUESTE ISTRUZIONI PRIMA DELL’USO.
Usando apparecchi elettrici è necessario prendere le opportune precauzioni, tra le quali:
1 Assicurarsi che il voltaggio elettrico dell’apparecchio corrisponda a quello della vostra rete
elettrica.
2 Non lasciare l’apparecchio incustodito quando collegato alla rete elettrica; disinserirlo dopo
ogni uso.
3 Non mettere l’apparecchio sopra o vicino a fonti di calore.
4 Durante l’utilizzo posizionare l’apparecchio su di un piano orizzontale, stabile e ben illuminato.
5 Non lasciare l’apparecchio esposto ad agenti atmosferici (pioggia, sole, ecc...).
6 Fare attenzione che il cavo elettrico non venga a contatto con superfici calde.
7 Questo apparecchio non è adatto all’utilizzo da parte di persone (compresi i bambini) con capa--
cita fisiche, sensoriali o mentali ridotte. Gli utenti che manchino di esperienza e conoscenza
dell’apparecchio oppure ai quali non siano state date istruzioni relative all’utilizzo dell’apparec--
chio dovranno essere soggette alla supervisione da parte di una persona responsabile della loro
sicurezza.
8 E’ necessario vigilare sui bambini per assicurare che non giochino con l’apparecchio.
9 NON IMMERGERE MAI IL CORPO DEL PRODOTTO, LA SPINA ED IL CAVO ELETTRICO IN
ACQUA O ALTRI LIQUIDI, USARE UN PANNO UMIDO PER LA LORO PULIZIA.
10 ANCHE QUANDO L’APPARECCHIO NON E’ IN FUNZIONE, STACCARE LA SPINA DALLA
PRESA DI CORRENTE ELETTRICA PRIMA DI INSERIRE O TOGLIERE LE SINGOLE PARTI O
PRIMA DI ESEGUIRE LA PULIZIA.
11 Assicurarsi di avere sempre le mani ben asciutte prima di utilizzare o di regolare gli interruttori
posti sull’apparecchio o prima di toccare la spina e i collegamenti di alimentazione.
12 NON TOCCARE MAI LE PARTI IN MOVIMENTO.
13 Non inserire mai le mani nella tazza quando l’apparecchio è collegato alla rete elettrica (Fig. 6).
14 Le lame sono ben affilate, prestate la massima attenzione durante la loro pulizia.
15 Non fate funzionare l’apparecchio a vuoto.
16 Non usare l’apparecchio se la lama è danneggiata.
17 Non utilizzare l’apparecchio per tritare alimenti aventi un’eccessiva consistenza (esempio: carne
con ossa).
18 PREPARARE LA TAZZA DEL FRULLATORE CON GLI ELEMENTI DA FRULLARE E MONTARLO
SUL CORPO MOTORE PRIMA DI COLLEGARE LA SPINA ALLA PRESA DI CORRENTE.
19 IL PRODOTTO E’ STATO PROGETTATO IN MODO CHE SIA FUNZIONANTE SOLO SE LA
TAZZA DEL FRULLATORE E’ STATA MONTATA CORRETTAMENTE. QUALORA QUESTO NON
SI VERIFICASSE, PORTARE IL PRODOTTO AD UN CENTRO ASSISTENZA AUTORIZZATO.
20 Non trasportare il frullatore tramite la tazza montata, ovvero, la maniglia della tazza non deve
servire per trasportare il frullatore.
21 PRIMA DI TOGLIERE IL COPERCHIO ATTENDERE CHE LA LAMA SIA COMPLETAMENTE
FERMA.
22 Per evitare infortuni e danni all’apparecchio tenere sempre le mani e gli utensili da cucina lontani
dalle lame e da parti in movimento.
IT
- 2 -
23 Per staccare la spina, afferrarla direttamente e staccarla dalla presa a parete. Non staccarla mai
tirandola per il cavo.
24 Non usare l’apparecchio se il cavo elettrico o la spina risultano danneggiati, o se l’apparecchio
stesso risulta difettoso; in questo caso portatelo al più vicino Centro di Assistenza Autorizzato.
25 Se il cavo di alimentazione è danneggiato, esso deve essere sostituito dal Costruttore o dal
suo servizio assistenza tecnica o comunque da una persona con qualifica similare, in modo da
prevenire ogni rischio.
26 L’apparecchio è concepito per il SOLO USO DOMESTICO e non deve essere adibito ad uso
commerciale o industriale.
27 Questo apparecchio è conforme alla direttiva 2006/95/CE e EMC2004/108/CEE.
28 Eventuali modifiche a questo prodotto, non espressamente autorizzate dal produttore, possono
comportare il decadimento della sicurezza e della garanzia del suo utilizzo da parte dell’utente.
29 Allorchè si decida di smaltire come rifiuto questo apparecchio, si raccomanda di renderlo inope--
rante tagliandone il cavo di alimentazione. Si raccomanda inoltre di rendere innocue quelle parti
dell’apparecchio suscettibili di costituire un pericolo, specialmente per i bambini che potrebbero
servirsi dell’apparecchio per i propri giochi.
30 Gli elementi dell’imballaggio non devono essere lasciati alla portata dei bambini in quanto poten--
ziali fonti di pericolo.
CONSERVARE QUESTE ISTRUZIONI
Il frullatore, unendo la professionalità alla praticità dell’uso, diventerà un insostituibile aiuto in cuci--
na:
- comodo da usare, grazie al tappo del coperchio che permette l’inserimento degli alimenti durante
il funzionamento.
- ideale per preparazioni istantanee.
- indispensabile per ottenere velocemente ottime granite.
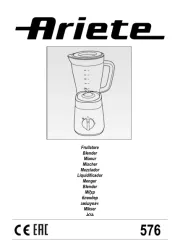
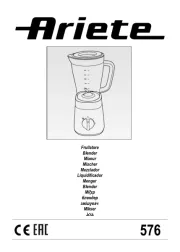
DESCRIZIONE DELL’APPARECCHIO (Fig. 1)
A Tappo
B Coperchio
C Tazza
D Corpo dell’apparecchio
E Manopola accensione / velocità
I T
- 3 -
ISTRUZIONI PER L’USO
ATTENZIONE: PREPARARE IL RECIPIENTE CON GLI ELEMENTI DA FRULLARE E MONTARLO
SUL CORPO MOTORE PRIMA DI COLLEGARE LA SPINA ALLA PRESA DI CORRENTE.
- Tagliare gli alimenti, quali frutta (yogurt, latte, succhi di frutta), gelato o ghiaccio, in piccoli pezzi ed
inserirli nella tazza (C) in una quantità tale da non superare il livello massimo indicato sul conteni--
tore stesso.
- Inserire il coperchio (B) sulla tazza (C), premendolo leggermente fino alla completa chiusura
(Fig. 2).
- Chiudere il foro superiore del coperchio (B) inserendo l’apposito tappo (A) (Fig. 3).
- Montare la tazza (C) completa sul corpo dell’apparecchio (D) in modo che le due frecce, presenti
su questi componenti, siano perfettamente allineate (Fig. 4).
- Inserire la spina del cavo alimentazione in una presa di corrente elettrica.
- Mettere in funzione l’apparecchio ruotando la manopola accensione (E) in senso orario fino al
primo o al secondo scatto per azionare le lame. Ruotando nuovamente la manopola (E) in senso
orario fino al secondo scatto, aumenterà la velocità delle lame.
Ruotando invece la manopola (E) in senso antiorario, si otterrà la funzione PULSE.
ATTENZIONE: Nel caso l’apparecchio non iniziasse a funzionare, verificare che la tazza sia posizio--
nata correttamente. L’apparecchio è dotato di dispositivi che impediscono il funzionamento qualora
la tazza non sia presente o sia montata in maniera errata.
ATTENZIONE: NON SUPERARE IL TEMPO DI FUNZIONAMENTO MASSIMO DI 30 SEC.
NON RIMUOVERE MAI IL COPERCHIO (B) DURANTE L’USO.
ATTENZIONE: Prima di frullare liquidi tiepidi rimuovere sempre il tappo coperchio frullatore (A). Non
inserire mai nel frullatore liquidi caldi.
ATTENZIONE: Non lasciare l’apparecchio acceso per più di 30 secondi. L’utilizzo ideale è a brevi
impulsi di pochi secondi.
- Per interrompere il funzionamento ruotare la manopola di accensione (E) in posizione «0».
- Durante l’uso, è possibile aggiungere alimenti nel contenitore, sollevando il tappo (A), dopo aver
spento l’apparecchio.
- Potrebbe rendersi necessario dover spengere l’apparecchio varie volte, allo scopo di rimuovere
residui di cibo dalle pareti del bicchiere. Se ciò dovesse verificarsi, spengere l’apparecchio e
disconnettere il cavo di alimentezione.
- Rimuovere il tappo, il coperchio e mediante l’utilizzo di un’apposita spatola, rimuovere ogni even--
tuale residuo dall’interno del bicchiere.
ATTENZIONE: MANTENERE LA SPATOLA LONTANA DALLA PORTATA DEL COLTELLO IN
MODO DA NON DANNEGGIARE LA LAMA.
SMONTAGGIO DEL FRULLATORE
- Staccare la spina dalla presa di corrente prima di rimuovere la tazza (C) dalla base.
- Estrarre verso l’alto la tazza (C) e togliere il coperchio (B) col tappo (A).
- Versare il frullato in un bicchiere.
I T
- 4 -
PULIZIA E MANUTENZIONE
ATTENZIONE: NON IMMERGERE MAI IL CORPO DEL PRODOTTO, LA SPINA ED IL CAVO
ELETTRICO IN ACQUA O ALTRI LIQUIDI, USARE UN PANNO UMIDO PER LA LORO PULIZIA.
ATTENZIONE: ANCHE QUANDO L’APPARECCHIO NON E’ IN FUNZIONE, STACCARE LA SPINA
DALLA PRESA DI CORRENTE ELETTRICA PRIMA DI INSERIRE O TOGLIERE LE SINGOLE
PARTI O PRIMA DI ESEGUIRE LA PULIZIA.
E’ severamente vietato smontare l’apparecchio o cercare di intervenire in qualsiasi modo all’interno
dello stesso. Mantenere l’apparecchio ben pulito ed in ordine, Vi garantirà una qualità ottimale dei
preparati e una maggiore durata della macchina stessa.
- La tazza (C), il coperchio (B), il tappo (A) possono essere lavati anche in lavastoviglie, nel ripiano
superiore.
- Per la pulizia della base motore usare un panno leggermente umido. Non usare prodotti potenzial--
menti abrasivi.
- Pulire attentamente la lama.
ATTENZIONE: GLI SPIGOLI DI TAGLIO DELLA LAMA SONO ESTREMAMENTE AFFILATI.
- É possibile riporre l’apparecchio con il cavo di alimentazione avvolto attorno al relativo avvolgicavo
inferiore (Fig. 5).
E N
- 5 -
IMPORTANT SAFEGUARDS
READ THESE INSTRUCTIONS BEFORE USE.
The necessary precautions must be taken when using electrical appliances, and these include the
following:
1 Make sure that the voltage on the appliance rating plate corresponds to that of the mains
electricity.
2 Never leave the appliance unattended when connected to the power supply; unplug it after
every use.
3 Never place the appliance on or close to sources of heat.
4 Always place the appliance on a flat, level surface during use.
5 Never leave the appliance exposed to the elements (rain, sun, etc....).
6 Make sure that the power cord does not come into contact with hot surfaces.
7 This appliance is not intended for use by persons (including children) with reduced physical,
sensory or mental capabilities, or lack of experience and knowledge, unless they have been
given supervision or instruction concerning use of the appliance by a person responsible for their
safety.
8 Children should be supervised to ensure that they do not play with the appliance.
9 NEVER PLACE THE APPLIANCE BODY, PLUG OR POWER CORD IN WATER OR OTHER
LIQUIDS; ALWAYS WIPE CLEAN WITH A DAMP CLOTH.
10 ALWAYS UNPLUG THE POWER CORD FROM THE ELECTRICITY MAINS BEFORE FITTING
OR REMOVING SINGLE ATTACHMENTS OR BEFORE CLEANING THE APPLIANCE.
11 Always make sure that your hands are thoroughly dry before using or adjusting the switches on
the appliance, or before touching the power plug or power connections.
12 NEVER TOUCH THE MOVING PARTS.
13 Never place hands in the goblet when the appliance is plugged into the mains power (Fig. 6).
14 The blades are very sharp; take care when cleaning.
15 Do not operate the appliance when it is empty.
16 Never use the appliance if the blade is damaged.
17 Never use the appliance to chop excessively hard foods (e.g., meat on the bone).
18 PLACE THE FOODS FOR BLENDING INSIDE THE BLENDER GOBLET AND FIT THE
GOBLET ONTO THE POWER BASE BEFORE PLUGGING THE APPLIANCE INTO THE MAINS
POWER.
19 THE PRODUCT HAS BEEN DESIGNED TO OPERATE ONLY WHEN THE BLENDER GOBLET
IS CORRECTLY FITTED. IF IT STILL DOES NOT START, TAKE THE PRODUCT TO YOUR
NEAREST AUTHORISED ASSISTANCE CENTRE.
20 Never hold the blender by the fitted goblet when carrying; i.e., the handle on the goblet must
never be used to carry the blender.
21 WAIT FOR THE BLADE TO STOP COMPLETELY BEFORE REMOVING THE COVER.
22 To prevent accidents or damage to the appliance, always keep hands and cooking utensils well
away from blades and any moving parts.
23 To unplug the appliance, grip the plug and remove it directly from the power socket. Never pull
the power cord to unplug the appliance.
EN
- 6 -
24 Never use the appliance if the power cord or plug are damaged or if the appliance itself is faulty;
in this case, take it to your nearest Authorised Assistance Centre.
25 To prevent any risks, if the power cord is damaged, it must be replaced by the manufacturer, its
Technical Assistance Service or a similarly qualified person.
26 This appliance is designed for HOME USE ONLY and may not be used for commercial or indu--
strial purposes.
27 This appliance conforms to the 2006/95/EC and EMC2004/108/EEC directives.
28 Any changes to this product that have not been expressly authorised by the manufacturer may
lead to the user’s guarantee being rendered null and void.
29 In the event that you decide to dispose of the appliance, we advise you to make it inoperative
by cutting off the power cord. We also recommend that any parts that could be dangerous be
rendered harmless, especially for children, who may play with the appliance or its parts.
30 Packaging must never be left within the reach of children since it is potentially dangerous.
DO NOT THROW AWAY THESE INSTRUCTIONS
With its combination of professional and practical use, this blender is an irreplaceable kitchen aid:
- easy to use, thanks to the filler cap in the lid, which makes it possible to insert foods while the
blender is operating.
- ideal for instant recipe preparation.
- indispensable for excellent instant slush drinks.
DESCRIPTION OF THE APPLIANCE (Fig. 1)
A Filler cap
B Cover
C Goblet
D Appliance’s body
E On/speed dial
BLENDER USE INSTRUCTIONS
CAUTION: PLACE THE FOODS FOR BLENDING IN THE CONTAINER AND FIT IT TO THE
POWER BASE BEFORE PLUGGING THE APPLIANCE INTO THE MAINS POWER.
- Cut up foods such as fruit (yoghurt, milk, fruit juice), ice cream or ice into small pieces and place
them inside the goblet (C). Take care not to exceed the maximum level indicated on the goblet
itself.
- Place the lid (B) on the goblet (C), pressing it gently into place (Fig. 2).
- Close the opening in the top of the lid (B) by inserting the special cap (A) (Fig. 3).
- Fit the assembled goblet (C) onto the power base (D) so that the two arrows are perfectly lined up
(Fig. 4).
- Plug the appliance into a mains power socket.
- Start the appliance by turning the on dial (E) clockwise as far as the first or second notch to start
the blades. Turning the dial (E) clockwise as far as the second notch will increase the speed of
the blades.
E N
- 7 -
Turning the dial (E) anticlockwise will start the PULSE operating mode.
WARNING: If the appliance should fail to start, make sure that the goblet is correctly fitted. The
appliance is fitted with devices to prevent it from operating if the goblet is not fitted or if it has been
fitted incorrectly.
WARNING: NEVER EXCEED THE MAXIMUM OPERATING TIME OF 30 SECS. NEVER REMOVE
THE LID (B) DURING USE.
WARNING: Before blending warm liquids, always remove the filler cap (A) from the blender lid.
Never place hot liquids in the blender.
WARNING: Never leave the appliance on for more than 30 seconds. The ideal use is with brief pulse
operations for a few seconds each.
- To stop the appliance, turn the on dial (E) back to «0».
- It is possible to add foods to the blender goblet during use, by first lifting out the filler cap (A) after
switching off the appliance.
- It could become necessary to switch off the appliance several times in order to remove food resi--
dues from the sides of the goblet. If this occurs, switch off the appliance and unplug it from the
mains power.
- Remove the filler cap and lid and use a spatula to remove any residues from the sides of the
goblet.
WARNING: KEEP THE SPATULA WELL AWAY FROM THE BLADE SET SO AS NOT TO CAUSE
ANY DAMAGE TO THE BLADES.
BLENDER DISASSEMBLY
- Unplug the appliance from the mains power socket before removing the goblet (C) from the
base.
- Pull the goblet off upwards (C) and remove the lid (B) and plug (A).
- Pour the smoothy into a glass.
CLEANING
WARNING: NEVER PLACE THE APPLIANCE BODY, PLUG OR POWER CORD IN WATER OR
OTHER LIQUIDS; ALWAYS WIPE CLEAN WITH A DAMP CLOTH.
WARNING: ALWAYS UNPLUG THE POWER CORD FROM THE ELECTRICITY MAINS BEFORE
FITTING OR REMOVING SINGLE ATTACHMENTS OR BEFORE CLEANING THE APPLIANCE.
It is strictly prohibited to disassemble the appliance or try to intervene inside it in any way. Keep the
appliance clean and in order. This will guarantee excellently chopped foods and a longer useful life
for the appliance itself.
- The goblet (C), lid (B), and plug (A) can be washed in the top rack of the dishwasher.
- Use a slightly damp cloth to clean the power base.
Never clean with potentially abrasive products.
- Clean the blade with care.
WARNING: THE CUTTING EDGES OF THE BLADE SET ARE EXTREMELY SHARP.
- The appliance can be stored with the power cord wound around the cord winder in the base (Fig. 5).
E N
- 8 -
RECIPES
Nourishing vegetable soup from Budapest
Ingredients:
180g kohlrabi
180g potatoes
270g celery
90g carrots
water (fill up to 1.5 - litre indication)
If you want to prepare a larger quantity of soup,
let the appliance cool down for 60 minutes after
processing the ingredients for each batch.
Put the kohlrabi, potatoes, celery, carrots and
water in the blender in this order. Blend the
ingredients for 5 seconds for a coarse soup or
longer for a finer result.
150g dal (from can)
150g smoked pork
190g crème fraîche
15g parsley
salt
fresh pepper
1.5 stock cubes
2 bay leaves
Put the blended ingredients in a pot and bring
to the boil.
Add water, crème fraîche, dal, meat and herbs.
Cook for 30 minutes while stirring constantly.
If you want to prepare a larger quantity of soup,
let the appliance cool down for 60 minutes after
processing the ingredients for each batch.
Fresh fruit milkshake
Do not process more than the quantities indi--
cated in this recipe in
one go. Let the appliance cool down to room
temperature before
you continue processing.
Ingredients:
100g bananas or strawberries
200ml fresh milk
50g vanilla ice cream
granulated sugar to taste
Peel the bananas or rinse and hull the strawber--
ries. Cut the fruit
into smaller pieces. Put all the ingredients in the
blender jar.
Blend until smooth.
Tip: You can use any fruit you like to make your
favourite fresh fruit
milkshake.
F R
- 9 -
INSTRUCTIONS IMPORTANTES
LIRE CES INSTRUCTIONS AVANT L’EMPLOI.
Lors de l’utilisation d’appareils électriques, il est nécessaire de prendre les précautions suivantes:
1 Vérifiez que le voltage électrique de l’appareil corresponde à celui de votre réseau électrique.
2 Ne laissez jamais l’appareil sans surveillance lorsqu’il est branché au réseau électrique; débran--
chez-le après chaque utilisation.
3 Ne placez pas l’appareil au dessus ou près de sources de chaleur.
4 Lors de son utilisation, placez l’appareil sur une surface horizontale et stable.
5 N’exposez jamais l’appareil aux agents atmosphériques externes (pluie, soleil, etc.).
6 Veillez à ce que le câble électrique n’entre jamais en contact avec des surfaces chaudes.
7 Cet appareil n’est pas indiqué pour l’utilisation de la part de personnes (y compris les enfants)
ayant des capacités physiques, sensorielles ou mentales réduites. Les utilisateurs n’ayant pas
l’expérience, une connaissance suffisante de l’appareil ou n’ayant pas reçu les instructions
relatives à l’appareil, devront faire l’objet d’un contrôle de supervision de la part d’une personne
responsable de leur sécurité.
8 Il est nécessaire de surveiller les enfants pour empêcher qu’ils ne jouent avec l’appareil.
9 NE PAS PLONGER LE CORPS DU PRODUIT, LA FICHE NI LE CABLE ELECTRIQUE DANS
L’EAU OU AUTRES LIQUIDES, ET UTILISER TOUJOURS UN CHIFFON HUMIDE POUR LES
NETTOYER.
10 MEME LORSQUE L’APPAREIL N’EST PAS EN MARCHE, DEBRANCHER LA FICHE DE LA
PRISE DE COURANT ELECTRIQUE AVANT D’INSTALLER OU DE DEFAIRE LES SIMPLES
PARTIES OU AVANT DE PROCEDER AU NETTOYAGE.
11 Vérifier d’avoir toujours les mains sèches avant d’utiliser ou de régler les interrupteurs placés sur
l’appareil ou avant de manipuler la fiche et les connexions électriques.
12 NE TOUCHEZ JAMAIS LES PARTIES EN MOUVEMENT.
13 N’introduisez jamais vos mains dans la tasse quand l’appareil est branché au réseau électrique
(Fig. 6).
14 Prêtez la plus grande attention lors du nettoyage des lames car elles sont extrêmement affû--
tées.
15 Ne faites pas fonctionner l’appareil à vide.
16 N’utilisez pas l’appareil si la lame est endommagée.
17 Ne pas utiliser l’appareil pour hacher des aliments ayant une consistance excessive (comme par
exemple la viande avec les os).
18 PREPARER LA TASSE DU MIXEUR AVEC LES ALIMENTS A MIXER AVANT DE L’INSTALLER
SUR LE CORPS MOTEUR, PUIS BRANCHER LA FICHE A LA PRISE DE COURANT.
19 CE PRODUIT A ETE CONÇU DE FAÇON A FONCTIONNER SEULEMENT SI LA TASSE DU
MIXEUR EST INSTALLEE CORRECTEMENT. EN CAS DE MAUVAIS FONCTIONNEMENT,
FAIRE CONTROLER L’APPAREIL PAR UN CENTRE DE SERVICE APRES-VENTE AUTORISE.
20 Ne jamais déplacer le mixeur en le saisissant par la tasse, le manche de la tasse ne devant pas
servir pour transporter l’appareil.
21 AVANT DE RETIRER LE COUVERCLE, ATTENDEZ QUE LA LAME SOIT COMPLETEMENT A
L’ARRET.
F R
- 11 -
MODE D’EMPLOI DU MIXEUR
ATTENTION: PREPARER LE RECIPIENT AVEC LES ALIMENTS A MIXER AVANT DE L’INSTALLER
SUR LE CORPS MOTEUR, PUIS BRANCHER LA FICHE A LA PRISE DE COURANT.
- Couper les aliments tels que les fruits (yaourt, lait, jus de fruits), les crèmes glacées ou glaçons en
petits morceaux avant de les mettre dans la tasse (C) sans dépasser le niveau maximum indiqué
sur le récipient.
- Installer le couvercle (B) sur la tasse (C), en appuyant légèrement dessus jusqu’à sa fermeture
totale (Fig. 2).
- Refermer l’ouverture supérieure du couvercle (B) avec le bouchon (A) (Fig. 3).
- Installer la tasse (C) ainsi montée sur le corps de l’appareil (D) de façon à ce que les deux flèches
situées sur ces deux composants soient parfaitement alignées (Fig. 4).
- Brancher la fiche du cordon d’alimentation dans une prise de courant électrique.
- Mettre l’appareil en marche en tournant la poignée marche/arrêt (E) vers la droite jusqu’au pre--
mier ou deuxième déclic pour actionner les lames. Pour augmenter la vitesse des lames, tourner
encore la poignée (E) vers la droite, jusqu’au deuxième déclic.
Par contre, pour obtenir la fonction PULSE, tourner la poignée (E) vers la gauche.
ATTENTION: Si l’appareil ne démarre pas, vérifier que la tasse soit positionnée correctement.
L’appareil est muni de dispositifs qui empêchent son fonctionnement si la tasse n’est pas présente
ou si elle est mal installée.
ATTENTION: NE PAS DEPASSER LE TEMPS DE FONCTIONNEMENT MAXIMUM DE 30 SEC.
NE JAMAIS RETIRER LE COUVERCLE (B) PENDANT L’EMPLOI DE L’APPAREIL.
ATTENTION: Avant de mixer des liquides tièdes, retirer toujours le bouchon du couvercle du mixeur
(A). Ne jamais verser dans le mixeur de liquides chauds.
ATTENTION: Non pas laisser l’appareil allumé pendant plus de 30 secondes. L’utilisation idéale u
mixeur est à travers de brèves impulsions de quelques secondes.
- Pour interrompre le fonctionnement, positionner la poignée marche/arrêt (E) sur «0».
- Pendant l’utilisation, il est possible d’ajouter des aliments dans le récipient, en soulevant le bou--
chon (A), après avoir éteint l’appareil.
- Il pourrait s’avérer nécessaire de devoir éteindre l’appareil plusieurs fois, pour éliminer les résidus
d’aliments attachés sur les parois de la tasse. Dans ce cas, éteindre l’appareil et débrancher le
câble d’alimentation.
- Extraire le couvercle et, à l’aide d’une spatule, retirer les éventuels résidus à l’intérieur de la
tasse.
ATTENTION: GARDER LA SPATULE LOIN DE LA PORTEE DU COUTEAU DE FACON A NE PAS
ENDOMMAGER LA LAME.
DEMONTAGE DU MIXEUR
- Débrancher la fiche de la prise de courant avant d’extraire la tasse (C) de sa base.
- Extraire la tasse (C) vers le haut et retirer le couvercle (C) (B) muni de son bouchon (A).
- Verser la préparation dans un verre.
F R
- 12 -
NETTOYAGE
ATTENTION: NE PAS PLONGER LE CORPS DU PRODUIT, LA FICHE NI LE CABLE ELECTRIQUE
DANS L’EAU OU AUTRES LIQUIDES, ET UTILISER TOUJOURS UN CHIFFON HUMIDE POUR
LES NETTOYER.
ATTENTION: MEME LORSQUE L’APPAREIL N’EST PAS EN MARCHE, DEBRANCHER LA
FICHE DE LA PRISE DE COURANT ELECTRIQUE AVANT D’INSTALLER OU DE DEFAIRE LES
SIMPLES PARTIES OU AVANT DE PROCEDER AU NETTOYAGE.
Il est strictement interdit de démonter l’appareil ou d’essayer d’intervenir à l’intérieur de ce dernier.
Maintenir l’appareil toujours propre et en ordre vous garantira une qualité optimale des préparations
et une majeure durée de vie de l’appareil.
- La tasse (C), le couvercle (B) et le bouchon (A) peuvent être lavés au lave-vaisselle, sur la clayette
supérieure.
- Pour le nettoyage de la base moteur, utiliser un chiffon légèrement humide. Ne pas utiliser de
produits abrasifs.
- Nettoyer soigneusement la lame.
ATTENTION: LES ARETES DE COUPE DE LA LAME SONT EXTREMEMENT TRANCHANTES.
- Pour ranger l’appareil, enrouler le cordon d’alimentation autour de l’emplacement situé dans la
partie inférieure (Fig. 5).
D E
- 13 -
WICHTIGE HINWEISE
VOR GEBRAUCH BITTE DIESE ANLEITUNG LESEN.
Beim Gebrauch von Elektrogeräten sind einige Vorsichtsmaßnahmen zu treffen:
1 Vergewissern Sie sich, dass die Netzspannung mit der Gerätespannung übereinstimmt.
2 Das am Stromnetz angeschlossene Gerät niemals unbeaufsichtigt lassen; die Stromzuführung
des Geräts nach jedem Gebrauch unterbrechen.
3 Gerät nicht auf oder an Wärmequellen abstellen.
4 Gerät beim Gebrauch auf eine waagerechte und solide Fläche stellen.
5 Gerät keinen Witterungseinflüssen (Regen, Sonne, usw.) aussetzen.
6 Das Stromkabel darf nicht mit heißen Flächen in Berührung kommen.
7 Dieses Gerät ist nicht für den Gebrauch durch Personen (einschließlich Kindern) geeignet, die
nicht im vollen Besitz ihrer körperlichen, sensoriellen und geistigen Fähigkeiten sind. Benutzer,
denen es an Erfahrung und Kenntnis des Geräts mangelt oder die nicht in die Verwendung
des Geräts eingewiesen wurden, müssen durch eine Person überwacht werden, die für ihre
Sicherheit verantwortlich ist.
8 Kinder müssen überwacht werden, um sicher zu stellen, dass sie nicht mit dem Gerät spielen.
9 DAS GEHÄUSE, DEN STECKER UND DAS STROMKABEL DES GERÄTS KEINESFALLS
IN WASSER ODER SONSTIGE FLÜSSIGKEITEN TAUCHEN. VERWENDEN SIE ZUR
REINIGUNG EIN FEUCHTES TUCH.
10 AUCH WENN DAS GERÄT NICHT IN BETRIEB IST, ZIEHEN SIE DEN NETZSTECKER
AUS DER DOSE, BEVOR SIE DIE EINZELNEN TEILE EINSETZEN ODER DIE REINIGUNG
VORNEHMEN.
11
Vergewissern Sie sich immer, dass Ihre Hände trocken sind, bevor Sie die Schalter am Gerät
benutzen oder einstellen, oder bevor Sie den Stecker und die Versorgungsanschlüsse berühren.
12 SICH BEWEGENDE TEILE DÜRFEN NICHT BERÜHRT WERDEN.
13 Niemals mit den Händen in den Becher fassen, wenn das Gerät an das Stromnetz angeschlos--
sen ist (Abb. 6).
14 Die Klingen sind messerscharf; deshalb ist während der Reinigung höchste Vorsicht geboten.
15 Das Gerät nie leer laufen lassen.
16 Gerät nicht benutzen, wenn das Messer beschädigt ist.
17 Das Gerät nicht zum Zerkleinern von Lebensmitteln mit sehr fester Konsistenz benutzen
(Beispiel: Fleisch mit Knochen).
18 FÜLLEN SIE DEN MIXERBECHER MIT DEN ZU MIXENDEN ZUTATEN UND SETZEN SIE IHN
AUF DAS MOTORGEHÄUSE, BEVOR SIE DEN STECKER IN DIE STECKDOSE STECKEN.
19 DAS PRODUKT FUNKTIONIERT NUR DANN, WENN DER MIXBECHER KORREKT
MONTIERT WURDE. FALLS DIES NICHT DER FALL SEIN SOLLTE, DAS GERÄT ZU EINEM
AUTORISIERTEN KUNDENDIENST BRINGEN.
20 Den Mixer nicht über den aufgesetzten Becher transportieren bzw. nicht den Griff des Bechers
benutzen, um den Mixer zu transportieren.
21 VORM ABNEHMEN DES DECKELS DARAUF ACHTEN, DAß DIE KLINGE VOLLSTÄNDIG
STILLSTEHT.
22 Um Unfälle und Schäden am Gerät zu vermeiden, halten Sie die Hände und Küchengeräte
DE
- 14 -
immer von den Messern und den in Bewegung befindlichen Teilen fern.
23 Direkt am Stecker ziehen, um diesen aus der Wandsteckdose zu führen. Niemals am Kabel
ziehen.
24 Das Gerät nicht benutzen, falls das Stromkabel oder der Stecker beschädigt sein sollten oder
das Gerät selbst defekt ist. Es zur nächsten Vertrags-Kundendienststelle bringen.
25 Zur Gefahrenvorbeugung darf das eventuell beschädigte Stromkabel nur vom Hersteller oder
seiner Kundendienststelle, d.h. nur von einer ähnlich qualifizierten Person ausgewechselt wer--
den.
26 Das Gerät ist AUSSCHLIEßLICH FÜR DEN HAUSGEBRAUCH und nicht für Handels- oder
Industriezwecke bestimmt.
27 Dieses Gerät ist konform mit den Richtlinien 2006/95/EWG und EMV2004/108/EWG.
28 Eventuelle Abänderungen an diesem Produkt, die nicht ausdrücklich vom Hersteller genehmigt
wurden, können die Sicherheit und Garantie seines Einsatzes durch den Bediener aufheben.
29 Falls dieses Gerät entsorgt werden soll, ist sein Stromkabel abzuschneiden, so dass es nicht
mehr funktionstüchtig ist. Darüber hinaus sind all die Geräteteile unschädlich zu machen, die vor
allem für Kinder, die das Gerät als Spielzeug verwenden könnten, eine Gefahr darstellen.
30 Die Verpackungsteile nicht in Reichweite von Kindern lassen. Sie stellen eine potentielle Gefahr
dar.
ANLEITUNG AUFBEWAHREN
Der Mixer verbindet Professionalität mit Zweckmäßigkeit und ist somit eine unersetzliche Hilfe in
der Küche:
- benutzerfreundlich, dank des Stöpsels am Deckel, der das Hinzugeben der Lebensmittel während
des Betriebs ermöglicht.
- ideal für Instant-Zubereitungen.
- unabdingbar, um schnell leckere Granite zu bekommen.
GERÄTEBESCHREIBUNG (Abb. 1)
A Stöpsel
B Deckel
C Mixerbecher
D Motorgehäuse
E Taste Einschalten / Schnelligkeit
ANLEITUNG FÜR DIE VERWENDUNG DES MIXERS
ACHTUNG: FÜLLEN SIE DEN MIXERBECHER MIT DEN ZU MIXENDEN ZUTATEN UND SETZEN SIE
IHN AUF DAS MOTORGEHÄUSE, BEVOR SIE DEN STECKER IN DIE STECKDOSE STECKEN.
- Die Zutaten, wie Früchte (Joghurt, Milch, Fruchtsäfte), Eis oder Speiseeis in kleine Stücke zer--
teilen und in den Mixerbecher (C) geben, ohne die am Behälter markierte maximale Füllhöhe zu
überschreiten.
- Den Deckel (B) auf den Becher (C) aufsetzen und leicht drücken, bis er komplett verschlossen ist
(Abb. 2).
D E
- 15 -
- Das Loch oben auf dem Deckel (B) mit dem Stöpsel (A) schließen (Abb. 3).
- Den Becher (C) komplett auf den Sockel s(D) so aufsetzen und ausrichten, dass die zwei auf den
Komponenten vorhandenen Pfeile übereinstimmen (Abb. 4).
- Den Stecker des Stromkabels in eine Steckdose stecken.
- Das Gerät einschalten; die Einschalttaste (E) im Uhrzeigersinn bis zum ersten oder zweiten
Einrasten drehen, damit die Geschwindigkeit der Klingen erhöht wird.
Wenn hingegen die Taste (E) gegen den Uhrzeigersinn gedreht wird, erhält man die Funktion
PULSE.
ACHTUNG: Wenn das Gerät sich nicht einschaltet, kontrollieren, ob der Becher richtig positioniert
ist. Das Gerät verfügt über Vorrichtungen, die den Betrieb verhindern, sobald der Becher nicht oder
falsch aufgesetzt wurde.
ACHTUNG: ÜBERSCHREITEN SIE NICHT DIE MAXIMALE BETRIEBSZEIT VON 30 SEKUNDEN.
ENTFERNEN SIE KEINESFALLS DEN DECKEL (B) SOLANGE DAS GERÄT IN BETRIEB IST.
ACHTUNG: Bevor Sie warme Flüssigkeiten mixen, entfernen Sie immer den Stöpsel (A) des
Mixerdeckels. Geben Sie niemals heiße Flüssigkeiten in den Mixer.
ACHTUNG: Lassen Sie das Gerät nicht länger als 30 Sekunden nacheinander laufen. Ideal ist die
Verwendung mit Impulsen, die wenige Sekunden dauern.
- Um den Betrieb zu unterbrechen, die Einschalttaste (E) auf die Position «0» stellen.
- Während des Betriebs können weitere Zutaten in den Mixerbecher gegeben werden. Dazu den
Stöpsel (A) herausnehmen, nachdem das Gerät ausgeschaltet wurde.
- Es kann notwendig sein, das Gerät mehrmals abzuschalten, um Zutaten von den Wänden des
Mixerbechers zu entfernen. In diesem Fall das Gerät ausschalten und das Versorgungskabel aus
der Steckdose ziehen.
- Den Stöpsel und den Deckel entfernen, und mithilfe eines geeigneten Schabers alle eventuell an
den Becherwänden haftenden Rückstände in das Innere des Behälters schieben.
ACHTUNG: DEN SCHABER VOM MESSER FERN HALTEN, UM DIE SCHNEIDE NICHT ZU
SCHÄDIGEN.
ABMONTIEREN DES MIXERS
- Bevor der Mixbecher (C) vom Sockel genommen wird, den Stecker aus der Steckdose ziehen.
- Den Mixbecher (C) nach oben herausnehmen und den Deckel (B) mit dem Stöpsel (A) entfer--
nen.
- Das gemixte Getränk in ein Glas füllen.
REINIGUNG
ACHTUNG: DAS GEHÄUSE, DEN STECKER UND DAS STROMKABEL DES GERÄTS
KEINESFALLS IN WASSER ODER SONSTIGE FLÜSSIGKEITEN TAUCHEN. VERWENDEN SIE
ZUR REINIGUNG EIN FEUCHTES TUCH.
ACHTUNG: AUCH WENN DAS GERÄT NICHT IN BETRIEB IST, ZIEHEN SIE DEN NETZSTECKER
AUS DER DOSE, BEVOR SIE DIE EINZELNEN TEILE EINSETZEN ODER DIE REINIGUNG
VORNEHMEN.
Es ist streng verboten, das Gerät auseinander zu bauen oder Eingriffe jeglicher Art in dessen
Innerem vorzunehmen. Halten Sie das Gerät gut sauber und ordentlich. Das gewährleistet Ihnen
D E
- 16 -
eine optimale Qualität der Ergebnisse und längere Standzeit des Geräts selbst.
- Der Becher (C), der Deckel (B), der Stöpsel (A) können auch in der oberen Abteilung der
Spülmaschine gereinigt werden.
- Verwenden Sie zur Reinigung des Motorgehäuses ein leicht angefeuchtetes Tuch. Verwenden Sie
keine scheuernden Produkte.
- Seien Sie beim Reinigen des Messers vorsichtig
ACHTUNG: DIE SCHNEIDEN DES MESSERS SIND ÄUSSERST SCHARF.
- Das Gerät kann mit dem Stromkabel, das auf dem entsprechenden unteren Kabelaufwickler auf--
gewickelt wurde, abgestellt werden (Abb. 5).
REZEPTE
Budapester Gemüsesuppe
Zutaten:
180 g Kohlrabi
180 g Kartoffeln
270 g Sellerie
90 g Karrotten
Wasser (bis zur 1,5-Liter-Markierung auffüllen)
Zum Zubereiten einer größeren Suppenmenge
lassen Sie das Gerät nach dem Verarbeiten
der Zutaten für jede Portion jeweils 60 Minuten
abkühlen. Die Kohlrabi, Kartoffeln, Sellerie,
Karrotten und das Wasser in dieser Reihenfolge
in den Mixer beigeben. Für eine Suppe mit gro--
ben Zutaten die Zutaten 5 Sekunden oder für
feinere Zutaten länger vermixen.
150g Dal (aus der Büchse)
150g geräuchertes Schweinefleisch
190g Crème fraîche
15g Petersilie
Salz
Frischer Pfeffer
1,5 Würfel Brühe
2 Lorbeerblätter
Die vermischten Zutaten in einen Topf geben
und zum Kochen bringen.
Wasser, Crème fraîche, Dal, das Fleisch und die
Kräuter beigeben und 30 Minuten unter ständi--
gem Umrühren kochen lassen.
Zum Zubereiten einer größeren Suppenmenge
lassen Sie das Gerät nach dem Verarbeiten
der Zutaten für jede Portion jeweils 60 Minuten
abkühlen.
Frisches Früchte-Milkshake
Bereiten Sie nicht mehr als die in diesem Rezept
angegebene Menge auf einmal zu. Lassen Sie
das Gerät jeweils auf Raumtemperatur abkühlen
bevor Sie die weiteren Zutaten weiter verarbei--
ten.
Zutaten:
100 g Bananen oder Erdbeeren
200 ml frische Milch
50 g Vanille-Speiseeis
Feinkörniger Zucker je nach Geschmack
Die Bananen schälen und die Erdbeeren abspü--
len oder entstielen. Die Früchte in kleinere
Stückchen schneiden. Dann sämtliche Zutaten
in den Mixer geben und glattmixen.
Tipp: Zum Zubereiten Ihres bevorzugten
Milkshakes kann beliebiges Obst beigegeben
werden.
E S
- 17 -
ADVERTENCIAS IMPORTANTES
LEER ESTAS INSTRUCCIONES ANTES DEL EMPLEO.
Cuando se usan aparatos eléctricos es necesario tomar algunas precauciones, entre las cuales:
1 Cerciorarse que el voltaje eléctrico del aparato corresponda al de vuestra red eléctrica.
2 No dejar el aparato sin vigilar cuando esté conectado a la red eléctrica; desconectarlo después
de cada empleo.
3 No colocar el aparato sobre o en proximidad de fuentes de calor.
4 Durante el uso situar el aparato sobre una superficie horizontal estable.
5 No dejar el aparato expuesto a agentes atmosféricos (lluvia, sol, etc.).
6 Controlar que el cable eléctrico no toque superficies calientes.
7 Este aparato no es adecuado para ser empleado por personas (includos los niños) con capa--
cidades físicas, sensoriales o mentales reducidas. Los usuarios que no tengan la experiencia
y conocimiento del aparato o bien a aquellos a los que no se les haya dado las instrucciones
referentes al empleo del aparato tendrán que estar sometidos a la supervisión por parte de una
persona responsable de su seguridad.
8 Es necesario vigilar a los niños para asegurarse de que no jueguen con el aparato.
9 NO SUMERGIR NUNCA EL CUERPO DEL PRODUCTO, EL ENCHUFE Y EL CABLE
ELÉCTRICO EN EL AGUA O EN OTROS LÍQUIDOS, USAR UN PAÑO HÚMEDO PARA
LIMPIARLOS.
10 INCLUSO CUANDO EL APARATO NO ESTÉ EN MARCHA, HAY QUE DESCONECTAR EL
ENCHUFE DE LA TOMA DE CORRIENTE ELÉCTRICA ANTES DE ACOPLAR O QUITAR LAS
PARTES INDIVIDUALES O ANTES DE EFECTUAR LA LIMPIEZA.
11 Asegurarse de tener siempre las manos bien secas antes de utilizar o de regular los interruptores
situados en el aparato o antes de tocar el enchufe y las conexiones de alimentación.
12 NO TOCAR NUNCA LAS PARTES EN MOVIMIENTO.
13 No introducir nunca las manos en la taza cuando el aparato esté conectado a la red eléctrica
(Fig. 6).
14 Las cuchillas están muy afiladas, prestar la máxima atención cuando se limpien.
15 No hacer funcionar el aparato vacío.
16 No usar el aparato si la cuchilla está dañada.
17 No utilizar el aparato para picar alimentos que tengan una excesiva consistencia (por ejemplo:
carne con hueso).
18 PREPARAR LA JARRA DE LA BATIDORA CON LOS ELEMENTOS QUE VAYAMOS A BATIR Y
MONTARLA EN EL CUERPO MOTOR ANTES DE CONECTAR EL ENCHUFE A LA TOMA DE
CORRIENTE.
19 EL PRODUCTO HA SIDO DISEÑADO PARA QUE PUEDA FUNCIONAR SÓLO SI LA TAZA
DE LA BATIDORA HA SIDO MONTADA CORRECTAMENTE. SI NO FUERA ASÍ, LLEVAR EL
PRODUCTO A UN CENTRO DE ASISTENCIA AUTORIZADO.
20 No desplazar la batidora cogiéndola con la taza montada, o sea, el asa de la taza no tiene que
servir para desplazar la batidora.
21 ANTES DE QUITAR LA TAPA ESPERAR QUE LA CUCHILLA ESTÉ COMPLETAMENTE
PARADA.
ES
- 18 -
22 Para evitar accidentes y daños al aparato mantener siempre las manos y los utensilios de cocina
lejos de las cuchillas y de partes en movimiento.
23 Para desenchufar, coger directamente el enchufe y desconectarlo de la toma de la pared. No
desenchufar estirando del cable.
24 No usar el aparato si el cable eléctrico o el enchufe estuvieran dañados, o si el mismo aparato
fuera defectuoso; en este caso llevarlo al Centro de Asistencia Autorizado más cercano.
25 Si el cable de alimentación está dañado tiene que ser sustituido por el Fabricante o por su
servicio asistencia técnica o en todo caso por una persona con calificación similar, para prevenir
cualquier riesgo.
26 El aparato ha sido proyectado SÓLO PARA EMPLEO DOMÉSTICO y no tiene que ser destinado
a uso comercial o industrial.
27 Este aparato cumple la directiva 2006/95/CE y EMC2004/108/CEE.
28 Eventuales modificaciones a este producto, no autorizadas expresamente por el fabricante
pueden comportar el vencimiento de la seguridad y de la garantía de su empleo por parte del
usuario.
29 Cuando decida deshacerse de este aparato, aconsejamos inhabilitarlo cortando el cable de
alimentación. Se recomienda además hacer inocuas aquellas partes del aparato que pudieran
constituir un peligro, especialmente para los niños que podrían utilizar el aparato para sus jue--
gos.
30 Los elementos del embalaje no se tienen que dejar al alcance de los niños ya que constituyen
fuentes potenciales de peligro.
GUARDAR ESTAS INSTRUCCIONES
La batidora, uniendo profesionalidad y practicidad de uso, será una ayuda insustituible en la
cocina:
- cómoda de usar, gracias al tapón de la tapa que permite introducir los alimentos durante el fun--
cionamiento.
- ideal para preparaciones instantáneas.
- indispensable para obtener rápidamente óptimos granizados.
DESCRIPCIÓN DEL APARATO (Fig. 1)
A Tapón
B Tapa
C Jarra
D Cuerpo del aparato
E Control de encendido / velocidad
E S
- 19 -
INSTRUCCIONES PARA EL EMPLEO DEL BATIDOR
ATENCIÓN: PREPARAR EL RECIPIENTE CON LOS ELEMENTOS QUE VAYAMOS A BATIR Y
MONTARLO EN EL CUERPO MOTOR ANTES DE CONECTAR EL ENCHUFE A LA TOMA DE
CORRIENTE.
- Cortar los alimentos, como fruta (yogurt, leche, zumos de fruta), helado o hielo, en trozos peque--
ños e introducirlos en la jarra (C) en cantidad tal que no supere el nivel máximo indicado en el
mismo recipiente.
- Aplicar la tapadera (B) en la taza (C), apretándola libremente hasta que se cierre completamente
(Fig. 2).
- Cerrar el orificio superior de la tapadera (B) mediante el correspondiente tapón (A) (Fig. 3).
- Montar la taza (C) completa sobre el cuerpo del aparato (D) de manera que las dos flechas,
presentes en estos componentes, estén perfectamente alineadas (Fig. 4).
- Conectar el enchufe del cable de alimentación en una toma de corriente eléctrica.
- Poner en funcionamiento el aparato dando la vuelta al control de encendido (E) en sentido de las
agujas del reloj hasta el primero o segundo clic para accionar las cuchillas. Girando de nuevo el
control (E) en sentido de las agujas del reloj hasta el segundo clic, aumentará la velocidad de las
cuchillas.
Si giramos sin embargo el control (E) en sentido contrario a las agujas del reloj, se obtendrá la
función PULSE.
ATENCIÓN: En el caso en el cual el aparato no empezara a funcionar, controlar que la taza esté
colocada correctamente. El aparato cuenta con dispositivos que impiden el funcionamiento si la taza
no fuera presente o estuviera montada de manera incorrecta.
ATENCIÓN: NO SUPERAR EL TIEMPO DE FUNCIONAMIENTO MÁXIMO DE 30 SEG.
NO QUITAR NUNCA LA TAPADERA (B) DURANTE EL EMPLEO.
ATENCIÓN: Antes de batir líquidos tibios quitar siempre el tapón de la tapadera batidora (A). No
introducir nunca en la batidora líquidos calientes.
ATENCIÓN: No dejar el aparato encendido durante más de 30 segundos. El empleo ideal es
mediante impulsos breves de pocos segundos.
- Para interrumpir el funcionamiento dar la vuelta al control de encendido (E) en posición «0».
- Durante el empleo, se pueden añadir alimentos en la jarra, quitando el tapón (A), después de
haber apagado el aparato.
- Podría ser necesario tener que apagar el aparato varias veces, con el fin de quitar restos de
alimentos de las paredes de la jarra. Si sucediera esto, apagar el aparato y desconectar el cable
de alimentación.
- Quitar el tapón, la tapadera y mediante el empleo de una espátula adecuada, quitar todos los
posibles residuos del interior de la jarra.
ATENCIÓN: MANTENER LA ESPÁTULA LEJOS DEL ALCANCE DE LA CUCHILLA PARA QUE
PARA QUE NO PUEDA DAÑAR EL FILO.
DESMONTAJE DE LA BATIDORA
- Desconectar el enchufe de la toma de corriente antes de quitar la taza (C) de la base.
- Extraer hacia arriba la taza (C) y quitar la tapa (B) con el tapón (A).
- Echar el batido en un vaso.


Produkt Specifikationer

Mærke: Ariete
Kategori: Blender
Model: 560
Type: Bordplade blender
Produktfarve: Sølv
Antal hastigheder: 2
Strøm: 600 W
Skål volumen: 1.5 L
Impulsfunktion: Ja
Materiale, kniv: Rustfrit stål

Har du brug for hjælp?

Hvis du har brug for hjælp til Ariete 560 stil et spørgsmål nedenfor, og andre brugere vil svare dig