BenQ InstaShow S WDC20 Manual
Læs gratis den danske manual til BenQ InstaShow S WDC20 (71 sider) i kategorien Trådløs præsentationsenhed. Denne vejledning er vurderet som hjælpsom af 88 personer og har en gennemsnitlig bedømmelse på 4.5 stjerner ud af 44.5 anmeldelser.
Har du et spørgsmål om BenQ InstaShow S WDC20, eller vil du spørge andre brugere om produktet?

Produkt Specifikationer
| Mærke: | BenQ |
| Kategori: | Trådløs præsentationsenhed |
| Model: | InstaShow S WDC20 |
| Vægt: | 330 g |
| Produktfarve: | Sort |
| Formfaktor: | Desktop |
| Understøttede videotilstande: | 480p,525i,540p,576p,625i,720i,720p,768p,960p,1024p,1035i,1080i,1080p |
| Opbevaringstemperatur (T-T): | -10 - 60 °C |
| Relativ luftfugtighed ved drift (H-H): | 10 - 80 % |
| Relativ luftfugtighed ved opbevaring (H-H): | 5 - 90 % |
| Wi-Fi-standarder: | 802.11a,802.11b,802.11g,Wi-Fi 4 (802.11n),Wi-Fi 5 (802.11ac) |
| Driftstemperatur (T-T): | 0 - 40 °C |
| Sikkerhedsalgoritmer: | 128-bit AES,WPA2,WPA2-PSK |
| Hurtig start guide: | Ja |
| Kabler inkluderet: | HDMI,USB |
| Understøttede grafikopløsninger: | 720 x 480,720 x 576,1280 x 720 (HD 720),1920 x 1080 (HD 1080),3840 x 2160 |
| Strømforbrug (maks.): | 24 W |
| Bedste Wi-Fi standard: | Wi-Fi 5 (802.11ac) |
| Netværksstandarder: | IEEE 802.11ac,IEEE 802.11n |
| DC-in-stik: | Ja |
| Antenner, antal: | 4 |
| LED-indikatorer: | Ja |
| Strømkilde type: | Vekselstrøm |
| Udgangsspænding: | 12 V |
| Udgangsstrøm: | 2 A |
| AC-adapter inkluderet: | Ja |
| Harmoniseret systemkode (HS): | 85176990 |
| Mac kompabilitet: | Ja |
| Antal brugere: | 32 bruger(e) |
| Frekvensbånd: | 2.4 - 5 GHz |
| Understøttede Windows-operativsystemer: | Ja |
| Understøttede Mac-operativsystemer: | Ja |
| Grænseflade: | HDMI |
| Wi-Fi-datahastighed (maks.): | 1167 Mbit/s |
| Maksimum billedhastighed: | 60 fps |
| Antenne type: | Ekstern |
| HDMI-version: | 1.4 |
| Maksimal driftstilstand: | 15 m |
| Antal HDMI-udgange: | 1 |
| Dual-band: | Ja |
Har du brug for hjælp?
Hvis du har brug for hjælp til BenQ InstaShow S WDC20 stil et spørgsmål nedenfor, og andre brugere vil svare dig
Trådløs præsentationsenhed BenQ Manualer


Trådløs præsentationsenhed Manualer
- SMK-Link
- Techly
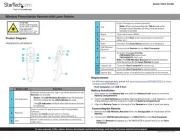
- StarTech.com
- König
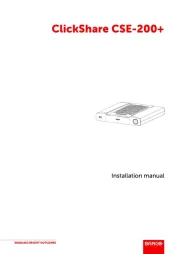
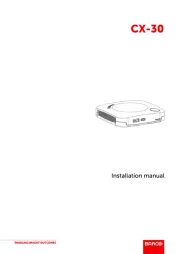
- Barco
- InFocus
- Arctic Cooling
- Viewsonic
- Gembird
- Kramer
- HP
- Marmitek
- Hama
- Epson
- EZCast
Nyeste Trådløs præsentationsenhed Manualer