BenQ MX501 Manual
Læs gratis den danske manual til BenQ MX501 (43 sider) i kategorien videoprojektorer. Denne vejledning er vurderet som hjælpsom af 13 personer og har en gennemsnitlig bedømmelse på 5.0 stjerner ud af 7 anmeldelser.
Har du et spørgsmål om BenQ MX501, eller vil du spørge andre brugere om produktet?

Produkt Specifikationer
| Mærke: | BenQ |
| Kategori: | videoprojektorer |
| Model: | MX501 |
| Vekselstrømsindgangsspænding: | 100 - 240 V |
| Vekselstrømsindgangsfrekvens: | 50 - 60 Hz |
| Vægt: | 2500 g |
| Produktfarve: | Sort |
| Understøttede videotilstande: | 1080i, 1080p, 480i, 480p, 576i, 576p, 720p |
| 3D: | Ja |
| Indbyggede højttaler(e): | Ja |
| Format til analogt signal: | NTSC, PAL, SECAM |
| Udgangseffekt (RMS): | 2 W |
| DVI-port: | Ingen |
| Antal USB 2.0-porte: | 1 |
| Udgange til hovedtelefoner: | 1 |
| Ethernet LAN: | Ingen |
| Strømforbrug (standby): | 1 W |
| Strømforbrug (typisk): | 290 W |
| Dimensioner (BxDxH): | 287 x 232 x 100 mm |
| Kabler inkluderet: | VGA |
| Batterier inkluderet: | Ja |
| Understøttede grafikopløsninger: | 1600 x 1200 (UXGA), 640 x 480 (VGA) |
| Sammensat videoindgang: | 1 |
| Støjniveau: | 33 dB |
| Fjernbetjening inkluderet: | Ja |
| Full HD: | Ja |
| Antal indbyggede højttalere: | 1 |
| Lydindgang: | 1 |
| Billedformat: | 4:3 |
| Vis antal farver: | 1.073 milliarder farver |
| Antal farver: | 1.073 milliarder farver |
| Kontrastforhold (typisk): | 4000:1 |
| Horisontal scanningsområde: | 31 - 99 kHz |
| Antal VGA-porte (D-sub): | 3 |
| USB-stik type: | Mini-USB B |
| Zoom kapacitet: | Ja |
| Brændviddeområde: | 21 - 23.1 mm |
| Projektor lysstyrke: | 2700 ANSI lumens |
| Projektionsteknologi: | DLP |
| Projektor indbygget opløsning: | XGA (1024x768) |
| Skærmstørrelse kompatibilitet: | 24 - 300 " |
| Projiceringsafstand: | - m |
| Trapezkorrektion, vertikal: | -40 - 40 ° |
| Vertikalt scanningsområde: | 48 - 120 Hz |
| Throw-forhold: | 1.86 - 2.04:1 |
| Zoom type: | Vejledning |
| RS-232-porte: | 1 |
| Levetid for lyskilde: | 4500 t |
| Lampeeffekt: | 220 W |
| Levetid for lyskilde (økonomisk tilstand): | 6000 t |
| Lyskilde type: | Lampe |
| 3D Ready: | Ja |
| Antal af S-video-indgange: | 1 |
| Seriel grænsefladetype: | RS-232 |
| Zoomforhold: | 1.1:1 |
| Støjniveau (økonomisk tilstand): | 27 dB |
| Lydudgang: | 1 |
Har du brug for hjælp?
Hvis du har brug for hjælp til BenQ MX501 stil et spørgsmål nedenfor, og andre brugere vil svare dig
videoprojektorer BenQ Manualer


videoprojektorer Manualer
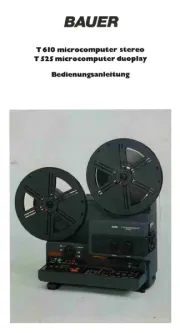
- Bauer
- Maxell
- NEC
- Toshiba
- Yaber
- Beghelli
- Steren
- Ibiza Sound
- Adj
- Epson
- JVC
- Leica
- Renkforce
- Kogan
- InFocus
Nyeste videoprojektorer Manualer