Bimar UM3.BI Manual

Bimar Luftrenser UM3.BI

Læs gratis den danske manual til Bimar UM3.BI (24 sider) i kategorien Luftrenser. Denne vejledning er vurderet som hjælpsom af 24 personer og har en gennemsnitlig bedømmelse på 4.7 stjerner ud af 12.5 anmeldelser. Har du et spørgsmål om Bimar UM3.BI, eller vil du spørge andre brugere om produktet?

Side 1/24
Copies of the I/B. Please reproduce them without any
changes except under special instruction from Bimar
(Italy). The pages must be reproduced and folded in
order to obtain a booklet A5 (+/- 148.5 mm width x 210
mm height). When folding, make sure you keep the good
numbering when you turn the pages of the I/B. Don’t
change the page numbering. Keep the language
integrity.
Fax +32 030 9904733
LIBRETTO ISTRUZIONI
NOTICE D'INSTRUCTIONS
INSTRUCTION BOOKLET
BEDIENUNGSANLEITUNG
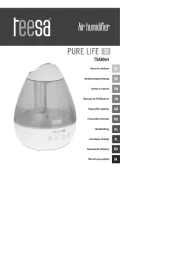
GOCCIA
UMIDIFICATORE
HUMIDIFICATEUR
HUMIDIFIER
LUFTBEFEUCHTER
type UM3.BL/UM3.FX/UM3.NE (mod. SPA- 878A)
1 24/
Assembly page 1/24
Copies of the I/B. Please reproduce them without any
changes except under special instruction from Bimar
(Italy). The pages must be reproduced and folded in
order to obtain a booklet A5 (+/- 148.5 mm width x 210
mm height). When folding, make sure you keep the good
numbering when you turn the pages of the I/B. Don’t
change the page numbering. Keep the language
integrity.
Fax +32 030 9904733
1. Serbatoio
2. Base
3. Manopola vapore
4. Orifizio uscita vapore
5. Ghiera filtro
6. Tappo serbatoio
7. Guaina
8. Vaschetta base
9. Filtro
1. Water tank
2. Base
3. Steam knob
4. Steam output orifice
5. Filter lock ring
6. Tank plug
7. Gasket
8. Base tray
9. Filter
1. Réservoir
2. Base
3.
Poignée vapeur
4. Orifice sortie vapeur
5.
Trou réservoir
6. Bouchon réservoir
7. Gaine
8. Petite cuve base
9. Filtre
1. Wasserbehälter
2. Untersatz
3. Dampfknopf
4. Dampfaustrittsöffnung
5. Filtergewindering
6. Behälterverschluss
7. Dichtung
8. Untersatzwanne
9. Filter
2 24/
Assembly page 2/24
Copies of the I/B. Please reproduce them without any
changes except under special instruction from Bimar
(Italy). The pages must be reproduced and folded in
order to obtain a booklet A5 (+/- 148.5 mm width x 210
mm height). When folding, make sure you keep the good
numbering when you turn the pages of the I/B. Don’t
change the page numbering. Keep the language
integrity.
Fax +32 030 9904733
Mai utilizzare l’umidificatore senza l’acqua. Utilizzare solo l’acqua del rubinetto, acqua
fredda o acqua distillata senza l’aggiunta di alcun additivo (aromi o essenze). Riempire
sempre il serbatoio solo con l’apparecchio spento.
INSTALLAZIONE
Dopo aver tolto l’imballaggio, assicurarsi dell’integrità dell’apparecchio; in caso di dubbio non
utilizzarlo e rivolgersi a personale professionalmente qualificato. Gli elementi di imballaggio
(sacchetti in plastica, polistirolo espanso, chiodi, ecc.) non devono essere lasciati alla portata di
mano di bambini in quanto potenziali fonti di pericolo; smaltirli secondo le norme vigenti.
Prima di collegare l’apparecchio controllare che i valori di tensione riportati sulla targa dati
corrispondano a quelli della rete elettrica. In caso di incompatibilità tra la presa e la spina
dell’apparecchio, far sostituire la presa con altra di tipo adatto da personale professionalmente
q . ualificato In generale è sconsigliato l’uso di adattatori e/o prolunghe; se il loro uso si rendesse
indispensabile, devono essere conformi alle vigenti norme di sicurezza e la loro portata di corrente
(ampères) non deve essere inferiore a quella massima dell’apparecchio.
Prima di ogni utilizzo verificare che l’apparecchio sia in buono stato, che il cordone elettrico non
sia danneggiato: in caso di dubbio rivolgersi a personale professionalmente qualificato.
Assicurarsi che il cavo sia posizionato correttamente e che non sia a contatto con parti calde o
spigoli taglienti, né avvolto intorno all’apparecchio o attorcigliato su se stesso.
La presa di corrente deve essere facilmente accessibile in modo da poter disinserire con facilità la
spina in caso di emergenza.
L’apparecchio non deve essere posizionato immediatamente al di sotto di una presa di corrente.
Posizionare l’umidificatore lontano da fonti di calore (stufe, termoventilatori), da moquette,
parquet, tende, tappezzerie, o su mobili delicati che potrebbero venire danneggiati dal contatto con
l’acqua o il va La superficie d’appoggio deve essere resistente all’acqua, pore. lo spazio libero
attorno all’apparecchio deve essere almeno di 50 cm, perché il vapore si pdepositare su oggetti
che si possono danneggiare. , ciò potrebbe Verificare che il vapore non sia diretto contro parete
provocare danni.
La superficie d’appoggio deve essere stabile, ampia (sono da escludere mensole), non in pendenza
(in quanto l’apparecchio potrebbe ribaltarsi).
Una eccessiva umidità nell’ambiente pcausare la formazione di condensa su finestre e mobili.
In tal caso, spegnere l’umidificatore.
L’apparecchio deve essere utilizzato ad una temperatura compresa +5 e +40°C, con umidi
relativa inferiore al 80% rh.
Assicurarsi che l’apparecchio funzioni correttamente: nel caso contrario spegnere l’apparecchio e
farlo controllare da personale professionalmente qualificato.
Assicurarsi che l’orifizio uscita vapore sia pulita e libera e non sia ostruito da oggetti, tessuti o altro
per evitare il surriscaldamento o la rottura dell’apparecchio.
Questo apparecchio non è destinato a essere fatto funzionare per mezzo di un temporizzatore esterno o
con un sistema di comando a distanza separato, per evitare il rischio di incendio nel caso
l’apparecchio sia coperto o sia posizionato in modo non corretto. Controllare che sulla stessa linea
elettrica non siano collegati altri apparecchi ad alto assorbimento.
In caso di guasto o cattivo funzionamento spegnere l’apparecchio e farlo controllare da personale
professionalmente qualificato; le riparazioni effettuate da personale non qualificato possono essere
pericolose e fanno decadere la garanzia.
Attenzione: riempire il serbatoio solo quando l’apparecchio è spento e la spina non è inserita
nella presa di corrente.
Il serbatoio dell’umidificatore contiene circa 3 litri d’acqua e assicura un autonomia di
funzionamento di circa 8/9 ore.
4 24/
Assembly page 4/24
Copies of the I/B. Please reproduce them without any
changes except under special instruction from Bimar
(Italy). The pages must be reproduced and folded in
order to obtain a booklet A5 (+/- 148.5 mm width x 210
mm height). When folding, make sure you keep the good
numbering when you turn the pages of the I/B. Don’t
change the page numbering. Keep the language
integrity.
Fax +32 030 9904733
FUNZIONAMENTO
1. Assicurarsi che l’apparecchio non sia collegato alla rete.
2. Posizionare l’umidificatore su una superficie stabile.
3. ndolo Per riempire dalla bil serbatoio (1): rimuoverlo ase (2), psvitare il tap o (6) ruota in senso
antiorario; inserire dal foro fino al livello massimoserbatoio acqua fresca e pulita indicato
(scritta MAX stampata sul dente del foro, come , quindi richiuderla ruotando è indicato in figura)
il tappo in senso orario e serrandolo con cura.
Attenzione: non riempire il serbatoio oltre il livello prescritto.
4. Posizionare correttamentela tanica sulla base , assicurarsi che le due frecce (sulla base e sulla
tanica, poste nella parte posteriore) combaciano.
5. Ins . erire la spina nella presa di corrente
6. Ruotare la manopola (3) in senso orario in corrispondenza al valore di umidita desiderata la spia
luminosa di colore verde si accende, e sarà maggiore quanto più la manopola è ruotata verso la
pos. di massimo ( ), dopo alcuni secondi inizierà a uscire vapore.
7. Quando il serbatoio oè vuot , l’apparecchio si spegne automaticamente e la spia luminosa di
colore rosso di fine acqua si accende.
8. 4. Per riem ire nuovamente p il serbatoio, ripetere l i punti da 1 a
9. Per spegnere l’apparecchio, riportare la manopola selettore in posizione0-OFF
in senso
antiorario e togliere la spina dalla presa di corrente.
10. Dopo ogni uso svuotare la vaschetta (8) all’interno della base da eventuali residui di acqua e
ascigurla con un panno leggermente morbido.
Per lunghi periodi di inattività, togliere la spina dalla presa di corrente, assicurarsi che il
serbatoio e l’interno della base siano perfettamente asciutti.
Disincrostazione
Attenzione: prima di pulire l’apparecchio spegnerlo, disinserire la spina dalla presa di corrente.
Per prolungare la durata dell’umidificatore e dei suoi accessori (filtro in ceramica, ecc), rimuovere ril
calcare dopo circa 5 (o più frequentemente se l’acqua è molto dura)00 litri
Filtro in ceramica:
1. Togliere il tappo d in senso antiorario dal filtroal serbatoio, svitare la ghiera (10) (9).
2. Immergere il filtro in un contenitore di aceto bianco (8 gradi) o aceto acritico o sostanze
disincrostante per 10 minuti.
3. Risciacquare con cura il filtro sotto il getto d’acqua e p a di rim avvitare il filtro verificare che sia
perfettamente asciutto.
Serbatoio:
a) Aggiungere all’interno del serbatoio 10/15 gocce di aceto bianco (8 gradi) o aceto acritico o
sostanze disincrostante per 5 minuti.
5 24/
Assembly page 5/24
Copies of the I/B. Please reproduce them without any
changes except under special instruction from Bimar
(Italy). The pages must be reproduced and folded in
order to obtain a booklet A5 (+/- 148.5 mm width x 210
mm height). When folding, make sure you keep the good
numbering when you turn the pages of the I/B. Don’t
change the page numbering. Keep the language
integrity.
Fax +32 030 9904733
Before connecting the appliance, check that the voltage shown on the data plate matches that of
your electricity. In the event of incompatibility between the electric outlet and the plug of the
appliance, have the outlet replaced with another more suitable type by professionally qualified
personnel, who will make sure that the section of the wires of the outlet is appropriate for the
absorbed power of the appliance. In general, the use of adapters or extension cords is not
recommended; if their use is indispensable, they must conform to existing safety standards and
their current capacity (amperes) must not be less that the maximum of the appliance.
Stand the appliance on a horizontal, flat surface or table; do not stand on a inclined plane (the
appliance could upset.
Make sure that the cable is correctly positioned, that it is not touching hot elements or sharp edges,
is not wound around the utensil, is not twisted up on itself or in the way to prevent the utensil from
being pulled over. Check that you cannot trip over to prevent accidental falls or harm to persons.
The appliance must not be positioned immediately under a socket.
The power socket must be easy to reach so the plug can be removed quickly in case of emergency.
Place the humidifier away from sources of heat (stoves, fan heaters, etc.), carpets, parquet floors,
curtains, upholstery or delicate furniture that could be damaged by contact with water or steam.
The support surface must be water-resistant and there must be at least 50 cm of free space around
the appliance because water vapour can be deposited on objects that could be damaged. Make sure
that the steam is not directed against a wall, which could be damaged.
The support surface must be stable, wide (not on a shelf) and not sloping (because the appliance
could tip over).
Excessive humidity in the room could cause condensation on windows and furniture. In this case,
turn off the humidifier.
The appliance must be used at a temperature between 5 and 40 °C, with relative humidity less than
80%.
Make sure that the appliance is working correctly: if not, turn off the appliance and have it checked
by prof qualified personnel.essionally-
Make sure the Steam output orifice is clean and free from foreign bodies.
In the case of a breakdown or fault, switch off the appliance and have it checked by a
professionally qualified technician; repairs made by unqualified persons can be dangerous and
render void the warranty.
Do not use the appliance with a timer or a programmer or with a system that can switch on the
appliance automatically, to avoid risk of fire, since a fire risk exists if the heater is covered or
positioned incorrectly.
Attention: only fill the tank when the appliance is off and the plug is disconnected from the
electric outlet.
The tank of the humidifier holds about 3 litres of water and can run autonomously for about 8
to 9 hours.
OPERATION
1. Make sure that the appliance is not connected to the mains.
2. Place the humidifier on a stable surface.
3. To fill the tank (1): remove it from the base (2) and unscrew the plug (6) by turning it counter-
clockwise; add fresh and clean up at the given maximum (MA water X written printed on the
tooth of the hole, as shown in the figure), in the water tank hole (5) and then close it by turning
the plug clockwise and tightening it carefully.
: dAttention o not fill the tank beyond the level required.
9 24/
Assembly page 9/24
Copies of the I/B. Please reproduce them without any
changes except under special instruction from Bimar
(Italy). The pages must be reproduced and folded in
order to obtain a booklet A5 (+/- 148.5 mm width x 210
mm height). When folding, make sure you keep the good
numbering when you turn the pages of the I/B. Don’t
change the page numbering. Keep the language
integrity.
Fax +32 030 9904733
CLEANING AND MAINTENANCE
Attention: before cleaning the appliance, switch off and remove the plug from the electric
outlet.
The base tray and black gasket (7) must be cleaned periodically: empty the water, wash it with soapy
water and rinse it carefully to avoid the formation of dirt and scale. Do not wash it under a jet of water
or immerse in water; do not wash in the dishwasher. Avoid the use of abrasive products that could
damage the gasket and the surface; do not use scouring pads or abrasive products. Before use, check
that the utensil, and above all the contacts are perfectly dry.
Failure to perform maintenance and cleaning could allow microorganisms to grow in the water. For
this reason, the humidifier must be cleaned periodically to ensure correct and efficient operation.
Correct, habitual cleaning of the appliance is extremely important for avoiding the formation of
bacteria and algae inside.
Periodically check the steam output orifice is not obstructed.
To clean the body use a soft damp cloth; do not use abrasive products.
A special tool is required to replace the electrical cord: contact an authorized service center, also for
any repairs.
If you decide not to use the appliance any more, we recommend making it inoperative by cutting the
power cord (after making sure you have disconnected the plug from the socket) and make dangerous
parts harmless if children are allowed to play with them.
Do not dispose of non biodegradable products in the environment but dispose of -
them in accordance with current law. At the end of its working life, the product must not be
disposed of as urban waste. It must be taken to a special local authority differentiated waste
collection centre or to a dealer providing this service. Disposing of a household appliance
separately avoids possible negative consequences for the environment and health deriving
from inappropriate disposal and enables the constituent materials to be recovered to obtain
significant savings in energy and resources.
Trouble
Possible reasons
Shooting Way
Power lamp off, does not work
No power supply
Connect power supply, switch
on
Power lamp on, no mist outlet
with wind
No water in water tank
Fill water into water tank
Security switch is too slight
Make the switch tight
Abnormal smell mist
New unit
Take out water tank, open
cover, let it stay 12 hours in
cool position
Dirty water or long time
staying water
Cleaning water tank, fill in
clear water
Power lamp on, unit doesn’t
work
Too much water in the water
basin
Pour away some water from the
water basin, closed the cover of
water tank tightly
Mist fog is too small
Too much scum in the water
basin
Clean transducer
11 24/
Assembly page 11/24
Copies of the I/B. Please reproduce them without any
changes except under special instruction from Bimar
(Italy). The pages must be reproduced and folded in
order to obtain a booklet A5 (+/- 148.5 mm width x 210
mm height). When folding, make sure you keep the good
numbering when you turn the pages of the I/B. Don’t
change the page numbering. Keep the language
integrity.
Fax +32 030 9904733
Water is too dirty or water kept
too long in the tank
Clean water tank, change to
fresh clear water
Abnormal noise
Resonant in water tank when
water is too less
Fill water into water tank
Unit is on an unstable surface
Move the unit to a stable flat
surface
Mist coming out from around
nozzle
There are apertures between the
nozzle and water tank
Dip the nozzle in water for a
while and then fix it to the
socket on water tank
Nous vous prions de lire attentivement ces instructions avant d’utiliser l'appareil et de les
divulguer à toutes les personnes qui pourraient en avoir besoin. GARDEZ-LES A
PORTEE DE MAIN.
PRÉCAUTIONS
Cet appareil est destiexclusivement à l’emploi pour le quel il a été formellement conçu, pour
humidifier les environnements domestiques, selon les modalités indiquées dans ces instructions. Il
faut considérer tout autre emploi impropre et dangereux. Le constructeur ne pourra pas être retenu
responsable d’éventuels ts qui dérivent d’un emploi impropre, erroné et irresponsable et/ou de
réparations effectuées par le responsable non qualifié.
N’utilisez pas l’appareil à l’extérieur.
Utiliser l’appareil complet des accessoires en dotation. Ne pas utiliser d’accessoires différents de
ceux fournis en dotation: cela peut être dangereux pour l’utilisateur et endommager l’appareil.
Contrôler que l’humidificateur ne soit pas en contact avec l'autre eau ou les autres liquides. Si cela
avait lieu ne pas immerger la main dans le liquide mais avant tout enlever la fiche de la prise de
courant. Essuyer avec soin l’appareil et vérifier que toutes les parties électriques sont sèches: en cas
de doute s’adresser au personnel professionnellement qualifié.
Ne touchez pas l'appareil avec les mains ou les pieds mouillés.
Ce produit n’est pas prévu pour être utilisé par des personnes (y compris les enfants) posdant des
capacités physiques, sensorielles ou mentales duites ou bien une expérience et connaissance
insuffisante, à moins qu’elles ne se trouvent sous la surveillance de quelqu’un ou qu’elles n’aient
reçu des instructions concernant l’utilisation de l’appareil de la part des personnes responsables de
leur sécurité. Il convient de surveiller les enfants pour s’assurer qu’ils ne jouent pas avec l’appareil.
Tenir hors de portée des enfants.
Attention : quand on utilise des appareils électrique il faut toujours respecter les consignes de
sécurité de base afin d’éviter tout risque d’incendie, d’électrocution et de blessure. Il faut faire
encore plus attention lorsquon utilise des appareils électriques munis d’un réservoir contenant de
l’eau : si l’eau déborde, débrancher immédiatement l’appareil, vérifier que les parties électriques de
l’appareil ne soient pas mouillées et si c’est le cas les sécher soigneusement et intégralement.
Vérifier que l’interrupteur principal soit sur la pos.”0” éteint, puis rebrancher l’appareil pour
l’utiliser. En cas de doute, s’adresser à un technicien spécialisé.
Ne pas enlever le réservoir quand l’humidificateur est en fonction.
Ne pas déplacer l’appareil quand il est en fonction et quand le réservoir est plein.
Ne pas mettre les mains, le visage et le corps directement sur l’orifice sortie vapeur quand
l’appareil est en fonction.
Ne jamais utiliser l’humidificateur sans l’eau. Utiliser seulement l’eau du robinet, eau froide ou eau
distillée sans ajouter l'additif. Remplir toujours le tank seulement avec l’appareil éteint.
12 24/
Assembly page 12/24
Copies of the I/B. Please reproduce them without any
changes except under special instruction from Bimar
(Italy). The pages must be reproduced and folded in
order to obtain a booklet A5 (+/- 148.5 mm width x 210
mm height). When folding, make sure you keep the good
numbering when you turn the pages of the I/B. Don’t
change the page numbering. Keep the language
integrity.
Fax +32 030 9904733
Attention: remplir le réservoir seulement quand l’appareil est éteint et la fiche n’est pas
introduite dans la prise de courant.
Le réservoir de l’humidificateur contient environ 3 litres d’eau et assure une autonomie de
fonctionnement d’environ 8/9 heures.
FONCTIONNEMENT
1. S’assurer que l’appareil ne soit pas branché au réseau.
2. Positionner l’humidificateur sur une surface stable.
3. Pour remplir le réservoir (1): l’enlever de la base (2), dévisser le bouchon (6) le faire tourner en
sens contraire à celui des aiguilles d’une montre; introduire du trou Réservoir (5) eau fraîche et
propre, et de nettoyer au maximum donnée (MAX écrit imprimé sur la dent du trou, comme
indiqué dans la figure), par conséquent la refermer faisant tourner le bouchon en sens horaire et
le serrant avec soin.
Attention: n -e pas remplir le réservoir au delà du niveau requis.
4. Positionner correctement le tank sur la base, s’assurer que les deux flèches (sur la base et sur la
tank, positionnées dans la partie postérieure) sont jointes.
5. Brancher la fiche dans la prise de courant.
6. Faire tourner la poignée (3) en sens horaire en correspondance à la valeur d’humidité désirée le
voyant lumineux de couleur verte s’allume, et elle sera majeur si la poignée est tournée toujours
plus vers la position maximum ( ), après quelques secondes pour démarrer la vapeur de sortie.
7. Quand le réservoir est vide, l’appareil s’éteint automatiquement et le voyant lumineux de couleur
rouge de fin eau s’allume.
8. Pour remplir encore une fois le réservoir, répéter les points de 1 au 4.
9. Pour éteindre l’appareil, reporter la poignée sélecteur en position en sens contraire à 0-OFF
celui des aiguilles d’une montre et enlever la fiche de la prise de courant.
10. Après chaque emploi vider la petite cuve (8) à l’intérieur de la base d'éventuels risques d’eau et
l’essuyer avec un panneau légèrement souple.
Pour de longues périodes d’inactivité, enlever la fiche de la prise de courant, s’assurer que le
réservoir est l’intérieur de la base soit parfaitement sec.
Détartrage
Pour prolonger la durée de l’humidificateur et de ses accessoires (filtre enramique, etc), enlever le
calcaire après environ 500 litres (ou plus fréquemment si l’eau est très dure)
Filtre en céramique:
1. Enlever le bouchon du réservoir, dévisser l’embout (10) en sens contraire du filtre (9).
2. Plonger le filtre dans un conteneur de vinaigre blanc (8 degrés) ou vinaigre acritique ou des
substances pour le détartrage pour 10 minutes.
3. Rincer de nouveau avec soin le filtre sous le jet d’eau et avant de visser le filtre vérifier qu'il soit
parfaitement sec.
Réservoir:
a) Ajouter à l’intérieur du réservoir 10/15 gouttes de vinaigre blanc (8 degrés) ou vinaigre acritique
ou des substances de détartrage pour 5 minutes.
b) Rincer de nouveau avec soin ajoutant l’eau à l’intérieur et vérifier qu’il soit parfaitement sec.
14 24/
Assembly page 14/24


Produkt Specifikationer

Mærke: Bimar
Kategori: Luftrenser
Model: UM3.BI
Velegnet til rumvolumen på op til: - m³
Vekselstrømsindgangsspænding: 230 V
Vekselstrømsindgangsfrekvens: 50 Hz
Bredde: 250 mm
Dybde: 247 mm
Højde: 250 mm
Produktfarve: Hvid
Antal hastigheder: 1
Pakkevægt: 1650 g
Pakkedybde: 265 mm
Pakkebredde: 450 mm
Pakkehøjde: 515 mm
Vandtank volumen: 3 L
Strømforbrug (maks.): 30 W
Luftrensningshastighed: 350 m³/t
Antal knapper: 1

Har du brug for hjælp?

Hvis du har brug for hjælp til Bimar UM3.BI stil et spørgsmål nedenfor, og andre brugere vil svare dig