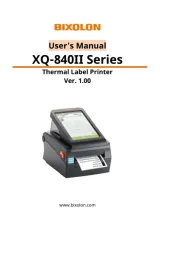
Bixolon SRP-380plus Manual


Læs gratis den danske manual til Bixolon SRP-380plus (4 sider) i kategorien Ikke kategoriseret. Denne vejledning er vurderet som hjælpsom af 26 personer og har en gennemsnitlig bedømmelse på 4.6 stjerner ud af 13.5 anmeldelser. Har du et spørgsmål om Bixolon SRP-380plus, eller vil du spørge andre brugere om produktet?

Side 1/4
Information
Information
Information
Information Information
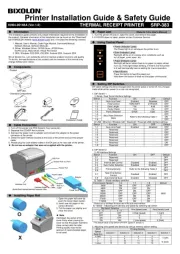
This installation guide contains quick information required for the product
installation. Please refer to the Software and Documents provided on the
Download section of the BIXOLON Website ( ) for more
www.bixolon.com
information on how to setup.
1. Ma , etc. nual: User’s Manual, Code Table, Control Commands
2. Driver: Windows, OPOS, CUPS (Linux, Mac), VCOM (USB, Ethernet)
3. SDK: UPOS SDK (Windows, Android, iOS)
4. Utility: Unified POS Utility, Net Configuration Tool, Android Utility, iOS Utility
We at BIXOLON maintain ongoing efforts to enhance and upgrade the functions
and quality of all our products. In following, product specifications and/or user
manual content may be changed without prior notice.
Please refer to the BIXOLON website for the addresses and phone numbers of
the company's headquarters and branch offices.
Components
Components
Components
Components Components
SRP-380plus 82plus /3
DK Gender
Cable Cover
USB A-B Cable
Installation Guide
AC/DC Adaptor
Power Cord
Paper Roll
Cable Connection
Cable Connection
Cable Connection
Cable ConnectionCable Connection
1. Turn off the printer and peripheral devices.
2. Connect the power cord to the adapter and connect the adapter to the power
supply connector of the printer.
3. Check the type of the interfaces at the back of the printer (USB, Serial,
Parallel, Ethernet, Powered USB, Wireless LAN, Bluetooth and connect the )
interface cable.
4. Connect the drawer kick-out cable to the drawer kick-out port located on the
underside of the printer.
- Be sure t
- Be sure t
- Be sure t
- Be sure t- Be sure to turn off the
o turn off the
o turn off the
o turn off theo turn off the printer and con
printer and con
printer and con
printer and con printer and connect or disc
nect or disc
nect or disc
nect or discnect or disconnect
onnect
onnect
onnect onnect
the adapte
the adapte
the adapte
the adaptethe adapter jack.
r jack.
r jack.
r jack. r jack.
-
-
-
-- Only use a
Only use a
Only use a
Only use aOnly use a power supply pr
power supply pr
power supply pr
power supply pr power supply provided by Bixol
ovided by Bixol
ovided by Bixol
ovided by Bixolovided by Bixolon
on
on
onon
- Pay attentio
- Pay attentio
- Pay attentio
- Pay attentio- Pay attention to the dire
n to the dire
n to the dire
n to the diren to the direction in which you
ction in which you
ction in which you
ction in which youction in which you insert the
insert the
insert the
insert the insert the
adapter ja
adapter ja
adapter ja
adapter ja adapter jack.
ck.
ck.
ck. ck.
Installing Paper Roll
Installing Paper Roll Installing Paper Roll
1. Push the Cover Open Button to open the
Printer Cover.
2. Insert new roll paper in the correct
direction.
3. Pull the paper out slightly and close the
Printer Cover.
When closing the cover, press down on the center of the cover
to ensure that the paper is in contact with the roller. Printing
quality may not be optimum if the recommended paper is not
used.
Using Control Panel
Using Control Panel
Using Control Panel
Using Control PanelUsing Control Panel
Power (LED)
The Power LED is on whenever the printer is on.
Error (LED)
Red light will be on in various error conditions such as out of
paper, cover open, etc.
Paper (LED)
Red LED will be lit when the paper roll is running low.
The LED keeps blinking when the printer is in self-test standby
mode or macro execution standby mode.
Feed (Button)
Press this button to feed the paper out.
Hold down this button to feed out the paper continuously.
Self-Test
Self-Test
Self-Test
Self-Test Self-Test
You can check whether printer works correctly or not through the self-test.
Printing quality, ROM version, and memory switch settings can be checked
through the self-test function.
1. Check whether paper is mounted correctly.
2. Turn on the power while holding down the Feed button and the self-test
procedure will begin.
3. The printer will print out the current status of printer including the version of
ROM.
4. After printing out the current status of printer, the printer will print following
lines and waits for the next step (paper lamp will keep blinking).
Self-TEST
Self-TEST
Self-TEST
Self-TESTSelf-TEST PRINT COMPL
PRINT COMPL
PRINT COMPL
PRINT COMPL PRINT COMPLETE
ETE
ETE
ETEETE
SELECT M
SELECT M
SELECT M
SELECT MSELECT MODE BY PRESSIN
ODE BY PRESSIN
ODE BY PRESSIN
ODE BY PRESSINODE BY PRESSING THE
G THE
G THE
G THEG THE FEED BUTTON.
FEED BUTTON.
FEED BUTTON.
FEED BUTTON. FEED BUTTON.
End of S
End of S
End of S
End of SEnd of SELF-TEST
ELF-TEST
ELF-TEST
ELF-TEST ELF-TEST : Less than 1 secon
: Less than 1 secon
: Less than 1 secon
: Less than 1 secon: Less than 1 second
d
d
d d
VMSM Selecti
VMSM Selecti
VMSM Selecti
VMSM SelectiVMSM Selection : 1 se
on : 1 se
on : 1 se
on : 1 seon : 1 second or more
cond or more
cond or more
cond or morecond or more
5. Press the Feed button to resume printing or hold down the button for at
least one second to change the VMSM settings.
5- SELF- 1 If “Continuous TEST” is selected
(1) Press the Feed button for less than one second to print the preset page.
(2) The self test ends automatically as it prints the following line and cuts
-
the paper.
*** COMP
*** COMP
*** COMP
*** COMP*** COMPLETED ***
LETED ***
LETED ***
LETED *** LETED ***
(3) The printer goes into normal print mode upon completion of the self
test.
5- 2 If “VMSM Selection” is selected
(1) The following lines will be printed when the VMSM opens.
** VMSM Sele
** VMSM Sele
** VMSM Sele
** VMSM Sele** VMSM Selection **
ction **
ction **
ction **ction **
0 : Exit and reb
0 : Exit and reb
0 : Exit and reb
0 : Exit and reb0 : Exit and reboot printe
oot printe
oot printe
oot printeoot printer
r
r
r r
1 : Print curre
1 : Print curre
1 : Print curre
1 : Print curre1 : Print current settings
nt settings
nt settings
nt settingsnt settings
2 : Set Pri
2 : Set Pri
2 : Set Pri
2 : Set Pri2 : Set Print Density
nt Density
nt Density
nt Density nt Density
3 : Set Pri
3 : Set Pri
3 : Set Pri
3 : Set Pri3 : Set Print Speed
nt Speed
nt Speed
nt Speed nt Speed
4 : Set Cutting
4 : Set Cutting
4 : Set Cutting
4 : Set Cutting4 : Set Cutting mode
mode
mode
mode mode
5 : Set Buz
5 : Set Buz
5 : Set Buz
5 : Set Buz5 : Set Buzzer
zer
zer
zer zer
6
6
6
6 6 Set Near-
Set Near-
Set Near-
Set Near-Set Near-End Sensor
End Sensor
End Sensor
End SensorEnd Sensor
:
:
:
: :
7 : Set Serial
7 : Set Serial
7 : Set Serial
7 : Set Serial 7 : Set Serial Interface
Interface
Interface
Interface Interface
(2) Press the Feed button to run the above function.
Step 1(Select Options): press the button a number of times as shown
by each menu.
Step 2(Enter Options): hold down the button for at least one second
to apply each item selected.
If you select any items not listed above, the list of “VMSM
Selection” will be printed again. Setting the mode will be canceled
if no item is selected in Step 1.
If “0: Exit and reboot printer” is not executed, the new settings will
not be saved.
(3) Hold down the Feed button for at least 1 second to save the changes.
The following line will be printed before cutting the paper.
*** COMP
*** COMP
*** COMP
*** COMP*** COMPLETED ***
LETED ***
LETED ***
LETED *** LETED ***
6. The new settings will be automatically applied when printer resets.
Printer Instal
Printer Instal
Printer Instal
Printer InstalPrinter Installation Gu
lation Gu
lation Gu
lation Gulation Guide
ide
ide
ideide & Safety
& Safety
& Safety
& Safety & Safety Guide
Guide
Guide
GuideGuide
KN04-
KN04-
KN04-
KN04-KN04- A (V1
A (V1
A (V1
A (V1A (V1.01)
.01)
.01)
.01) .01)
00237
00237
00237
0023700237
THERMAL RE
THERMAL RE
THERMAL RE
THERMAL RETHERMAL RECEIPT PRINTER
CEIPT PRINTER
CEIPT PRINTER
CEIPT PRINTERCEIPT PRINTER SRP-380/382plus
SRP-380/382plus
SRP-380/382plus
SRP-380/382plus SRP-380/382plus
Power Jack
Ethernet
Cable
Interface Cable
(Serial/Parallel/Powered USB/
Wireless LAN/Bluetooth)
AC/DC Adapter
Adapter Jack
Interface port
USB
Cable
Ethernet Port
USB Port
Power Port
Drawer
Kick-out
Port
Drawer
Kick-out
Cable
Recommended Papers
Recommended Papers
Recommended Papers
Recommended Papers Recommended Papers
- TF50KS-E (Paper Thickness: 65μm): Nippon Paper Industries Co., Ltd.
- PD 150R (Paper Thickness: 7m): New Oji Paper Mfg, Co., Ltd.
- PD 160R (Paper Thickness: 7m): New Oji Paper Mfg, Co., Ltd.
- P350 (Paper Thickness: 62μm): Kansaki Specialty Paper, Inc. (USA)
- P220AG (Paper Thickness: 65μm): Mitsubishi Paper Mills Limited
- P220A (Paper Thickness: 6m): Mitsubishi Paper Mills Limited
- F5041 (Paper Thickness: 65μm): Mitsubishi HitecPaper Flensburg Gmbh
- P5047 (Paper Thickness: 60μm): Mitsubishi Paper Mills Limited
Use of papers
Use of papers
Use of papers
Use of papersUse of papers other than th
other than th
other than th
other than th other than those recommend
ose recommend
ose recommend
ose recommendose recommended abo
ed abo
ed abo
ed aboed above may damage
ve may damage
ve may damage
ve may damage ve may damage
TPH or deg
TPH or deg
TPH or deg
TPH or degTPH or degrade the printing
rade the printing
rade the printing
rade the printingrade the printing quality and
quality and
quality and
quality and quality and our compa
our compa
our compa
our compaour company.
ny.
ny.
ny. ny.
Is not resp
Is not resp
Is not resp
Is not respIs not responsible for the d
onsible for the d
onsible for the d
onsible for the donsible for the damage caused
amage caused
amage caused
amage causedamage caused by non
by non
by non
by non by non-recom
-recom
-recom
-recom-recommended
mended
mended
mended mended
papers.
papers.
papers.
papers. papers.
WEEE(Waste Electrical and Electric Equipment)
WEEE(Waste Electrical and Electric Equipment) WEEE(Waste Electrical and Electric Equipment)
This marking shown on the product or its literature, indicates that is should not be
disposed with other household wastes at the end of its working life, To prevent
possible harm to the environment or human health from uncontrolled waste
disposal, please separate this from other types of wastes and recycle it responsibly to
promote the sustainable reuse of material resources. Household users should
contact either the retailer where they purchased this product, or their local
government office, for details of where and how they can take this item for
environmentally safe recycling. Business users should contact their supplier and
check the terms and conditions of the purchase contract. This product should not be
mixed with other commercial wastes for disposal.
Safety Precautions
Safety Precautions
Safety Precautions
Safety Precautions Safety Precautions
WARNING & CAUTIO
WARNING & CAUTIO
WARNING & CAUTIO
WARNING & CAUTIOWARNING & CAUTION
N
N
N N
It describes death, physical injuries, serious financial losses, and
damage to data etc. that can be caused to the user.
Do not connect multiple products to
a single or faulty power outlet.
Use only grounded power outlets
that meet the industry standard.
Noncompliance may cause electric
Noncompliance may cause electric Noncompliance may cause electric
shock or fire.
shock or fire.
shock or fire.
shock or fire.shock or fire.
Only use authentic products from BIXOLON.
The company will
The company will
The company will
The company willThe company will not provide post-sal
not provide post-sal
not provide post-sal not provide post-sale
e
e
e e
support for damage
support for damage
support for damage
support for damagesupport for damaged or other quality
d or other quality
d or other quality
d or other quality d or other quality issues
issues
issues
issues issues
that any fake (or refur
that any fake (or refurthat any fake (or refurbished) products
bished) products
bished) products
bished) productsbished) products may
may
may
may may
incur.
incur.
incur.
incur. incur.
Do not excessively bend or strain the power cord.
Securely push the power cord all the way into the
power outlet lest it remain loose. Make sure to
hold the cord tight when separating it from the
power outlet. Do not remove the power cord
while the product is in use. No
No
No
NoNoncompliance
ncompliance
ncompliance
ncompliance ncompliance may
may
may
may may
cause elect
cause elect
cause elect
cause electcause electric shock or fi
ric shock or fi
ric shock or fi
ric shock or firic shock or fire.
re.
re.
re.re.
Keep small accessories or other packaging
materials away from young children. Beware:
choking hazard. Mishandling the product m
Mishandling the product m
Mishandling the product mMishandling the product may
ay
ay
ay ay
incur injuries which m
incur injuries which mincur injuries which may requir
ay requir
ay requir
ay requiray require seeking
e seeking
e seeking
e seeking e seeking
urgent medical
urgent medical
urgent medical
urgent medical urgent medical attention.
attention.
attention.
attention.attention.
Keep excessive liquids away from the
power cord and outlet. If matter is
smeared onto the power cords, wipe
with a dry cloth. Noncompliance
Noncompliance
Noncompliance
Noncompliance Noncompliance
may cause
may cause
may cause
may cause may cause electric shock or fire.
electric shock or fire.
electric shock or fire. electric shock or fire.
an
an
an
anan
Do not allow the product to be
damaged by heavy objects.
Noncompliance may cause electric
Noncompliance may cause electric Noncompliance may cause electric
shock or fire.
shock or fire.
shock or fire.
shock or fire.shock or fire.
If the product emits a strange sound, burning smell,
or smoke, turn off the power immediately and unplug
the power cord. If the product is dropped or its
exterior is damaged, turn off the power immediately
and unplug the power cord. Do not subject the
product to shock. It m
It m
It m
It mIt may star
ay star
ay star
ay staray start a fire and
t a fire and
t a fire and
t a fire and t a fire and i
i
i
ii may
may
may
may may
t
t
t
t t
damage the p
damage the p
damage the p
damage the pdamage the product.
roduct.
roduct.
roduct.roduct.
Install the product in a well-ventilated area by keeping it a certain
distance from the wall. The product installed in certain places such
as where a lot of fine dust is generated, where the temperature is
too high or too low, where there is a lot of moisture or water, and at
airports or stations that are used continuously for a long time may
suffer serious quality problems due to the influence of the
surrounding environment. An
An
An
AnAn inc
inc
inc
inc increas
reas
reas
reasrease i
e i
e i
e ie in in
n in
n in
n inn inter
ter
ter
terternal
nal
nal
nal nal tem
tem
tem
temtempera
pera
pera
peraperature
ture
ture
tureture
may
may
may
maymay sta
sta
sta
sta start a
rt a
rt a
rt art a fi
fi
fi
fi fire.
re.
re.
re. re. Be
Be
Be
Be Be sure
sure
sure
suresure to
to
to
to to cont
cont
cont
contcontact
act
act
actact the
the
the
the the pl
pl
pl
pl place
ace
ace
ace ace of p
of p
of p
of pof purc
urc
urc
urcurcha
ha
ha
hahase be
se be
se be
se bese befor
for
for
forfore
e
e
e e
ins
ins
ins
insinstall
tall
tall
talltalling
ing
ing
ing ing the
the
the
thethe pr
pr
pr
pr produc
oduc
oduc
oducoduct.
t.
t.
t.t.
Install the product in a fixed place preventing it
from tipping over. When moving the product,
turn off the power and disconnect all connected
cables, including the power cord. It may
It may
It may
It may It may
damage the pro
damage the pro
damage the pro
damage the prodamage the product.
duct.
duct.
duct.duct.
Never independently disassemble,
repair, or modify the product as the
warranty will become invalid.
When repair is necessary, contact the
When repair is necessary, contact the When repair is necessary, contact the
original place of purchase.
original place of purchase.original place of purchase.
Do not let any foreign substances
enter the product. Do not place heavy
objects, liquids, or metals on the
product. Th
Th
Th
ThThis c
is c
is c
is cis cou
ou
ou
ouould c
ld c
ld c
ld cld cau
au
au
auause d
se d
se d
se dse dam
am
am
amamage
age
age
ageage to
to
to
to to th
th
th
th the
e
e
e e
pr
pr
pr
prprodu
odu
odu
oduoduct o
ct o
ct o
ct oct or
r
r
r r a fi
a fi
a fi
a fia fire
re
re
rere.
.
.
..
If there is a problem with the produ
If there is a problem with the produIf there is a problem with the product,
ct,
ct,
ct, ct,
please contact the original place of
please contact the original place of please contact the original place of
purchase or through BIXOLON website’s
purchase or through BIXOLON website’s purchase or through BIXOLON website’s
product repair page
product repair page
product repair page
product repair page product repair page
(
(
(
((
http://www.bixolon.com
http://www.bixolon.comhttp://www.bixolon.com).
).
).
).).


Produkt Specifikationer

Mærke: Bixolon
Kategori: Ikke kategoriseret
Model: SRP-380plus

Har du brug for hjælp?

Hvis du har brug for hjælp til Bixolon SRP-380plus stil et spørgsmål nedenfor, og andre brugere vil svare dig