8803-000005
HB47E
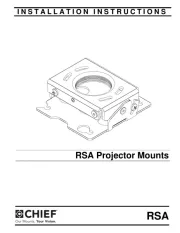
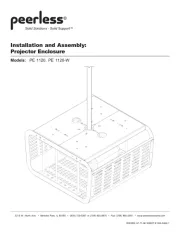
VIDEO PROJECTOR CEILING MOUNT
for EIKI LC-XT1, PROXIMA DP 9350, SANYO PLC XF20
The Chief HB47E video projector ceiling mount is designed to provide a fast, simple and secure installation of your
projector. Special roll, pitch, yaw and horizontal adjustments simplify projection positioning for image alignment. The
HB47E mount also has positive registration lock so that the projector may be removed without losing projector mount
registration.
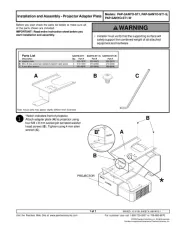
WARNING: IMPROPER INSTALLATION MAY RESULT IN SERIOUS PERSONAL INJURY!
All components must be securely fastened to each other and to the ceiling, AND the ceiling
MUST be capable of supporting 5 times the total weight of the installation. If it cannot, the
ceiling MUST be reinforced.
Unpack and check contents:
(1) (3)Deluxe ceiling mount housing assembly. M8 - 12mm bolt
(1) (2)Mounting bracket M8 - 25mm bolt
(4) (1)5/16” flange nuts M8 - 35mm bolt
(6) (4)M8 Flatwashers ½” Round Nylon Spacers
(1) Allen Wrench
INSTALLATION INSTRUCTIONS
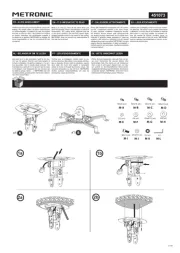
1. Turn your projector upside down.
2. Place the mounting bracket on the projector lining up the four mounting holes.
3. Place (2) ½” Round Nylon Spacers, one on each side of the front of the projector between the projector and the
bracket. Start by hand (1) M8 - 12mm bolt and M8 flatwasher in the front center hole and (2) M8 – 25mm bolts
and M8 flatwashers in the front outer holes.
4. Use the remaining (2) ½” Round Nylon Spacers, stack them so they are 1” tall, lift the rear of the bracket just
enough to place them between the center hole in the bracket and the hole in the projector and place the (1) M8 –
38mm bolt and M8 flatwasher though the hole in the bracket and spacers and start treading the bolt in to the
treaded insert. Place the remaining (2) M8 – 12mm bolts and M8 flatwashers in the two rear holes in the bracket
and then snug using the proper size wrench. Securely tighten all six mounting bolts at this time.
5. Be sure that the method of support you are using for the VCM ceiling mount is securely installed to the ceiling. If
not, the ceiling must be reinforced. Improper installation may result in serious personal injury.
6. Attach the VCM housing to your method of support and tighten firmly so the VCM housing is square to the
screen.