STITCH LINE
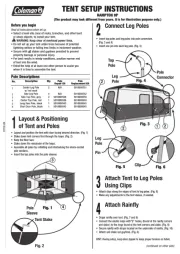
Fig. 5
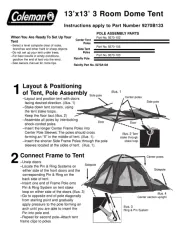
2
Connect Leg Poles
• Insert top poles and leg poles into pole connectors.
(Fig. 3 and 4)
• Insert one pin into each leg pole. (Fig. 5)
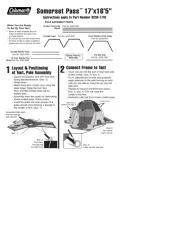
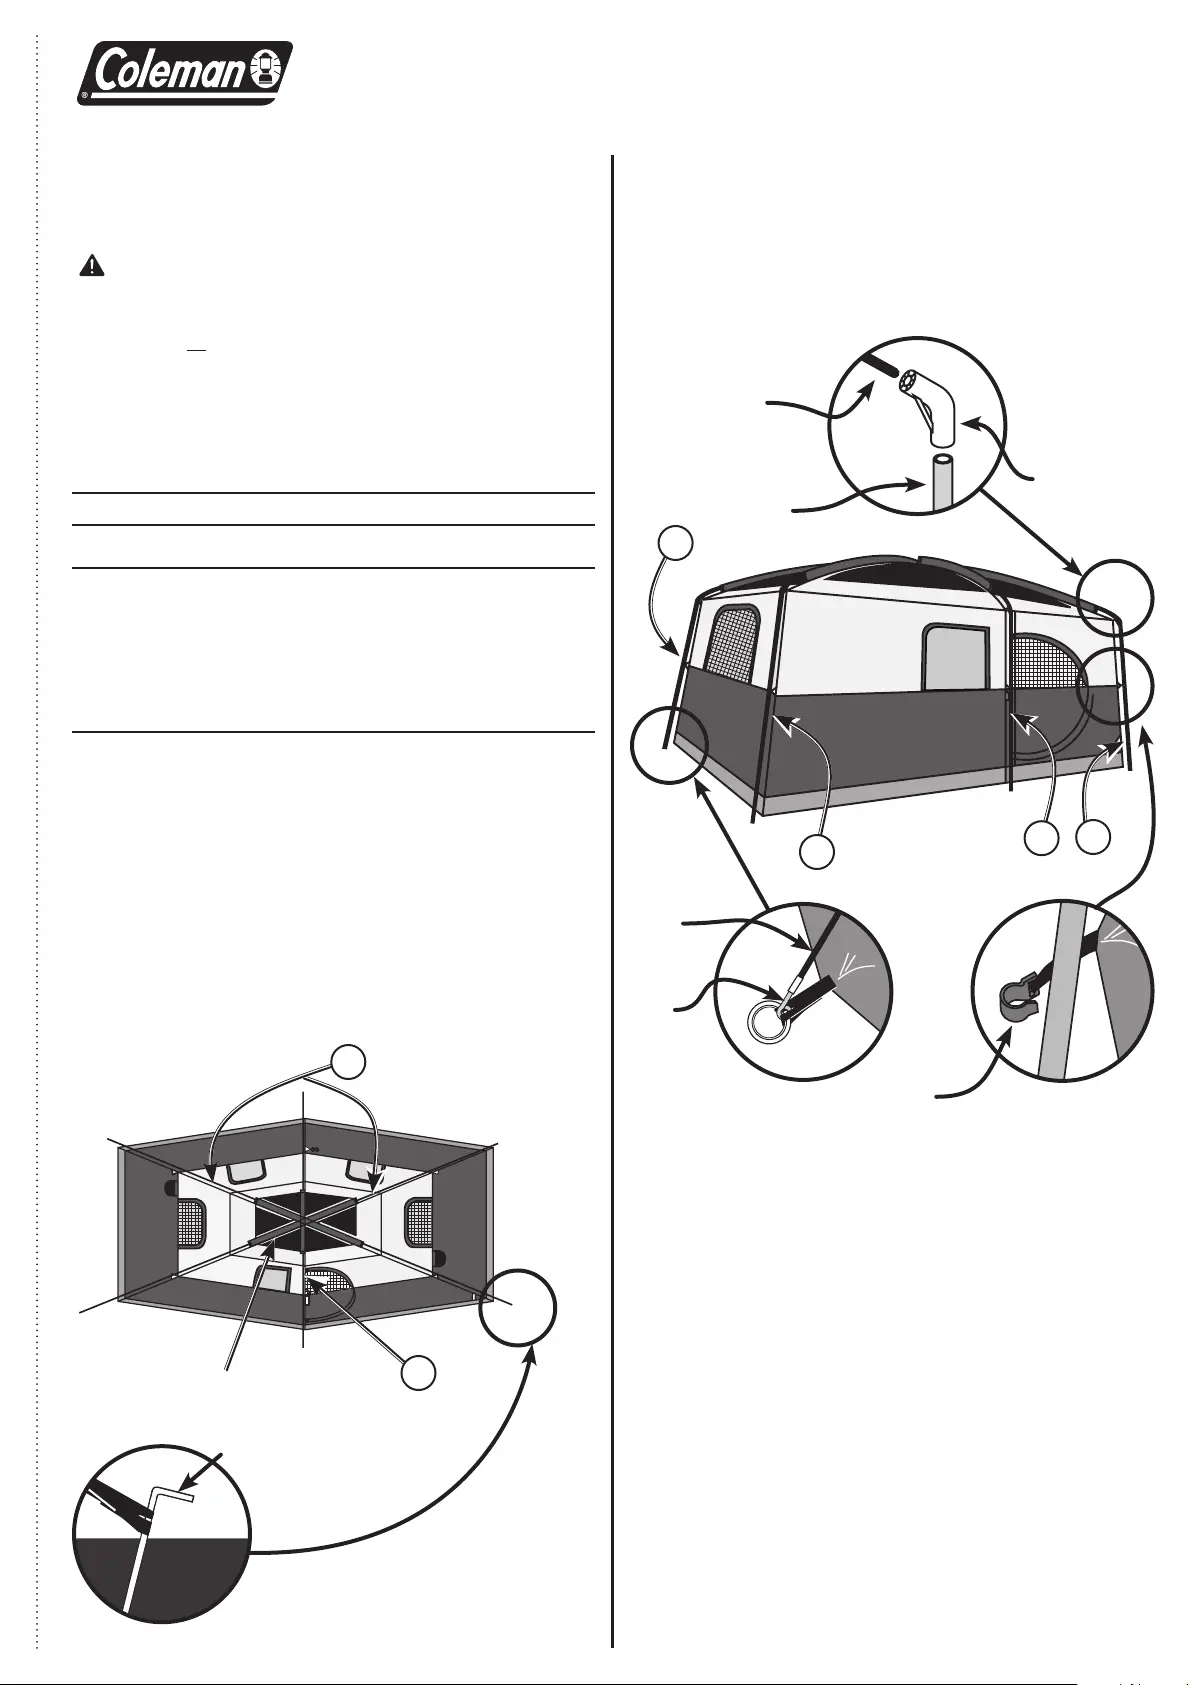
3
Attach Tent to Leg Poles
Using Clips
• Attach clips along the edges of tent to leg poles. (Fig. 6)
• Make any adjustments to the tent stakes, if needed.
4
Attach Rainfly
• Drape rainfly over tent. (Fig. 7 and 8)
• Connect the elastic loops with”S” hooks, (found at the rainfly corners
and sides ) to the rings found at the tent corners and sides. (Fig. 9)
• Secure rainfly with straps located on the underside of rainfly. (Fig. 10)
• Attach and stake out guylines. (Fig. 8)
HINT: During setup, keep door zipped to keep proper tension on fabric.
Leg
Pole
Pole
Connector
Top
Pole
Fig. 3
Fig. 4
Pin
Leg
Pole
Clip
Fig. 6
(continued on other side)
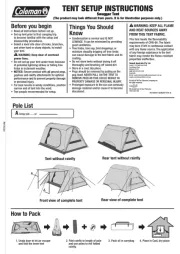
Before you begin
Read all instructions before set up.
• Select a level site clear of rocks, branches, and other hard
or sharp objects, to install your tent.
WARNING: Keep clear of overhead power lines.
• Do not set up your tent under trees because of potential
lightning strikes or falling tree limbs in inclement weather.
• Secure with all stakes and guylines provided to prevent
property damage or personal injury.
• For best results in windy conditions, position narrow end
of tent into the wind.
• Enlist the help of at least one other person to assist you
when it is time to assemble the tent.
1
Layout & Positioning
of Tent and Poles
• Layout and position the tent with door facing desired direction. (Fig. 1)
• Stake down tent corners first through the loops. (Fig. 2)
• Keep the floor taut.
• Stake down the remainder of the loops.
• Assemble all poles by unfolding and interlocking the shock-corded
pole sections.
• Insert the top poles into the pole sleeves.
Fig. 1
Pole
Sleeve
Fig. 2
Tent Stake
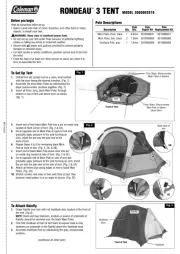
Pole Descriptions
Description Qty. Pole
Repair Kit
Pole
Replacement Kit
Center Leg Pole
w/ red mark
Side Leg Pole
Side Top Pole, grey
Center Top Pole, red
Long Door Pole, black
Short Door Pole, black
2
4
2
1
1
1
N/A
N/A
5010000538
5010000538
5010000543
5010000543
5010000751
5010000752
5010000550
5010000550
5010000545
5010000545
TENT SETUP INSTRUCTIONS
1
2
3
4
5
6
No.
1
2
2
2
4
HAMPTON 9P
(The product may look different from yours. It is for illustration purpose only.)
3