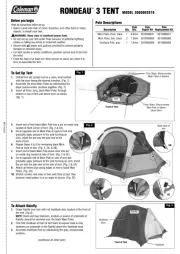
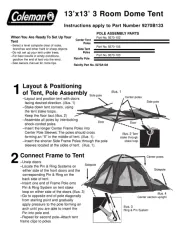
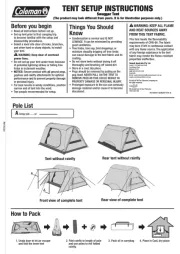
Coleman Rondeau 3 Manual

| Mærke: | Coleman |
| Kategori: | Fuld |
| Model: | Rondeau 3 |
Har du brug for hjælp?
Hvis du har brug for hjælp til Coleman Rondeau 3 stil et spørgsmål nedenfor, og andre brugere vil svare dig
Fuld Coleman Manualer
12 Oktober 2025
12 Oktober 2025
12 Oktober 2025
12 Oktober 2025
12 Oktober 2025
12 Oktober 2025

29 December 2024

29 December 2024
Fuld Manualer
- Sierra Designs
- Dwt-Zelte
- Eureka
- Outwell
- Jack Wolfskin
- SereneLife
- Trigano
- Bestway
- Rollei
- Sunny
- Tepro
- Yamazen
- Grand Canyon
- Nomad
- Robinhood
Nyeste Fuld Manualer

30 November 2025

30 November 2025

23 November 2025

23 November 2025

22 November 2025

21 November 2025

20 November 2025

20 November 2025

20 November 2025

20 November 2025