GREAT BRITAIN • CUSTOMER SERVICE tel. 020 8247 9300 e-mail customerservice@clasohlson.co.uk internet www.clasohlson.co.uk
8
9
10
11
12
13
14
15
16
1 5
2
3
4
6
7
Ver. 20151021
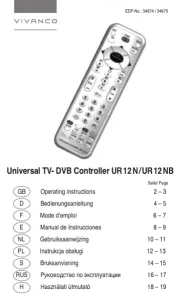
Multi-Remote Control
Art.no 36-6012 Model 50052
Please read theentire instruction manual before using theproduct and then
save it for future reference. We reserve theright for any errors in text or images
and any necessary changes made to technical data. In theevent of technical
problems or other queries, please contact our Customer Services.
Safety
• Never subject theproduct to direct sunlight, high temperatures, dusty
environments or heavy vibrations.
• Never expose theproduct to impacts, shocks, rain, liquids or moisture.
Buttons and functions
1. Activate thebatteries by opening thebattery compartment on theback of
theremote control and removing theplastic tabs from theterminals.
2. Ret thebattery cover.
Setting the time
1. Hold in [ CLOCK ] until thehours ash.
2. Press or hold in [ ▼ ▲/ ] to set thehours.
3. Press [ ENTER ] to conrm. Theminutes will ash.
4. Press or hold in [ ▼ ▲/ ] to set theminutes. Press [ ENTER ] to conrm.
Linking the remote control to a receiver
1. Press [ ▼ ▲/ ] to select achannel (15 channels are available) for thereceiver
you want to link to theremote control.
2. Make sure that thereceiver that you are going to use theremote control with is
ready to be linked to theremote control (refer to theuser manual of thereceiver).
3. Press [ ON ] on theremote control to link it to thereceiver.
4. Theprevious steps can be repeated to link multiple receivers.
Timer settings
1. Hold in [ TIMER ] until thetimer settings appear on thedisplay.
2. Press [ ▼/▲ ] to choose thedesired memory slot (8 memory slots are available).
3. Press [ ENTER ] to conrm.
4. Press [ ▼ ▲/ ] to choose thedesired channel 1–15.
5. Press [ ENTER ] to conrm.
6. Press [ ▼ ▲/ ] to choose theswitch-on time hour.
7. Press [ ENTER ] to conrm.
8. Press [ ▼ ▲/ ] to choose theswitch-on time minutes.
9. Press [ ENTER ] to conrm.
10. Press [ ▼ ▲/ ] to choose theswitch-off time hour.
11. Press [ ENTER ] to conrm.
12. Press [ ▼ ▲/ ] to choose theswitch-off time minutes.
13. Press [ ENTER ] to conrm.
14. Press [ ▼ ▲/ ] to select thetimer function (refer to
the section above).Buttons and functions – Display
15. Press [ ENTER ] to conrm.
16. Press [ TIMER ] to return to time display mode.
Note: If no settings are made within 20 seconds, thedisplay automatically
reverts to time display mode.
To temporarily deactivate a timer setting
1. Hold in [ TIMER ] until thetimer settings appear on thedisplay.
2. Press [ ▼ ▲/ ] to choose thedesired memory slot.
3. Press [ ll/DEL ] (abox will ash around thechosen memory slot) and then
[ ENTER ] to temporarily stop thetimer setting. Abox will appear surrounding
thememory slot to indicate that thetimer is temporarily turned off.
To reactivate a timer setting
1. Hold in [ TIMER ] until thetimer settings appear on thedisplay.
2. Press [ ▼ ▲/ ] to choose thedesired memory slot.
3. Press [ ll/DEL ] (thebox around thechosen memory slot will ash) and then
[ ENTER ] to reactivate thetimer setting. Thebox surrounding thememory
slot will dissappear.
To delete a timer setting
1. Hold in [ TIMER ] until thetimer settings appear on thedisplay.
2. Press [ ▼ ▲/ ] to choose thedesired memory slot.
3. Hold in [ ll/DEL ] until theon/off times ash and then press [ ENTER ] to delete
thesetting.
Dimming
If theremote control is used with adimmable receiver it can be used to dim
aconnected light. Pressing theon-button twice in quick succession will cause
thelight to continually increase and decrease. Press theon-button once more
when thedesired light level has been reached. Switch thelight on/off using
theon and off buttons. Thelight comes on at thelatest light level setting when
theon-button is pressed (refer even to theuser manual of thedimmer receiver).
Button lock
• Activate: hold in [ ENTER ] for approximately 4 seconds until thelock symbol
appears on thedisplay.
• Deactivate: hold in [ ENTER ] for approximately 4 seconds until thelock
symbol disappears from thedisplay.
Care and maintenance
• Clean theremote control by wiping it with adry cloth.
• Remove thebatteries from theremote control if it is not to be used for along
time.
1. [ ALL ] Switch all linked devices on/off
at thesame time
2. [ TIMER ] Enable thetimer settings to
be made
3. [ CLOCK ] Enable thetime settings to
be made
4. [ ENTER ] Conrm, stop and delete
timer settings, activate/deactivate
button lock
5. [ ON/OFF ] On/off, link together,
dimmer (ON)
6. [ ▼ ▲/ ] Navigate themenus,
make settings, etc.
7. [ ll/DEL ] Pause, delete
Display
8. Time display
9. Channel number
10. Battery charge status indicator
11. Button lock
12. Memory slot
13. Programmed switch-on time
14. Programmed switch-off time
15. Displays theselected timer function:
- Daily function, in which thetimer
switches on/off depending on
theprogrammed settings
- One time function, in which thetimer
switches on/off once
- Security function, in which thetimer
switches on/off randomly at different
times from 40 minutes before
aset time until 120 minutes after theset time
16. Indicates that asignal has been sent to areceiver
Operating instructions
Batteries
Theremote control has 2 batteries: 1×CR2032 and 1×A23 (replacement
batteries for A23 at Clas Ohlson are called V23GA, art.no 22-3226).
Changing the batteries
1. Open thebattery cover on theback of theremote control.
2. Remove thebatteries from their respective battery
compartments (slide theCR2032 battery out from its
holder, see picture).
3. Slide in anew CR2032 battery in its place. Thebattery’s
positive (+) terminal should be facing upwards.
4. Insert anew A23 battery into its compartment, ensuring
that thepolarity poles are in facing correctly.
Responsible disposal
This symbol indicates that this product should not be disposed of
with general household waste. This applies throughout theentire
EU. In order to prevent any harm to theenvironment or health
hazards caused by incorrect waste disposal, theproduct must be
handed in for recycling so that thematerial can be disposed of
in aresponsible manner. When recycling your product, take it to
your local collection facility or contact theplace of purchase.
They will ensure that theproduct is disposed of in anenvironmentally
sound manner.
Specifications
Max range 25m
Frequency 433.92 MHz
Channels 15
Memory slots 8
Batteries 1×CR2032, 3 V DC, 1×A23, 12 V DC (included)