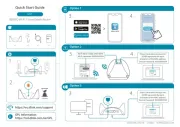
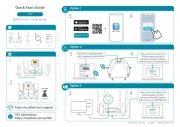
OPTION 1 - D-LINK WI-FI APP SETUP OPTION 2 - WEB BROWSER SETUP
Step 1. Install the D-Link Wi-Fi Assist App. You can also use a Web browser on your computer or on your phone to set up the Router.
Step 1. Connect your computer or phone to your Router’s Wi-Fi. The Wi-Fi Name and
Password are printed on the label at the back of the Router. Alternatively you can connect
you computer to one of the Router’s LAN ports using a network cable.
Step 2. Open your Web browser and enter http://192.168.0.1 in the address bar. You will
be prompted to enter the Router’s admin password – the factory password is printed on
the label at the back of the Router.
For conguration guides and the latest software updates, please visit
You can contact our Technical Support Team:
• Via website: https://www.dlink.com.au/contactus
• Via Live Chat: https://support.dlink.com.au/
New Zealand: 0800 900 900
Step 2. Connect your phone to your Router’s Wi-Fi. The Wi-Fi Name and password are
printed on the label at the back of the Router.
Step 3. Open the D-Link Wi-Fi Assist app and tap on the Router icon.
Access the setup options by tapping on the Settings icon.
Step 4. Tap on Quick Setup.
Select your Internet Connection type and enter the required details.
Enter your desired Wi-Fi Name and assign a secure password to your Wi-Fi.
After completing the Quick Setup, the Router will restart.
Reconnect to your Router’s Wi-Fi using the new name and password.
Step 3. The Quick Setup Wizard will take you through the initial Router set up.
Select your Internet Connection type and enter the required details.
After completing the Quick Setup Wizard, the Router will restart.
Reconnect to your Router’s Wi-Fi using the new name and password.
Enter your desired Wi-Fi Name and assign a secure password to your Wi-Fi.