Dell Brocade 6510 Manual
Dell
Netværkskort/adapter
Brocade 6510
| Mærke: | Dell |
| Kategori: | Netværkskort/adapter |
| Model: | Brocade 6510 |
| Vekselstrømsindgangsspænding: | 85 - 264 V |
| Vekselstrømsindgangsfrekvens: | 47/63 Hz |
| Bredde: | 438 mm |
| Dybde: | 443 mm |
| Højde: | 43 mm |
| Vægt: | 9160 g |
| Produktfarve: | Grå |
| Formfaktor: | 1U |
| Opbevaringstemperatur (T-T): | -20 - 70 °C |
| Relativ luftfugtighed ved drift (H-H): | 10 - 85 % |
| Relativ luftfugtighed ved opbevaring (H-H): | 10 - 90 % |
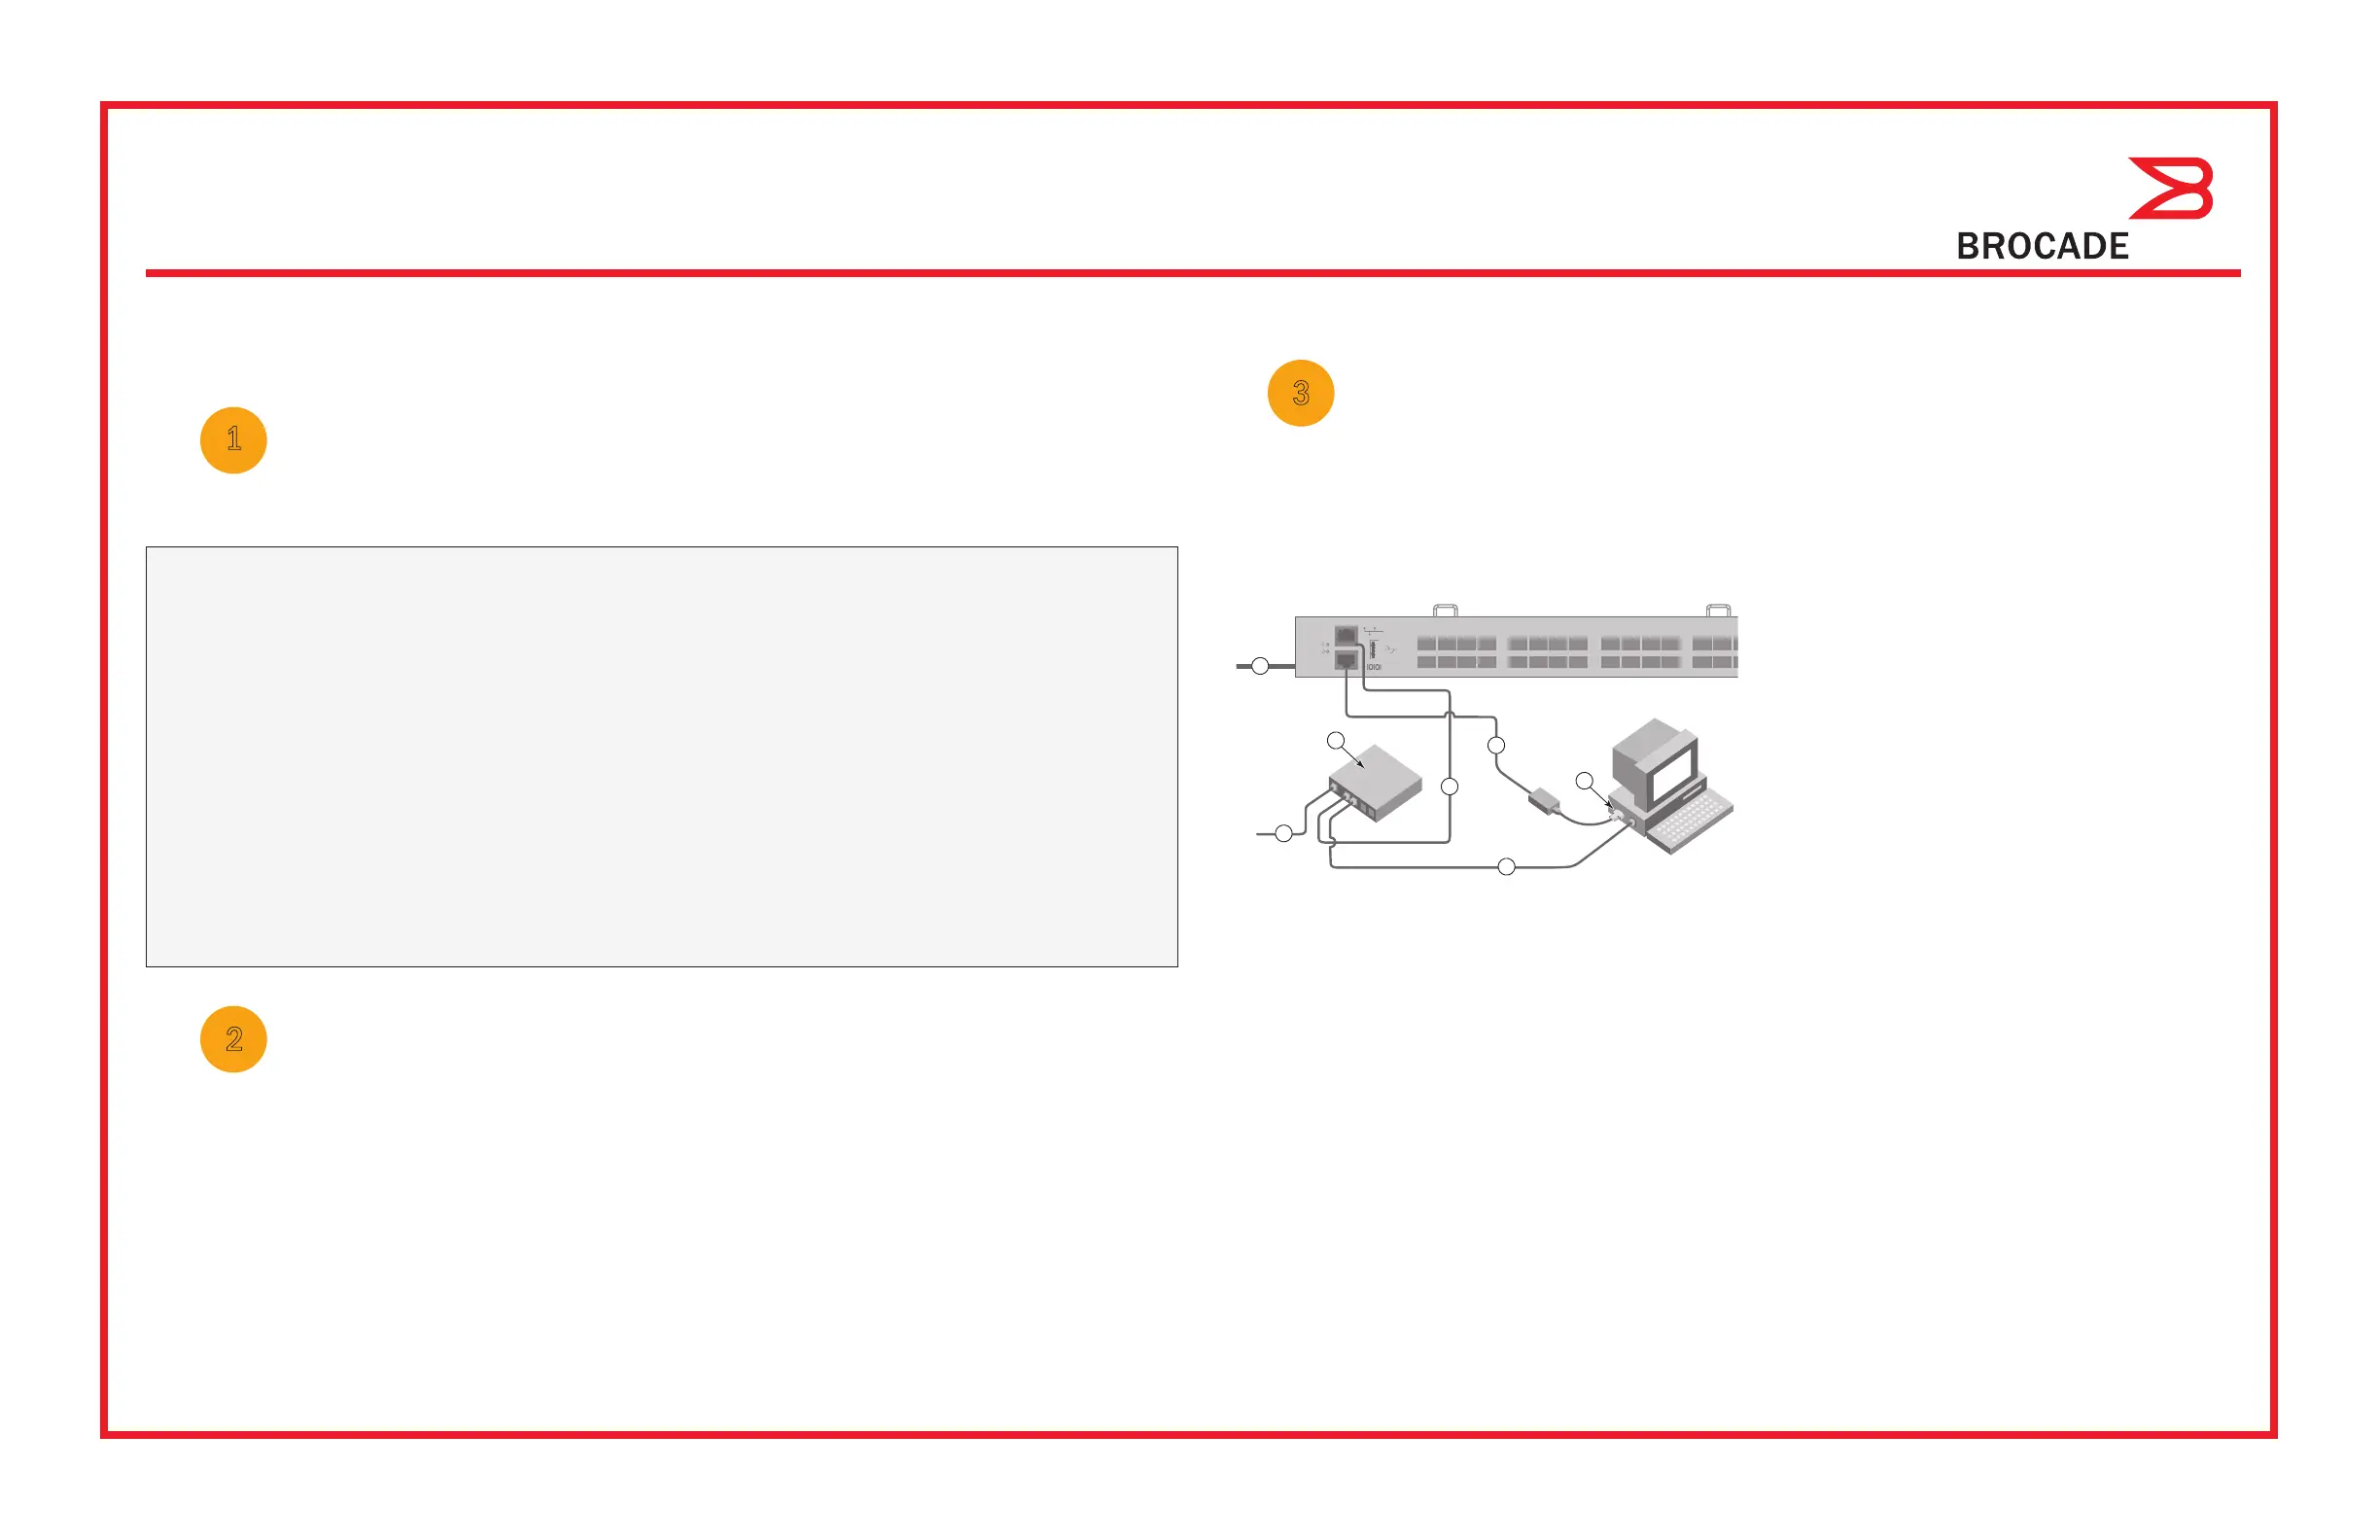
| Antal USB 2.0-porte: | 1 |
| Driftstemperatur (T-T): | 0 - 40 °C |
| Sikkerhedsalgoritmer: | HTTPS, SSH |
| Netværksstandarder: | IEEE 802.3, IEEE 802.3u |
| Webbaseret administration: | Ja |
| Servicekvalitet support (QoS): | Ja |
| Driftshøjde: | -15.2 - 3048 m |
| Ikke-drift højde: | -15.2 - 12000 m |
| Fiber optisk strømstik: | LC |
| Fuld duplex: | Ja |
| Strøm over Ethernet (PoE): | Ingen |
| Switch-type: | Administreret |
| System hændelseslog: | Ja |
| Port til konsol: | RJ-45 |
| Administrationsprotokoller: | HTTP, SNMP v1/v3 |
| MAC adresselabel: | - entries |
| Switch kapacitet: | 384 Gbit/sek. |
| Stativ-montering: | Ja |
| Antal blæsere: | 2 blæser(e) |
| Begrænsning af hastighed: | Ja |
| Fast Ethernet (kobber) porte, antal: | 1 |
| Stabelbar: | Ingen |
| Redundant strømforsyning: | Ja |
| Fiberkanal porte: | 24 |
| SSH/SSL support: | Ja |
| Antal strømforsyninger: | 2 |
Har du brug for hjælp?
Hvis du har brug for hjælp til Dell Brocade 6510 stil et spørgsmål nedenfor, og andre brugere vil svare dig
Netværkskort/adapter Dell Manualer
10 August 2025
Netværkskort/adapter Manualer
- Asustor
- Gembird
- Aiphone
- Crestron
- Pioneer
- Moxa
- Billion
- AirTies
- Nexxt
- OpenVox
- NGS
- ScreenBeam
- Minute Man
- AVM
- Linksys
Nyeste Netværkskort/adapter Manualer

18 December 2025

17 December 2025

7 December 2025

29 November 2025

29 November 2025

28 November 2025

28 November 2025

28 November 2025

28 November 2025

27 November 2025