DeLonghi Pinguino PAC EL112 Silent CST Manual
DeLonghi
Klimaanlæg
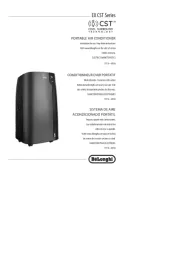
Pinguino PAC EL112 Silent CST

| Mærke: | DeLonghi |
| Kategori: | Klimaanlæg |
| Model: | Pinguino PAC EL112 Silent CST |
| Type: | Monoblok mobilt klimaanlæg |
| Justerbar termostat: | Ja |
| Velegnet til rumvolumen på op til: | 110 m³ |
| Vekselstrømsindgangsspænding: | 220 - 240 V |
| Vekselstrømsindgangsfrekvens: | 50 Hz |
| Bredde: | 449 mm |
| Dybde: | 395 mm |
| Højde: | 750 mm |
| Vægt: | 30000 g |
| Produktfarve: | Sort |
| Indbygget skærm: | Ja |
| Skærmtype: | LCD |
| Timer: | Ja |
| Tilsluttet belastning: | 950 W |
| Klimaanlæg funktioner: | Circulation, Dehumidifying, Ventilating |
| Kølekapacitet (maks.): | 11000 BUT/t |
| Kølekapacitet i watt (nominel): | 2700 W |
| Kølekapacitet i watt (maks.): | 2900 W |
| Opvarmingskapacitet i watt (maks.): | - W |
| Støjniveau: | 63 dB |
| Affugtningsfunktion: | Ja |
| Energieffektivitetsklasse (opvarmning): | Ingen |
| Energiforbrug pr. time (køling): | 0.9 kWh |
| Energiforbrug pr. time (opvarmning): | - kWh |
| Årligt energiforbrug (køling): | - kWh |
| Fjernbetjening inkluderet: | Ja |
| Energieffektivitetsskala: | A+++ til D |
| Timer varighed (maksimum): | 24 t |
| Fjernbetjent: | Ja |
| Håndtag: | Ja |
| Timer type: | Digital |
| Køling energieffektivitet (EER, W/W): | 3.1 |
| Energieffektivitetsklasse (køling): | A+ |
| Affugtningskapacitet: | 0.9 l/t |
| Teknologi: | Luft - luft |
| Opvarmningskapacitet i watt (nominel): | - W |
| Luftstrøm (høj hastighed): | 350 m³/t |
| Luftstrøm (lav hastighed): | 250 m³/t |
| Luftstrøm (medium hastighed): | 310 m³/t |
| Indbygget ventilator: | Ja |
| Energibesparende procentdel: | 30 % |
| Cool Surround Technology (CST): | Ja |
Har du brug for hjælp?
Hvis du har brug for hjælp til DeLonghi Pinguino PAC EL112 Silent CST stil et spørgsmål nedenfor, og andre brugere vil svare dig
Klimaanlæg DeLonghi Manualer
6 September 2025
6 September 2025
30 August 2025

10 Januar 2025

24 Maj 2024

12 Maj 2024

29 April 2024

11 April 2024

6 April 2024

21 Marts 2024
Klimaanlæg Manualer
- Avidsen
- EWT
- Mestic
- JIMMY
- EcoFlow
- Livoo
- Olimpia Splendid
- Ardes
- Ferroli
- BEKO
- Alberello
- Haceb
- Crosley
- Teco
- Impecca
Nyeste Klimaanlæg Manualer

11 December 2025

10 December 2025

9 December 2025

9 December 2025

8 December 2025

8 December 2025

8 December 2025

8 December 2025

8 December 2025

7 December 2025