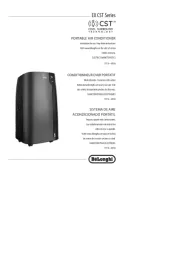
DeLonghi Pinguino PAC EX130 Manual

DeLonghi Klimaanlæg Pinguino PAC EX130

Læs gratis den danske manual til DeLonghi Pinguino PAC EX130 (8 sider) i kategorien Klimaanlæg. Denne vejledning er vurderet som hjælpsom af 58 personer og har en gennemsnitlig bedømmelse på 4.8 stjerner ud af 29.5 anmeldelser. Har du et spørgsmål om DeLonghi Pinguino PAC EX130, eller vil du spørge andre brugere om produktet?

Side 1/8
12
INTRODUCTION
Thank you for choosing a De’Longhi product. Please take a few
moments to read the instructions to avoid risks or damage to the
appliance.
DESCRIPTION
Description of the appliance (see page 3 - A)
A1 air outlet ap
A2 control panel
A3 handles
A4 castors
A5 BioSilver lter
A6 air intake grille
A7 air exhaust hose housing
A8 air intake grille
A9 power cable
A10 drainage hose with cap
A11 remote control signal receiver
A12 remote control compartment
Description of the accessories (see page 3 - B)
B1 wall ange with cap
B2 air exhaust hose
B3 hose adaptor
B4 adapter for window bracket
B5 window bracket with wing nut
B6 adapter for wall mounting/window outlet
B7 window outlet
B8 remote control
B9 window bracket cap
ELECTRICAL CONNECTION
Before plugging into the mains, check the following:
the mains voltage is the same as that indicated on the plate
on the back of the appliance;
the socket and electrical line are sized to support the load
required;
the socket is the proper type for the plug, otherwise, re-
place the socket;
the socket is connected to an ecient earthing system.
The manufacturer is not responsible in the event of non-
compliance with these injury prevention standards.
The power cable must only be replaced by specialised
technicians.
USE
The instructions below will enable you to prepare your air con-
ditioner for operation as eciently as possible. Before use, make
sure the air intake and outlet grilles are unobstructed.
Please note: This appliance is provided with an auto-evapora-
tion feature for condensate removal during cooling and dehu-
midifying modes.
AIR CONDITIONING WITHOUT INSTALLATION
CASEMENT WINDOW
If you have a casement window proceed as follows:
Fit the air exhaust hose (B2) in the relevant housing located
on the rear side of the appliance (g. 1).
Screw the window outlet (B7) and place outside the win -
dow to exhaust the hot air (g. 2).
DOUBLEHUNG WINDOW
If you have a double-hung window proceed as follows:
Insert and lock the adapter for window bracket (B4) into
the slot of the window bracket (B5) (g.3)
Place the window bracket in the window sill, and extend
the bracket fully within the window frame (g. 4).
Fix the bracket by the wing nut (g. 5) (Should the window
bracket be too large for the window the plastic can be cut
with a saw by a qualied professional).
Insert the air exhaust hose (B2) into the adapter for win-
dow bracket (B4) and rotate it as shown in g. 6.
In order to facilitate the tting of the air exhaust hose (B2)
in the relevant housing located on the rear side of the ap-
pliance, position the hose adapter s tabs (B3) in a vertical
axis as shown in g. 7 and proceed as shown in g.1.
SLIDING WINDOWS
Thanks to the locking wing nut, it’s possible to use the win-
dow bracket also for sliding windows. Position the bracket
vetically with the hole in the lower part so to allow a easier
installation of the exhaust hose.
AIR CONDITIONING WITH INSTALLATION
Fit the air exhaust hose (B2) in the relevant housing located
on the rear side of the appliance (g. 1).
Drill a hole 150 mm in an outside wall or through a window
panel. Respect the distances, dimensions and heigh of the
hole given in gure 8.
13
ø 150mm
in the
window
panel
in the wooden
kickboard of a
French window
in the wall: you are
recommended to
insulate the section
of wall using suita-
ble insulation.
Fit the wall ange (B1) into the hole.
Fit the air exahaust hose (B2) into the wall ange (B1) (Fig.
9)
When the hose (B2) is not connected, the drilled hole can
be closed with the ange cap (B1).
Please note: As special tools are required for installation, we
suggest you have the appliance installed by specialized person-
nel.
When installing the air conditioner, you should leave a door
slightly open little as 1 cm to guarantee correct ventilation
and room pressure.
Keep the air hose as short and free of curves as possible to
avoid constrictions.
OPERATING FROM THE CONTROL PANEL
C1
C15
C13
C12
C11
C10
C9
C8
C7
C6
C16C17
C3
C4
C2
C5
C14
DESCRIPTION OF THE CONTROL PANEL (C)
C1. ON/STAND-BY (on/o) key
C2. Function selection key MODE (air conditioner, dehumidier,
fan)
C3. Temperature increase key
C4. Temperature decrease key
C5. Fan speed selection key (MIN/MED/MAX/AUTO)
C6. Air conditioner symbol
C7. Dehumidifyìng symbol
C8. Fan symbol
C9. ECO REAL FEEL status indicator
C10. Swing symbol
C11. Fan speed indicator
C12. SILENT symbol
C13. Alarm symbol
C14. Set temperature values, programmed on/o time
C15. Timer symbol
C16. Timer indicator
C17. Selected temperature scale indicator
CONTROL PANEL OPERATION
TURNING THE APPLIANCE ON AND OFF
Insert the plug in the socket. Two dashes appear on the display
indicating that the appliance is in stand-by.
Touch the (C1) key to turn on the appliance.
The ap A1 will open after few seconds. When the appliance
comes on the last function set before it was shut o is activated.
Please note: If start-up is not continued, after a few minutes
the display light dims in order to reduce energy consumption.
To turn the appliance o, touch the key and then pull the ,
plug.
Please note: Never turn o the air conditioner by simply pulling
the plug. Touch the key in order to put your air conditioner in
stand-by and wait a few minutes before pulling the plug. In this
way, the appliance can perform the operating status checks..


Produkt Specifikationer

Mærke: DeLonghi
Kategori: Klimaanlæg
Model: Pinguino PAC EX130
Type: Monoblok mobilt klimaanlæg
Justerbar termostat: Ja
Velegnet til rumvolumen på op til: 120 m³
Vekselstrømsindgangsspænding: 220 - 240 V
Vekselstrømsindgangsfrekvens: 50/60 Hz
Bredde: 445 mm
Dybde: 390 mm
Højde: 805 mm
Vægt: 35400 g
Produktfarve: Sort
Antal hastigheder: 3
Indbygget skærm: Ja
Skærmtype: LED
Wi-Fi: Ingen
Timer: Ja
Tilsluttet belastning: 1050 W
Klimaanlæg funktioner: Cooling,Dehumidifying
Kølekapacitet (maks.): 13000 BUT/t
Kølekapacitet i watt (nominel): 3300 W
Kølekapacitet i watt (maks.): - W
Opvarmingskapacitet i watt (maks.): - W
Støjniveau: 65 dB
Affugtningsfunktion: Ja
Energieffektivitetsklasse (opvarmning): Ingen
Energiforbrug pr. time (køling): 1.3 kWh
Energiforbrug pr. time (opvarmning): - kWh
Årligt energiforbrug (køling): - kWh
Energieffektivitetsskala: A+++ til D
Timer varighed (maksimum): 12 t
Luftfilter: Ja
Håndtag: Ja
Timer type: Digital
Kølemedium: R290
Køling energieffektivitet (EER, W/W): 2.6
Energieffektivitetsklasse (køling): A
Affugtningskapacitet: 1.25 l/t
Opvarmningskapacitet i watt (nominel): - W
Luftstrøm (høj hastighed): 310 m³/t
Wi-Fi klar: Ingen
Luftstrøm (lav hastighed): 235 m³/t
Luftstrøm (medium hastighed): 270 m³/t
Indbygget ventilator: Ja
Real Feel-teknologi: Ja

Har du brug for hjælp?

Hvis du har brug for hjælp til DeLonghi Pinguino PAC EX130 stil et spørgsmål nedenfor, og andre brugere vil svare dig