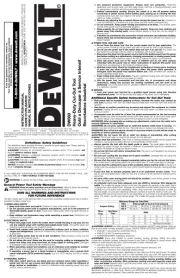
DeWalt DW660 Manual


Læs gratis den danske manual til DeWalt DW660 (5 sider) i kategorien Multiværktøj. Denne vejledning er vurderet som hjælpsom af 21 personer og har en gennemsnitlig bedømmelse på 5.0 stjerner ud af 11 anmeldelser. Har du et spørgsmål om DeWalt DW660, eller vil du spørge andre brugere om produktet?

Side 1/5
F YOU HAVE QUESTIONS OR COMMENTS THIS OR D WA N Y A B O U T A N Y EA LT TO O L ,
C A L L US TO L L FREE AT:
- 8 0 0 - 4 - D E WA LT (1-800-433-9258)
General Safety Rules
WARNING! READ AND UNDERSTAND ALL INSTRUCTIONS. Failure to follow all
nstructions listed below may result in electric shock, re and/or serious personal injury.
SAVE THESE INSTRUCTIONS
WORK AREA
Keep your work area clean and well lit. Cluttered benches and dark areas invite accidents.
Do not operate power tools in explosive atmospheres, such as in the presence of am -
mable liquids, gases, or dust. Power tools create sparks which may ignite the dust or fumes.
Keep bystanders, children, and visitors away while operating a power tool. Distractions can
cause you to lose control.
ELECTRICAL SAFETY
Grounded tools must be plugged into an outlet properly installed and grounded in accor -
dance with all codes and ordinances. Never remove the grounding prong or modify the plug in
any way. Do not use any adapter plugs. Check with a qualified electrician if you are in doubt as
to whether the outlet is properly grounded. If the tools should electrically malfunction or break
down, grounding provides a low resistance path to carry electricity away from the user. A p p l i c a b l e
only to Class I (grounded) tools.
Double insulated tools are equipped with a polarized plug (one blade is wider than the
o t h e r. ) This plug will t in a polarized outlet only one way. If the plug does not t fully in the out -
let, reverse the plug. If it still does not t, contact a qualied electrician to install a polarized out -
let. Do not change the plug in any way. Double insulation eliminates the need for the three
wire grounded power cord and grounded power supply system. Applicable only to Class II (dou -
ble insulated) tools.
Avoid body contact with grounded surfaces such as pipes, radiators, ranges and refriger -
ators. There is an increased risk of electric shock if your body is grounded.
D o n ’t expose power tools to rain or wet conditions. Water entering a power tool will increase
the risk of electric shock.
Do not abuse the cord. Never use the cord to carry the tools or pull the plug from an outlet. Keep
cord away from heat, oil, sharp edges or moving parts. Replace damaged cords immediately.
Damaged cords increase the risk of electric shock.
When operating a power tool outside, use an outdoor extension cord marked “W-A” or
W.” These cords are rated for outdoor use and reduce the risk of electric shock. When using an
extension cord, be sure to use one heavy enough to carry the current your product will draw. A n
undersized cord will cause a drop in line voltage resulting in loss of power and overheating. The
following table shows the correct size to use depending on cord length and nameplate ampere
rating. If in doubt, use the next heavier gage. The smaller the gage number, the heavier the cord.
Recommended Minimum Wire Size for Extension Cords
Total Length of Cord
25 ft. 50 ft. 75 ft. 100 ft. 125 ft. 150 ft. 175 ft.
7.6 m 15.2 m 22.9 m 30.5 m 38.1 m 45.7 m 53.3 m
Wire Size
18 AWG 18 AWG 16 AWG 16 AWG 14 AWG 14 AWG 12 AWG
PERSONAL SAFETY
Stay alert, watch what you are doing and use common sense when operating a power tool.
Do not use tool while tired or under the inuence of drugs, alcohol, or medication. A moment of
inattention while operating power tools may result in serious personal injury.
Dress properly. Do not wear loose clothing or jewelry. Contain long hair. Keep your hair,
clothing, and gloves away from moving parts. Loose clothing, jewelry, or long hair can be
caught in moving parts. Air vents often cover moving parts and should also be avoided.
Avoid accidental starting. Be sure switch is o before plugging in. Carrying tools with you
nger on the switch or plugging in tools that have the switch on invites accidents.
Remove adjusting keys or switches before turning the tool on. A wrench or key that is lef
attached to a rotating part of the tool may result in personal injury.
Do not overreach. Keep proper footing and balance at all times. Proper footing and balance
enables better control of the tool in unexpected situations.
Use safety equipment. Always wear eye protection. Dust mask, non-skid safety shoes, hard
hat, or hearing protection must be used for appropriate conditions.
TOOL USE AND CARE
Use clamps or other practical way to secure and support the workpiece to a stable plat
form. Holding the work by hand or against your body is unstable and may lead to a loss of con
t r o l .
Use the correct tool for your application. The correct tool will do the job betDo not force tool.
ter and safer at the rate for which it is designed.
Do not use tool if switch does not turn it on or off. Any tool that cannot be controlled with the
switch is dangerous and must be repaired.
Disconnect the plug from the power source before making any adjustments, changing
accessories, or storing the tool. Such preventative safety measures reduce the risk of starting
the tool accidentally.
Store idle tools out of reach of children and other untrained persons. Tools are dangerous
in the hands of untrained users.
Maintain tools with care. Keep cutting tools sharp and clean. Properly maintained tools, with
sharp cutting edges are less likely to bind and are easier to control.
Check for misalignment or binding of moving parts, breakage of parts, and any other con
dition that may aect the tools operation. If damaged, have the tool serviced before using
Many accidents are caused by poorly maintained tools.
Use only accessories that are recommended by the manufacturer for your model
Accessories that may be suitable for one tool, may become hazardous when used on anothe
t o o l .
SERVICE
Tool service must be performed only by qualified repair personnel. Service or maintenance
performed by unqualied personnel could result in a risk of injury.
When servicing a tool, use only identical replacement parts. Follow instructions in the
Maintenance section of this manual. Use of unauthorized parts or failure to follow Maintenance
Instructions may create a risk of electric shock or injury.
Additional Specic Safety Instructions for Cut-Out
Tools
Hold tool by insulated gripping surfaces when performing an operation where the too
may contact hidden wiring or its own cord. Contact with a “live” wire will make exposed meta
parts of the tool “live” and shock the operator.
C A U T I O N : Wear appropriate personal hearing protection during use. Under some condition
and duration of use, noise from this product may contribute to hearing loss.
C A U T I O N : Do not touch the bit or collet nut during or immediately after cutting material. Th
bit and collet nut may be hot enough to burn bare skin.
WA R N I N G : After changing bits or making any adjustments, make sure the collet nut i
securely tightened to avoid injury.
WA R N I N G : Do not press spindle lock or collet lock buttons while motor is running. The ope
ator may lose control and drop the tool. Personal injury or serious tool damage may result.
WA R N I N G : Shut o all live electric circuits to any areas where cut outs will be made, to avoi
re or serious personal injury.
WA R N I N G : Some dust created by power sanding, sawing, grinding, drilling, and other con
struction activities contains chemicals known to cause cancer, birth defects or other reproduc
tive harm. Some examples of these chemicals are:
• lead from lead-based paints,
crystalline silica from bricks and cement and other masonry products, and
• arsenic and chromium from chemically-treated lumber (CCA).
Your risk from these exposures varies, depending on how often you do this type of work. T
reduce your exposure to these chemicals: work in a well ventilated area, and work wit
approved safety equipment, such as those dust masks that are specially designed to lter ou
microscopic particles.
Avoid prolonged contact with dust from power sanding, sawing, grinding, drilling
and other construction activities. Wear protective clothing and wash exposed area
with soap and water. Allowing dust to get into your mouth, eyes, or lay on the skin ma
promote absorption of harmful chemicals.
Always wear eye protection. Dust mask or hearing protection must be used for appropriate con
ditions. Using personal safety devices is recommended. WORK S A F E .
Always operate the tool with the depth guide in place. The guide keeps the bit from plunging
too deeply through the material. A minimum of penetration should be maintained to eliminate the
danger of cutting into electric wiring.
Do not use this tool with drill or screwdriver bits. This tool is not intended to be used as a
drill or screwdriver.
Be sure your cutting bits are sharp and in good condition. Damaged bits can cause the too
to jump, injuring the operator.
Never touch the bit immediately after use. It may be extremely hot.
Be sure that the motor has stopped completely before you lay the router down. If the cut
ter head is still spinning when the tool is layed down, it could cause injury or damage.
Be sure that the router bit is clear of the workpiece before starting motor. If the bit is in con
tact with the workpiece when the motor starts it could make the router jump, causing damage o
i n j u r y.
If your tool fails to function properly, take it to an authorized service center. There are no
user serviceable parts inside this tool and it should only be opened by trained service personnel
The label on your tool may include the following symbols.
V A. . . . . . . . . . . . . .v o l t s . . . . . . . . . . . . . . . .a m p e r e s
H z. . . . . . . . . . . .h e r t z W . . . . . . . . . . . . . .w a t t s
m i n . . . . . . . . . .m i n u t e s . . . . . . . . . . . . . .alternating current
. . . . . . . . . .direct current no. . . . . . . . . . . . . .no load speed
. . . . . . . . . . . . . .Class II earthing terminalC o n s t r u c t i o n . . . . . . . . . . . . . .
. . . . . . . . . . . .safety alert symbol revolutions per minute. . . / m i n. . . . . . . .
To Maintain Safe Tool Control
Make sure the work surface is free of nails or screws. Cutting into a nail or screw may cause
the tool to jump, damaging the bit.
Never operate the tool with one hand while holding the workpiece with the other hand
Always clamp the material and guide the tool with both hands.
Do not cut material lying on a hard surface. Clearance behind material to be cut must be
allowed for protruding bit.
before making adjustments, changing bits, or cleaningDisconnect plug from power supply
t o o l .
Do not start the tool with bit engaged in the material. The bit may grab the material.
Motor
Be sure your power supply agrees with nameplate marking. 120 volts AC means your too
may be operated only with alternating current and never with direct current.
Switch
To start the motor, slide the switch (A) to “I” position. To stop the motor, slide the switch to “O
position. (See FIG. 1)
Installing and Removing the Bit (Fig. 2)
This tool has a tool-free bit change system. To change bits, FIRST turn o the tool and dis
connect from power supply. Remove the guide.
1 . To replace bit, depress both spindle lock (C) and collet lock (B) and turn collet grip counte
c l o c k w i s e .
2 . Insert bit.
WA R N I N G : The bits are sharp and should be handled with great care.
D WALT Industrial TEool Co., 701 East Joppa Road, Baltimore, MD 21286
Printed in U.S.A. (JUL02-CD-1) Form No. 392453-01 DW660 Copyright © 2000
The following are trademarks for one or more DEWA LT power tools: the yellow and black color
scheme; the “D” shaped air intake grill; the array of pyramids on the handgrip; the kit box con-
guration; and the array of lozenge-shaped humps on the surface of the tool.
FIG. 5
H
L
M
N
FIG. 6
C A U T I O N : When replacing bits, do not insert cutting flutes into the collet. This may result in
broken bits.
3. While depressing both spindle and collet locks, turn the collet grip clockwise to rmly tight-
en the collet. For some heavy duty applications, it may be necessary to use a wrench to
further tighten the nut (D) while depressing the spindle lock (C).
4 . Attach guide.
C A U T I O N : Never tighten the collet without a bit installed.
This tool comes with both 1/8” and 1/4” collets. To change collets, remove the collet nut and
nsert the desired collet.
Depth Guide (Fig. 3)
To attach depth guide to the motor unit, TURN OFF TO O L AND DISCONNECT FROM POWER
S U P P LY.
Depth guide snaps onto locators as shown. Keep depth guide in place at all times during oper-
ation of the tool. For best results, adjust the guide using knob (E) to allow the bit to protrude
about 1/8” past the material to be cut.
Side Handle DW6619 (Fig. 4)
When operating the tool, use the side handle for optimum control. To attach the side handle to
the motor unit,TURN OFF TO O L AND DISCONNECT FROM POWER SUPPLY.
1 . Remove depth guide.
2 . Loosen knob (F) until the collar of the tool is able to t into the strap (G) of the side handle.
3 . Align the locator on the tool with the locator on the side handle. (Detail) Tighten knob (F).
4 . Snap the depth guide over the side handle strap (G) from the opposite side. Keep the depth
guide in place at all times during operation of the tool.
5 . For best results, adjust the guide using knob (E) to allow the bit to protrude about 1/8" through
the material to be cut.
6 . To remove the side handle, remove the depth guide, loosen the knob (F) until the tool can
come off the locator and slip out of the strap (G).
7 . Reattach the depth guide.
Circle Cutter DW6621 (Fig. 5)
To attach the circle cutter to the motor unit, TURN OFF THE T AND DISCONNECT FROMO O L
POWER SUPPLY.
1 . Remove the depth guide.
2 . Loosen knob (H) until the collar of the tool is able to t into the strap (J) of the circle cutter.
3 . Align the locator on the tool with the locator on the circle cutter. (Detail) Tighten knob (H).
4 . Disassemble the depth guide collar. Snap the upper half (M) onto the strap (J).
5 . Loosen knob (L) and extend circle cutter frame to the limit of travel.
6 . Insert knob (E) through the frame (N).
7 . Set depth of cut for your material and tighten knobs (E) and (L).
8 . Measure to the center of the circle you wish to cut and adjust the length of the guide to that
r a d i u s .
9 . Tighten the knob (O) holding the centerpoint in position.
10.Drill a 5/32" hole in the material to be cut at the center of the radius.
11 .Plug in the tool, start the motor and allow the tool to spin up to speed.
12.Position the center point into the hole and plunge the cutter into the material.
1 3 . With rm pressure, hold the center point in place and move the cutter counterclockwise
around to the nish.
C A U T I O N : At the nish of the circle, the material may drop out. Hold the tool with both hands
to maintain control.
1 4 . To remove the circle cutter, loosen knob (H) until the tool can come off the locator and slip
out of the strap (J).
15.Reassemble the depth guide and reattach.
Operation
CUTTING A HOLE FOR AN ELECTRICAL OUTLET (FIG. 6)
WA R N I N G : Shut o all live electric circuits to any areas where cut outs will be made.
1. Push any wiring deeply into the outlet box to avoid damage from the cutting bit.
2. -Before hanging the sheet covering the outlet, mark the approximate location of the cen
ter of the outlet on the wall board. Check the cutting bit depth against the side of the board
to be sure it will cut entirely through the material.
3. Tack the sheet in place with a few fasteners avoiding the stud holding the outlet. This
allows the wall board to ex slightly around the protruding xture box.
4. Turn the cut-out tool on. Holding the tool rmly with both hands, (Fig. 6) plunge the bit
straight into the center of the outlet.
5. Cut to the right until the edge of the box is touched. Pull out just enough for the bit to clear
the edge of the box. Plunge in again holding the bit gently against the outside of the box.
6. Follow the outside of the box as shown keeping slight pressure against the box. This will
minimize wandering and give you a clean precise cut.
7. Remove the waste and dust from the outlet. Finish fastening the sheet of wall board.
Maintenance
The tool should be cleaned with a blast of air at least once a week, to eject as much dust as
possible. This will increase the life of the brushes and bearings inside the motor. Always use
appropriate safety equipment when using compressed air to clean a tool.
Although the tool’s plastic case is solvent resistant, you should never use solvents or harsh
chemicals to clean it. Wipe the non-metallic parts of the tool with a dry cloth.
Lubrication
All bearings are factory lubricated for the life of the tool.
Accessories
Recommended accessories for use with your tool are available at extra cost from your local
dealer or authorized service center. If you need assistance in locating any accessory for your
tool, contact: D WALT TEIndustrial ool Co., 701 East Joppa Road, Baltimore, MD 21286
C A U T I O N : Do not use double ended bits. The use of any other accessory not recommend -
ed for use with this tool could be hazardous.
Repairs
To assure product SAFETY and RELIABILITY, repairs, maintenance and adjustment (includ-
ng brush inspection and replacement) should be performed by authorized service centers or
other qualied service organizations, always using identical replacement parts.
Full Warranty
D WALTEheavy duty industrial tools are warranted for one year from date of purchase. We will
repair, without charge, any defects due to faulty materials or workmanship. For warranty repair
nformation, call 1-800-4-DEWALT. This warranty does not apply to accessories or damage
caused where repairs have been made or attempted by others. This warranty gives you spe-
cic legal rights and you may have other rights which vary in certain states or provinces.
In addition to the warranty, D WALTEtools are covered by our:
30 DAY NO RISK SATISFACTION GUARANTEE
If you are not completely satised with the performance of your DEWALT heavy duty industri-
al tool, simply return it to the participating seller within 30 days for a full refund. Please return
the complete unit, transportation prepaid. Proof of purchase may be required.
FREE WARNING LABEL R E P L A C E M E N T: If your warning labels become illegible or are miss-
ng, call 1-800-4-DEWA LT for a free replacement.
SAVE THESE INSTRUCTIONS
FOR FUTURE USE
SI VOUS AVEZ DES QUESTIONS OU VOULEZ NOUS FAIRE PART DE VOS
COMMENTAIRES CONCERNANT CET OUTIL OU TOUT AUTRE OUTIL
DEWALT, COMPOSEZ SANS FRAIS LE : 1 800 433-9258.
Mesures de sécurité - Généralités
AVERTISSEMENT! Lire et comprendre toutes les directives, car le non-respect des direc -
tives suivantes pourrait entraîner un choc électrique un incendie ou des blessures graves
FIG. 1 FIG. 2
D
C
B
A
“O”
“I”
COLLET GRIP
DOUILLE DE
SERRAGE
ABRAZADERA
DELCOLLAR GUIDE
GUIDE
GUÍA
FIG. 3 FIG. 4
E
LOCATOR
POSITIONNEUR
LOCALIZADOR
CONSERVER CES DIRECTIVES
ZONE DE TRAVAIL
Garder la zone de travail propre et bien éclairée; les établis encombrés et les endroits sombres
sont propices aux accidents.
Ne pas utiliser les outils électriques dans une atmosphère explosive, comme à proximide
liquides, de gaz ou de poussières inammables; le moteur peut créer des étincelles et enammer
les vapeurs ou les poussières environnantes.
Tenir les enfants, les visiteurs ou toute autre personne à l’écart lorsqu’on utilise un outil élec
trique; les distractions peuvent faire perdre la maîtrise de ce dernier.
MESURES DE SÉCURITÉ - ÉLECTRICITÉ
Les outils mis à la terre doivent être branchés dans une prise bien installée et mise à la terre
conformément à tous les codes et glements en vigueur. Ne jamais retirer la broche de terre n
modier la che. Ne pas utiliser d’adaptateur. Vérier auprès d’un électricien qualié en cas de dout
quant à la mise à la terre de la prise. En cas de défaillance électrique ou de bris de l’outil, la mise
la terre procure un chemin de faible résistance au courant qui autrement traverserait l’utilisateur. Cett
protection ne s’applique qu’aux outils de classe I (mis à la terre).
Les outils à double isolation sont munis d’une che polarisée (c’est-à-dire que l’une des lames
est plus large que l’autre), laquelle ne peut être raccordée qu’à une prise polarisée et ce, dans
un seul sens; on doit l’inverser si on est incapable de l’enfoncer complètement. Si la che ne s’adapt
toujours pas, on doit demander à un électricien qualié d’installer la prise appropriée. On ne do
jamais modier la che. La double isolation élimine le besoin d’installer un cordon d’alimentation tri
laire et un système d’alimentation électrique pourvus d’une mise à la terre; seuls les outils de class
II double isolation) sont munis d’une telle protection.
Éviter tout contact entre le corps et les éléments mis à la terre, comme les tuyaux, les radia
teurs, les cuisinières et les réfrigérateurs, an de réduire les risques de choc électrique.
• l’inltrationNe pas utiliser l’outil électrique dans des endroits mouillés, ni l’exposer à la pluie;
d’eau à l’intérieur de l’outil augmente les risques de choc électrique.
Ne pas utiliser le cordon de manière abusive; on ne doit pas transporter l’outil en le tenant par le
cordon, ou utiliser ce dernier pour le débrancher. On doit tenir le cordon à l’écart des sources d
chaleur, de l’huile, des bords tranchants ou des pièces mobiles. Remplacer immédiatement les cor
dons endommagés, car ces derniers augmentent les risques de choc électrique.
Lorsqu’on utilise un outil électrique à l’extérieur, on ne doit utiliser que des rallonges conçues
pour cet usage, comme celles de type W-Aou W, an de réduire les risques de choc électrique. S
on utilise une rallonge, s’assurer d’en choisir une qui soit en mesure de porter le courant nécessair
à l’outil. Une rallonge de calibre inférieur entraînera une chute de tension se traduisant par une pert
de puissance et une surchaue. Le tableau ci-dessous illustre les calibres que l’on doit utiliser selo
la longueur de la rallonge et l’intensité nominale indiquée sur la plaque signalétique. En cas de doute
utiliser le calibre suivant. Plus le calibre est petit, plus la rallonge peut porter de courant.
Calibres minimaux des rallonges
Longueur totale du cordon
25 ft. 50 ft. 75 ft. 100 ft. 125 ft. 150 ft. 175 ft.
7.6 m 15.2 m 22.9 m 30.5 m 38.1 m 45.7 m 53.3 m
Intensité
18 AWG18 AWG 16 AWG 16 AWG 14 AWG 14 AWG 12 AWG
SÉCURITÉ PERSONNELLE
Rester vigilant en tout temps et faire preuve de jugement lorsqu’on utilise un outil électrique
ne pas utiliser l’outil lorsqu’on est fatigué ou sous l’inuence de drogues, d’alcool ou de médicaments
car un moment d’inattention pourrait entraîner des blessures graves.
Porter des vêtements appropriés; ne pas porter de tements amples ni de bijoux. Couvrir ou
attacher les cheveux longs. Garder les cheveux, les vêtements, les bijoux et les gants éloignés de
pièces mobiles, car ceux-ci peuvent s’y coincer. Se tenir éloigné des évents puisque ces derniers
pourraient camoufler des pièces mobiles.
Éviter les marrages accidentels; s’assurer que l’interrupteur soit en position d’arrêt avant de
brancher l’outil. Ne pas transporter l’outil en laissant le doigt sur l’interrupteur ni le brancher lorsqu
l’interrupteur est en position de marche, car cela pourrait causer un accident.
Retirer les clés de réglage avant de démarrer l’outil; une clé laissée sur une pièce rotative pour
rait entraîner des blessures.
les pieds doivent rester ancrés fermement sur le sol an de maintenirNe pas trop étendre les bras;
son équilibre en tout temps et de mieux maîtriser l’outil dans des situations imprévues.
Utiliser le matériel de curité approprié; toujours porter des lunettes de protection. Porter un
masque anti-poussières, des chaussures antidérapantes, un casque de sécurité ou des protecteur
auditifs lorsque la situation le requiert.
F
G
LOCATOR
POSITIONNEUR
LOCALIZADOR
LOCATOR
POSITIONNEUR
LOCALIZADOR
J
E
O


Produkt Specifikationer

Mærke: DeWalt
Kategori: Multiværktøj
Model: DW660

Har du brug for hjælp?

Hvis du har brug for hjælp til DeWalt DW660 stil et spørgsmål nedenfor, og andre brugere vil svare dig


Multiværktøj DeWalt Manualer

DeWalt

DeWalt DW660 Manual

3 September 2024
DeWalt

DeWalt DCS551 Manual

9 Juni 2024
DeWalt

DeWalt DCS353 Manual

9 Juni 2024
DeWalt

DeWalt DWE315-XE Manual

7 Oktober 2022

Multiværktøj Manualer

Nyeste Multiværktøj Manualer

Draper

Draper 58300 Manual

6 Juni 2025
Draper

Draper 19392 Manual

31 Maj 2025
Vonroc

Vonroc OT505DC Manual

9 Januar 2025
Einhell

Einhell TE-MG 18/1 Li Manual

30 December 2025
Alpha Tools

Alpha Tools A 180 Manual

28 December 2024
Powerblade

Powerblade PC4MT5 Manual

10 December 2024
EGO

EGO PH1420E Manual

8 December 2024
Einhell

Einhell TE-MG 200 E Manual

23 November 2024