Copyright © Digital Watchdog. All rights reserved.
Specifications and pricing are subject to change without notice.
Tel: +1 (866) 446-3595 / (813) 888-9555
Technical Support Hours: 9:00AM – 8:00PM EST, Monday through Friday
NOTE: Please see the full product manual for web viewer
setup, functions and camera settings options.
NOTE: This products is covered by one or more claims of the HEVC
Patents listed at patentlist.accessadvance.com.
Attention: This document is intended to serve as a quick reference for the initial set-up. It is recommended
that the user read the entire instruction manual for complete and proper installation and usage.
NOTE: Download all your support materials and tools in one place
1. Go to: http://www.digital-watchdog.com/resources
2. Search your product by entering the part number in the ‘Search by Product’ search
bar. Results for applicable part numbers will populate automatically based on the
3. Click ‘Search’. All supported materials, including manuals
and quick start guide (QSGs) will appear in the results.
Read through this Installation Guide carefully before installing the product. Keep the Installation Guide for future
reference. See the user manual for more information on the proper installation, use and care of the product.
These instructions are intended to ensure that users can use the product correctly to avoid danger or property loss.
Warnings: Serious injury or death may occur if any of the warnings are neglected.
Cautions: Injury or equipment damage may occur if any of the cautions are neglected.
1. In the use of the product, you must be strict compliance with the electrical safety regulations of the nation and
region. When the product is mounted on a wall or ceiling, the device shall be firmly fixed.
2. Be sure to use only the standard adapter specified in the specification sheet. Using any other adapter could
cause fire, electrical shock, or damage to the product.
3. Make sure the power supply voltage is correct before using the camera.
4. Incorrectly connecting the power supply or replacing the battery may cause an explosion, fire, electric shock, or
5. Do not connect multiple cameras to a single adapter. Exceeding the capacity may cause excessive heat
6. Securely plug the power cord into the power source. An insecure connection may cause a fire.
7. When installing the camera, fasten it securely and firmly. A falling camera may cause personal injury.
8. Do not install in a location subject to elevated temperature, low temperature, or high humidity. Doing so may
cause fire or electric shock.
9. Do not place conductive objects (e.g. screwdrivers, coins, metal items, etc.) or containers filled with water on top
of the camera. Doing so may cause personal injury due to fire, electric shock, or falling objects.
10. Do not install in humid, dusty, or sooty locations. Doing so may cause fire or electric shock.
11. Do not install near any heat sources such as radiators, heat registers, or other products (including amplifiers)
12. Keep out of direct sunlight and heat radiation sources. It may cause a fire.
13. If any unusual smells or smoke come from the unit, stop using the product at once. Immediately disconnect the
power source and contact the service center. Continued use in such a condition may cause fire or electric shock.
14. If this product does not operate normally, contact the nearest service center. Never disassemble or change this
15. When cleaning the product, do not spray water directly onto parts of the product. Doing so may cause fire or
1. Use proper safety gear when installing and wiring the product.
2. Do not drop objects on the product or apply strong shock to it. Keep away from a location subject to excessive
vibration or magnetic interference.
3. Do not use this product near water.
4. The product shall not be exposed to dripping or splashing and no objects filled with liquids, such as vases, shall
be placed on the product.
5. Avoid aiming the camera directly towards extremely bright objects such as the sun, as this may damage the
6. The Main plug is used as a disconnect device and shall stay readily operable at any time.
7. Remove the power adapter from the outlet when then there is lightning. Neglecting to do so may cause fire or
8. Do not block any ventilation openings. Install following the manufacturer’s instructions.
9. A polarized or grounding-type plug is recommended for this product. A polarized plug has two blades with one
wider than the other. A grounding-type plug has two blades and a third grounding prong. If the provided plug
does not fit into your outlet, consult an electrician for replacement.
10. Protect the power cord from being walked on or pinched particularly at plugs, convenience receptacles, and the
point where they exit from the product.
11. If any laser equipment is used near the product, make sure the surface of the sensor is not exposed to the laser
beam as that may damage the sensor module.
12. If you want to move the already installed product, be sure to turn o the power and then move or reinstall it.
13. Proper configuration of all passwords and other security settings is the responsibility of the installer and/or
14. If cleaning is necessary, please use a clean cloth to wipe it gently. If the device will not be used for a long time,
please cover the lens cap to protect the device from dirt.
15. Do not touch the camera’s lens or sensor module with fingers. If cleaning is necessary, please use a clean cloth
to wipe it gently. If the device will not be used for a long time, please cover the lens cap to protect the device
16. Use only attachments/accessories specified by the manufacturer.
17. Always use hardware (e.g. screws, anchors, bolts, locking nuts, etc.) compatible with the mounting surface and
of sucient length and construction to ensure a secure mount.
18. Use only with cart, stand, tripod, bracket, or table specified by the manufacturer, or sold with the product.
19. Unplug this product when a cart is used. Use caution when moving the cart/product combination to avoid injury
20. Refer all servicing to qualified service personnel. Servicing is needed when the product has been damaged in
any way, such as power supply cord or plug is damaged, liquid has been spilled or objects have fallen into the
product, the product has been exposed to rain or moisture, does not operate normally, or has been dropped.
SAFETY AND WARNING INFORMATION
Use the DW IP Finder software to scan the network and detect all MEGApix® cameras,
set the camera’s network settings or access the camera’s web client.
Bulk date/time assignment
1. To install the DW IP Finder, go to: http://www.digital-watchdog.com
2. Enter “DW IP Finder” on the search box at the top
3. Go to the “Software” tab on the DW IP Finder page
to download and install the installation file.
4. Open the DW IP Finder and click ‘Scan Devices’.
It will scan the selected network for all supported
devices and list the results in the table. During the
scan, the DW® logo will turn gray.
5. When connecting to the camera for the first time,
a. Check the box next to the camera in the IP
Finder’s search results. You can select multiple
b. Click “Bulk Password Assign” on the left.
c. Enter admin/admin for the current username
and password. Enter a new username and
Passwords must have a minimum of eight (8)
characters and at least four (4) combinations of uppercase and lowercase letters,
numbers and special characters. Passwords cannot contain the user ID.
d. Click “change” to apply all changes.
6. Select a camera from the list by double-
clicking on the camera’s name or clicking on
the ‘Click’ button. The pop-up window will
show the camera’s current network settings.
Admin users can adjust the settings as
needed. The camera’s network settings are
7. To access the camera’s web page, click on
8. To save changes made to the camera’s
settings, enter the username and password
of the camera’s admin account and click
To access the camera from an external network, port forwarding must be set in
Select ‘DHCP’ for the camera to automatically receive its IP address from the
Select ‘Static’ to manually enter the camera’s IP address, (Sub) Netmask, Gateway
The camera’s IP must be set to static if connecting to Spectrum® IPVMS.
Contact your network administrator for more information.
The GUI display may dier by camera models.
1. Find the camera using the DW IP Finder.
2. Double-click on the camera’s view in the results table.
3. Press the ‘View Camera Website’.
4. Enter the camera’s username and password you set up in the DW IP Finder.
If you did not set up a new username and password, a message will direct you to set up
a new password for the camera to view the video.
STEP 7 – SET UP DW SPECTRUM® CAAS™
To complete the DW Spectrum CaaS™ server’s set up and start recording, see the ® DW
Spectrum® CaaS™ QSG for additional information.
Default login information: admin | admin
When logging into the camera for the first time, you will be prompted
to set up a new password. You can set the new password using the
DW® IP Finder™ software or directly from the camera’s browser menu.
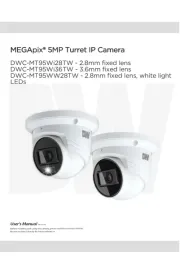
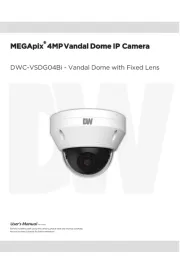
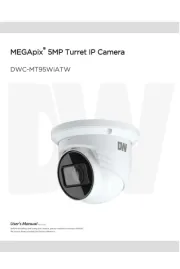
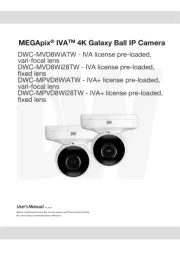
DWC-XSDE08MiC1 4K vandal dome IP camera with Ai, x= storage size
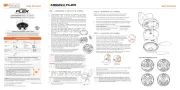
1. For the installation, remove the dome using the wrench included with the camera to loosen the
three (3) screws on the base of the dome. Remove the protection film between the dome and
WARNING DO NOT TOUCH THE BUBBLE.
Hydrophobic Dome Coating has been applied to the
2. Remove the existing moisture packet and insert the
new packet in its place. The camera will generate
enough heat to dry moisture during operation. In
case of a moisture issue, keep the moisture absorber
in the camera for up to six (6) months.
WARNING: The moisture absorber prevents moisture buildup inside the
camera, which may cause image performance issues and
3. Using the mounting template sheet or the camera itself, mark and drill the necessary holes in
STEP 1 – PREPARING TO MOUNT THE CAMERA
STEP 2 – POWERING THE CAMERA
Pass the wires through and make all necessary connections.
Use a PoE Switch or PoE Injector
to connect data and power to the
camera using a single Ethernet cable.
Use non-PoE Switch to connect data using and
Ethernet cable and use a power adapter to power
Power requirements DC12V, PoE (IEEE 802.3af class 3). Adapter not Included.
Power consumption DC12V: 10.2W, 850mA, PoE: 12.5W, 270mA
Maximum distance 328' (100m)
STEP 3 – INSTALLING THE CAMERA
1. Attach the camera to the mounting surface using the included anchors and screws.
2. To mount the camera using the mounting bolt and screws:
a. Secure the mounting screws to the camera’s base.
b. Use the mounting nuts to secure the camera to the mounting surface.
3. Adjust the camera’s tilt and angle by loosening the tilt screw at the base of the camera
module. Tighten the screw once the adjustment is complete.
NOTE: When setting up the camera for the first time, use the CALIBRATE button on
the camera’s web GUI to auto calibrate the camera’s lens before operation.
4. Assemble the dome cover over the camera body. Align the dome and
bottom case to match the case outline.
NOTE: Be careful not to alter the direction of the camera module.
5. Remove the protective film from the dome. Softly wipe the dome with lens tissue or a
microfiber cloth to remove any dust or smudges left from the installation process.
Resetting the camera: With the camera powered
ON, press the reset button for five (5) seconds
to initiate a camera-wide reset of all the settings,
including network settings.
3. Sensor Input (DI) - Connect an alarm input device to + and - of the Terminal
4. Relay Out (DO) - Connect alarm lights or siren (normal open or normal close) to
the + and - of the Terminal Block.
5. Microphone - The camera has a built-in microphone, controlled from the
6. Audio output - Connect an amplifier or speaker to the audio output in the
1. Network cable - To connect an RJ45 cable to the camera:
a. Remove the grommet plug.
b. Pass the network cable through the grommet at the base of the camera.
c. Once the cable is through, add the RJ45 connector.
a. Attach the included RJ45 installation tool to the network cable.
b. Remove the grommet plug.
c. Pass the network cable through the grommet.
Pay attention to the direction of the grommet connection.
d. Once the cable’s connector is through, remove
Once the network cable is passed through the grommet:
a. Insert the grommet into the bottom the camera base.
NOTE: Bending the cable may cause water leakage.
b. Connect the RJ45 into the camera’s network input at
Use the cable with a diameter of ø0.19” ~
Depending on the installation environment,
remove the rubber plug on the side of the
camera’s bracket and use the gap as a cable
guide to prevent cables from getting caught
between the camera and the mounting
surface, which can cause damage to the
cables or prevent a proper mounting.