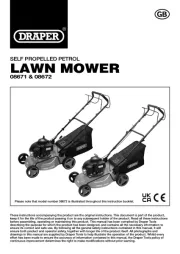
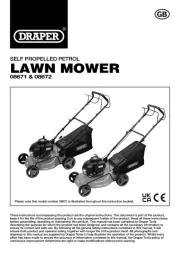
Draper 08674 Manual


Læs gratis den danske manual til Draper 08674 (32 sider) i kategorien Plæneklipper. Denne vejledning er vurderet som hjælpsom af 28 personer og har en gennemsnitlig bedømmelse på 4.8 stjerner ud af 14.5 anmeldelser. Har du et spørgsmål om Draper 08674, eller vil du spørge andre brugere om produktet?

Side 1/32
EN
Original Instructions
Version 3
08673 & 08674
LAWN MOWERS
SELF-PROPELLED PETROL
Important: Product 08674 is supplied with a
2.0Ah battery pack and charger. The battery
pack must be charged IMMEDIATELY after
purchase and every two months thereafter.
Please note that model number 08674 is
illustrated throughout this instruction booklet.
– 2 –
These are the original product instructions. This
document is part of the product; retain it for the life
of the product, passing it on to subsequent holders.
Read this manual in full before attempting to
assemble, operate or maintain this product.
This Draper Tools manual describes the purpose
of the product and contains all the necessary
information to ensure its correct and safe use.
Following all the instructions and guidance in
this manual will ensure the safety of both the
product and the operator and increase the
lifespan of the product.
All photographs and drawings within this manual are
supplied by Draper Tools to help illustrate correct
operation of the product.
Every eort has been made to ensure the
information contained in this manual is accurate.
However, Draper Tools reserves the right to amend
this document without prior warning. Always use the
latest version of the product manual.
1. Preface
1.1 Product Reference
User Manual for: Self-Propelled Petrol Lawn Mower
(510mm, 173cc / 530mm, 173cc)
Stock No: 08673, 08674
Part No: LMP510, LMP530
1.2 Revisions
Version 1: November 2020
First release
Version 2: February 2021
Product marking updates
Version 3: December 2023
General content and formatting updates
Updates to battery care instructions
As our manuals are continually updated, always ensure
that the latest version is used.
Please visit drapertools.com/manuals for the latest
version of this manual and the associated parts list, if
applicable.
1.3 Understanding the Safety Content
of This Manual
WARNING!
– Situations or actions that may
result in personal injury or death.
CAUTION! – Situations or actions that may
result in damage to the product or surroundings.
Important: – Information or instructions of particular
importance.
1.4 Copyright © Notice
Copyright © Draper Tools Limited.
Permission is granted to reproduce this manual for
personal and educational use ONLY. Commercial
copying, redistribution, hiring or lending is strictly
prohibited.
No part of this manual may be stored in a retrieval system
or transmitted in any other form or means without written
permission from Draper Tools Limited.
In all cases, this copyright notice must remain intact.
– 3 –
EN
2. Contents
1. Preface 2
1.1 Product Reference 2
1.2 Revisions 2
1.3 Understanding the Safety Content 2
1.4 Copyright © Notice 2
2. Contents 3
3. Product Introduction 4
3.1 Intended Use 4
3.2 Specication 4
4. Health and Safety Information 6
4.1 General Health and Safety
Precautions for Lawn Mowers 6
4.2 Additional Safety Precautions
for This Lawn Mower 7
4.3 Additional Safety Information
for Machines with a Petrol Engine 8
4.4 Additional Safety Instructions
for Rechargeable Batteries 8
4.5 Connection to the Power Supply (Charger) 9
4.6 Residual Risk 9
5. Identication and Unpacking 10
5.1 Product Overview 10
5.2 What’s in the Box? 11
5.3 Packaging 11
6. Preparing the Lawn Mower 12
6.1 Assembling the Handle and Control Panel 12
6.2 Assembling and Attaching the Collection Bag 14
6.3 Installing the Mulching Plug and Side
Discharge Chute 15
6.4 Selecting a Cutting Mode 15
6.5 Setting the Cutting Height 15
6.6 Fuelling the Lawn Mower 16
6.7 Checking and Topping Up the Engine Oil 17
6.8 Charging the Battery Pack 17
6.9 Inserting and Removing the Battery Pack 18
7. Operating Instructions 19
7.1 Starting and Stopping the Lawn Mower 19
7.2 Mowing Tips 21
8. Maintenance & Troubleshooting 22
8.1 General Maintenance 22
8.2 Cleaning the Mower Deck 22
8.3 Maintaining and Replacing the Blades 22
8.4 Draining the Fuel 23
8.5 Draining and Replacing the Engine Oil 23
8.6 Air Filter Care 24
8.7 Spark Plug Care 24
8.8 Storing the Lawn Mower 25
8.9 Troubleshooting 26
9. Spares, Returns and Disposal 28
10. Warranty 29
11. Explanation of Symbols 30
– 4 –
3.2 Specication
Stock No. 08673 08674
Part No. LMP510 LMP530
Engine
Type Four-stroke Four-stroke
Max. performance 3.3kW (4.4HP) 3.3kW (4.4HP)
Displacement 173cc 173cc
No-load speed 2,800rpm 2,800rpm
Max. speed 3,600rpm 3,600rpm
Fuel
Capacity 1.2L 1.2L
Type E10* (RON 95) E10* (RON 95)
Oil
Type SAE 10W-30 SAE 10W-30
Capacity 0.4L 0.4L
Features
Drive type Self-propelled Self-propelled
Mulching Available Available
Side discharge Available Available
Cut capacity
Cutting width Ø510mm Ø530mm
Cutting height 25–75mm 25–75mm
Collection bag capacity 65L 65L
Noise emissions
Sound pressure level 83.7dB(A) 83.7dB(A)
Uncertainty 3dB(A) 3dB(A)
Sound power level 96.1dB(A) 96.4dB(A)
Uncertainty 3dB(A) 3dB(A)
Guaranteed sound power level 98dB(A) 98dB(A)
Vibrations <7m/s2 <7m/s2
Net weight 33.2kg 38kg
3.1 Intended Use
This product is designed to cut grass lawn areas in
private houses and gardens. Any other application
beyond the conditions established for use will be
considered misuse. Draper Tools accepts no
responsibility for improper use of this product.
WARNING! This product is not a toy and must
be respected.
Read this manual in full before attempting to assemble,
operate or maintain the product and retain it for later use.
3. Product Introduction
– 5 –
EN
Charger (08674 only)
Stock No. 69937
Part No. LMP530CHGR
Applicable batteries 69910
Charging time 90 minutes (2.0Ah battery)
Rated voltage 220–240V AC
Rated frequency 50Hz
Rated output 20W
Rated DC output voltage 12.6V
Rated DC output current 1.5A
Construction Class II
Net weight 0.32kg
Battery (08647 only)
Stock No. 69910
Part No. LMP530BATT
Type Li-ion
Rated voltage 12V
Rating 2.0Ah
Suitable ambient conditions
Temperature during operation 20 to 55°C
Temperature during charging 0 to 45°C
Temperature during storage
-20 to 45°C
(up to three months)
Important: The declared vibration total values and noise
emissions values have been measured in accordance
with a standard test method and may be used for
comparing one tool with another. These values may also
be used in a preliminary assessment of exposure.
WARNING! The vibration and noise emissions
during actual use of the product can dier from
the declared values depending on the type of
work and the area upon which it is used. Before
each use, estimate the likely exposure resulting
from the actual conditions of use. Take into
account all parts of the operation cycle in order
to identify any safety measures required to
protect the operator.
*Draper Tools recommends using an additive or stabiliser
with E10 petrol so the fuel can be safely stored in the fuel
tank for longer.
– 6 –
Important: Read all the Health and Safety instructions
before attempting to operate, maintain or repair this
product. Non-compliance with these instructions may
result in injury or damage to the user or the product.
4.1 General Health and Safety
Precautions for Lawn Mowers
Training
• Read the instructions carefully.
Be familiar with the controls and the proper use
of the equipment.
• Never allow children or untrained people unfamiliar
with these instructions to use the machine.
• Never work while people, especially children, or pets
are nearby.
• Keep in mind that the operator is responsible for
accidents or hazards occurring to other people or
their property.
Preparation
• While working, always wear substantial footwear and
long trousers.
Do not operate the equipment when barefoot or
wearing open sandals.
• Thoroughly inspect the area where the lawn mower
is to be used and remove all objects, including stones,
toys, sticks and wires that could be thrown up by
the machine.
WARNING!
Petrol is highly ammable:
Store fuel in containers specically designed
for this purpose.
Only refuel outdoors and do not smoke
while refuelling.
Add fuel before starting the engine; never remove
the cap of the fuel tank or add petrol while the
engine is running or when the engine is hot.
If petrol is spilled, do not attempt to start the
engine; move the machine away from the area of
spillage and avoid creating any source of ignition
until the petrol vapours have dissipated.
Replace all fuel tank and container caps securely.
• Replace faulty silencers.
• Before use, always visually inspect the blades, blade
bolts and cutter assembly for wear and damage.
Replace worn or damaged blades and bolts in
sets to preserve balance.
Operation
• Do not operate the engine in conned spaces where
dangerous carbon monoxide fumes can collect.
• Work only in daylight or in good articial light.
• Avoid operating the mower in wet grass, where
possible.
• Always be sure of your footing on slopes.
• Walk, never run with the machine.
• Work across slopes, never up and down.
• Exercise extreme caution when changing direction on
slopes or when working near drop-os, ditches or
embankments.
• Do not work on excessively steep slopes.
• Use extreme caution when reversing or pulling the
machine towards you.
• Never operate the lawn mower with defective guards
or without safety devices, including deectors and
grass catchers, in place.
• Do not change the engine governor settings or
overspeed the engine.
• Ensure that all safety features and operation controls
function correctly before use.
• Disengage the drive clutch before starting the engine.
• Start the engine carefully according to these
instructions and keep your feet well away from the
cutting blade.
• Do not start the engine when standing in front of
an open discharge chute.
• Do not put your hands or feet near or under rotating
parts and keep clear of the discharge opening at
all times.
• Never pick up, tilt or carry the machine while the
engine is running.
WARNING! DO NOT operate this machine
in conditions where lightning may occur as
lightning strikes may ignite the fuel and cause
a re or explosion.
Maintenance, Transportation and Storage
• Keep all nuts, bolts and screws tight to ensure the
lawn mower is in safe working condition.
• Stop the engine, ensure that all moving parts have
completely stopped, disconnect the spark plug cable;
before carrying out the following:
Cleaning a blockage or unclogging a discharge
chute.
4. Health and Safety Information
– 7 –
EN
Checking, cleaning or adjusting the lawn mower.
Inspecting the lawn mower for damage after
striking a foreign object or if it begins to vibrate
abnormally.
Important: Make all necessary repairs before
restarting and operating the lawn mower.
Refuelling the machine.
Leaving the machine.
• Check the grass catcher frequently for wear
and deterioration.
• Wear strong protective gloves when handling
the blade.
• Never store the lawn mower with petrol in the tank
inside a building where fumes can reach an open
ame or spark.
• Allow the engine to cool before storing the lawn
mower in any enclosure.
• To reduce the re hazard, keep the engine, silencer,
battery compartment and petrol storage area free of
vegetative material and excessive grease.
• Replace worn or damaged parts for safety.
• Always drain the fuel outdoors.
• When transporting the lawn mower, drain the fuel and
engine oil to prevent spillage or contamination of
unintended parts of the engine.
• When transporting the machine in a vehicle, ensure
that the loading space is well-ventilated and that the
mower is securely tied down to prevent it from moving
and tipping over.
• When transporting the machine by hand, carry the
machine between two people, holding the front and
main handles and keeping your hands clear of the
cutting blade.
• Stop the blades if the lawn mower must be tilted for
transportation when crossing surfaces other than
grass and when transporting the mower to and from
the area to be mowed.
• Never transport the lawn mower with the engine
running.
4.2 Additional Safety Precautions
for This Lawn Mower
CAUTION! The battery pack supplied MUST be
charged for at least three hours immediately
after purchase. Charge the battery pack fully
at least once every three months to maintain
the health of the battery.
• Observe all basic Health and Safety precautions when
working with machines and mechanical tools in an
outdoor environment.
• ALWAYS ensure that all safety features are in good
working order and all safety labels are visible before
use.
• Stay alert at all times when using the machine and
DO NOT use it while tired or under the inuence of
alcohol, drugs or medication.
• DO NOT modify the machine in any way and only use
it in the manner intended.
• DO NOT tamper with or disable any of the safety
systems employed by the machine.
• Wear appropriate personal protective equipment,
including ear defenders and protective footwear
and gloves.
• DO NOT overreach and maintain good balance while
using the tool.
• Remove all adjustment tools before use.
• Keep a rm and secure grip on the handlebar
during use.
• DO NOT operate this machine without the collection
bag or discharge chute in place.
• ALWAYS start the machine on a level surface and do
not tilt it during start-up.
• If the machine vibrates abnormally during use,
immediately stop the machine, allow it to cool and
investigate the cause.
DO NOT use the mower until the issue has been
resolved.
• Take care when working near trees and other natural
obstacles.
• To reduce the risks associated with prolonged
exposure to vibrations through the handlebar, avoid
operating the machine for longer than necessary and
do not use excessive engine speeds.
• Maintain the machine appropriately and correctly in
order to prevent damage to moving parts and
mechanisms.
• Have the machine serviced ONLY by authorised and
suitably qualied personnel.
Important: The engine operation lever is a safety device;
never attempt to bypass its operation. Doing so renders
the safety device inoperative and may result in personal
injury. The blade control handle must operate easily in
both directions and must automatically return to the
disengaged position when released.
4. Health and Safety Information
– 8 –
4.3 Additional Safety Information
for Machines with a Petrol Engine
• NEVER smoke in the vicinity of the machine,
especially during refuelling.
• NEVER start the engine if you can smell petrol vapour
in the air.
If petrol vapour is present, wait for it to dissipate
or move to a new location.
• The engine and fuel get hot during use.
DO NOT touch the engine during or immediately
after use and allow it to cool before refuelling.
• NEVER remove the fuel cap while the engine is
running or immediately after use.
Take care when opening the fuel cap after use as
hot vapour may be released from the opening.
• NEVER place objects on the engine while it is in use
and keep all air vents clear of dust, dirt and other
obstructions.
WARNING! The machine exhaust emits
toxic carbon monoxide: a colourless and
odourless gas.
Breathing exhaust fumes can cause loss of
consciousness, permanent respiratory damage and
eventually death. ONLY operate this machine in a
well-ventilated outdoor environment.
Early signs of carbon monoxide poisoning resemble
u-like symptoms: headaches, dizziness and nausea. If
you or anyone nearby begins to exhibit these symptoms,
move immediately to an open, well-ventilated area away
from the heater and seek immediate medical attention.
Be aware that some people, including pregnant women
and those with heart and lung problems, are more
susceptible to carbon monoxide poisoning than others.
4.4 Additional Safety Instructions
for Rechargeable Batteries
Important: Use ONLY the battery pack and charger
supplied with this product. DO NOT use this charger with
any other batteries.
WARNING! DO NOT use or charge the battery
pack if leakage is evident.
Chargers
WARNING! NEVER charge non-rechargeable
or damaged batteries.
•  The supplied charger is for indoor use ONLY.
• Before connecting the charger to the power supply,
check that the plug, cable and charger casing are in
good condition and have any damaged part
immediately repaired by a suitably qualied person.
• Connect the supplied charger to a rated mains
outlet ONLY.
DO NOT plug the charger into site generators,
engine generators or DC power sources.
• ALWAYS disconnect the charger from the power
supply before removing the battery.
• Charge the battery in a dry and well-ventilated
environment in ambient temperatures between 5 and
40°C, ensuring that the ventilation slots on the
charger casing are not obstructed.
• DO NOT short-circuit the battery by connecting the
positive and negative terminals while it is outside of
the product.
Keep the battery away from metallic objects
that may inadvertently allow connection of
the terminals.
• The supplied charger is a Class II appliance.
Batteries
• DO NOT open, crush or burn the battery as this may
release potentially harmful chemicals.
• DO NOT expose the battery to temperatures greater
than 50°C.
• DO NOT attempt to charge batteries that exhibit a
temperature that is not between 5 and 30°C.
Allow batteries that are too hot or too cold to
normalise before charging.
• DO NOT expose the battery pack to rain or other
wet conditions.
4. Health and Safety Information
– 9 –
EN
• ALWAYS remove the battery before storing the
product for extended periods.
• ALWAYS remove the battery from the tool before
recycling and dispose of it in accordance with local
regulations.
• If a re occurs, use a CO2 or dry chemical
extinguisher.
WARNING! The electrolyte in this battery pack
is corrosive.
Avoid contact with skin. If contact occurs, ush the area
with clean water and pat it dry. Seek medical attention at
the earliest opportunity and inform the responder that
the contaminant is a “high-alkaline corrosive liquid”. If
contact with the eyes occurs, ush immediately with
plenty of water ONLY and seek medical advice at the
earliest opportunity.
4.5 Connection to the Power
Supply (Charger)
This appliance is supplied with an approved plug and
cable for your safety.
If the power supply cord is damaged, it must be replaced
by Draper Tools, an authorised service agent or similarly
qualied personnel in order to avoid a hazard.
The damaged or incomplete plug, when cut from the
cable, shall be disabled to prevent connection to a live
electrical outlet.
This charger is a Class II† appliance and is designed for
connection to a power supply matching that detailed on
the rating label and compatible with the plug tted.
The value of the fuse tted is marked on the pin face of
the plug. Should the fuse need replacing, use a small
plain-slot screwdriver to remove the fuse cover. Ensure
the substitute is of the correct rating, approved to BS
1363/A and ASTA or BS Kite marked. This should only be
performed by suitably qualied personnel.
If an extension lead is required, use an approved and
compatible lead rated for this appliance.
Follow all the instructions supplied with the
extension lead.
Important: Always follow the extension lead instructions
regarding maximum load while the cable is wound. If in
doubt, unwind the entire cable. A coiled extension lead
generates heat which could melt the lead and cause
a re.
Double insulated
: This product is double insulated
and does not require an earth connection to protect
against electric shock from accessible conductive parts
in the event of failure of
the basic insulation.
4.6 Residual Risk
The safety instructions in this manual cannot account
for all possible conditions and situations that may
occur. Exercise common sense and caution when
using this product and protect against any additional
conceivable risks.
– 10 –
(1) Battery port
(2) Collection bag
(3) Connection cable
(4) Control panel
(5) Cup holder
(6) Drive lever
(7) Electric start button (08674 only)
(8) Engine operation lever
(9) Front handle
(10) Front wheels
(11) Fuel cap
(12) Height adjustment handle
(13) Lower handle frame
(14) Mulching plug
(15) Oil ll cap and dipstick
(16) Rear discharge cover
(17) Rear wheels
(18) Recoil starter
(19) Side discharge cover
(20) Side discharge chute
(21) Spark plug cover
(22) Starter cable guide
(23) Upper handle frame
(24) Water nozzle
(25) Priming bulb
(26) Air lter cover
(27) Battery charge button (08674 only)
(28) Battery charge indicators (08674 only)
(29) Charging indicator (08674 only)
(30) Power/ready indicator (08674 only)
5.1 Product Overview
5. Identication and Unpacking
Stock No. 08674 shown
Important: The images throughout this manual depict Stock No. 08674 unless otherwise stated.
(15)
(16)
(6)
(2)
(14)
(12)
(17)
(7)
(11)
(24)
(3)
(13)
(23)
(9)
(10)
(20)
(4)
(5)
(22)
(8)
(1)
(19)
(21)
(18)
(27)
(29)
(28)
(30)
(25)
(26)
5. Identication and Unpacking
Please visit drapertools.com for our full range of accessories and consumables.
– 11 –
EN
(A) 1 x Lawn mower body with upper handle
frame (not shown)
(B) 1 x Collection bag (not shown)
(C) 1 x Lower handle frame
(D) 1 x Side discharge chute
(E) 1 x Cup holder (08673 only)
(F) 1 x 2Ah battery pack (08674 only)
(G) 1 x Battery charger (08674 only)
(H) 2 x Bolts with lock nuts
(I) 2 x Bolts with grip handles
(J) 4 x M6 x 32mm screws (08674 only)
(K) 3 x M5 x 30mm bolts with wingnuts (08673 only)
(L) 1 x Spark plug spanner body
(M) 1 x Spark plug spanner handle
(N) 1 x Cable clip
(O) 2 x Cable straps
5.3 Packaging
Keep the product packaging for the duration of the
warranty period for reference should the product need to
be returned for repair.
WARNING! Keep packaging materials out
of reach of children. Dispose of packaging
correctly and responsibly and in accordance
with local regulations.
5.2 What’s in the Box?
Carefully remove the product from the packaging and
examine it for any signs of damage that may have
occurred during shipment.
Before assembling the product, lay the contents out and
check them against the parts shown below. If any part is
damaged or missing, do not attempt to use the product.
Please contact the Draper Helpline; contact details can
be found at the back of this manual.
(H)
(M)
(N)
(I)
(J)
(E)
(K)
(C)
(G)
(F)
(D)
(L) (O)
– 12 –
6. Preparing the Lawn Mower
Important: Before assembling, fuelling or adjusting this
product, read and understand all the safety instructions
listed in this manual. Ensure that the lawn mower is
switched o, the blade has completely stopped, the
mower body has thoroughly cooled and the spark plug
cover has been detached before adjusting the product
in any way.
6.1 Assembling the Handle
and Control Panel
1. Assemble the handle:
a. Position the handle brackets of the main mower
body between the arms of the lower handle frame
(13) and insert the pins through the second-to-
lowest holes in the frame arms.
1Fig.
b. Remove the lock nuts and washers from the two
bolts (H) and pass the bolts outward through the
handle brackets and lower handle frame, using the
lock nuts and washers to secure them.
2Fig.
c. Position the arms of the upper handle frame
around the top of the lower handle frame so
that the holes align and the foam handle
arches upwards.
d. Remove the lock nut and one washer from each of
the two bolts (I) and pass the bolts inwards through
the upper and lower handle frames, using the lock
nuts and washers to secure them.
3Fig.
e. Push the grip handles inwards to tighten the xing
and tighten the lock nuts as required.
4Fig.
f. Use the cable clip (N) to secure the cables to the
handle frame.
5Fig.
(13)
(N)
(H)
(I)
– 13 –
EN
6. Preparing the Lawn Mower
2. Install the control panel or cup holder:
a. Stand behind the handle and push the left arm
of the engine operation lever (8) away from the
handle arm.
6Fig.
b. Holding the control panel (4) with the button
pointing towards you, unclip the cable from the
engine operation lever and pass it through the
small opening on the left side of the control panel.
7Fig.
c. Clip the cable and lever back into place and rest
the control panel or cup holder onto the six holes
on the upper frame handle.
8Fig.
Important: Ensure that the drive lever cable passes
under the engine operation lever attachment point.
d. Looking up underneath the control panel, align the
holes with the handle assembly and attach them
together using the screws or bolts supplied (J) (K).
9 Fig.
Important: Fully tighten the screws only after all four
have been loosely inserted.
e. Use the cable straps (O) to secure the control panel
cable to the handle.
10Fig.
(8)
(O)
(8)
– 14 –
6. Preparing the Lawn Mower
6.2 Assembling and Attaching the
Collection Bag
If required, the collection bag netting can be detached
from the steel frame by separating the plastic clips from
the frame rods.
11Fig.
Important: When reattaching the collection bag netting
to the steel frame, ensure that the shorter plastic clips
are directed inwards towards the centre and the longer
clips are directed outwards.
To attach the collection bag (2) to the lawn mower:
1. Lift the rear discharge cover (16) and remove the
mulching plug (14) from the rear of the mower.
12Fig.
Important: Keep a rm grip on the rear discharge
cover as it will snap back into place if released.
2. Holding the collection bag frame handle, hook the
front loop of the frame over the tab beneath the rear
discharge cover.
3. Carefully release the rear discharge cover into
place and check that the collection bag remains
in place securely.
13Fig.
WARNING! ALWAYS ensure that the blades are
not in motion and the lawn mower cannot start
before attaching or removing the collection bag.
(16)
(14)
(2)
– 15 –
EN
6. Preparing the Lawn Mower
6.3 Installing the Mulching Plug and Side
Discharge Chute
To install the mulching plug, remove the collection bag
(2) from the rear of the mower and insert the mulching
plug (14) into the rear discharge opening with the handle
pointing upwards.
14Fig.
To install the side discharge chute (20), lift the catch on
the side discharge cover (19) and swing it open, then clip
the tabs of the side discharge chute (D) onto the spaces
either side of the panel spring.
15Fig.
Important: The mulching plug (14) must be installed
when the side discharge chute is used.
6.4 Selecting a Cutting Mode
The lawn mower can be set to operate in the following
cutting modes, which are selected by installing the
appropriate combination of accessories:
Collection
bag (2)
Side
discharge
chute (D)
Mulching
plug (14)
Rear
collection
Side
discharge
Mulching
6.5 Setting the Cutting Height
The cutting height of the lawn mower can be set to one of
seven options from 25–75mm.
To adjust the cutting height, pull the height adjustment
lever (12) outwards from the mower body and move it
back and forth to the correct position. The lever locks
automatically when released. The further towards the
back of the mower the lever is positioned, the higher the
cutting height delivered.
16Fig.
(19)
(20)
(12)
(14)
– 16 –
6. Preparing the Lawn Mower
6.6 Fuelling the Lawn Mower
Important: Read all the Health and Safety guidance
for use of petrol as a fuel before lling or preparing
this product.
CAUTION! This machine is shipped WITHOUT
fuel. Check the fuel level before EVERY use and
top up as appropriate. NEVER attempt to run the
engine on an empty fuel tank.
Important: ALWAYS ensure that the correct type of fuel
is used. Damage caused by failure to add fuel or by the
use of incorrect or poor-quality fuel is not covered by
your warranty.
ALWAYS use automotive petrol. Draper Tools
recommends E10 (95 RON) automotive fuel, with
an appropriate additive or stabiliser, for use with
this product.
CAUTION! E10 petrol is hygroscopic and
attracts moisture, which may damage the
fuel system if stored in the product for more
than four weeks. See Using E10 Petrol below
for guidance.
WARNING! ALWAYS refuel in a well-ventilated
area away from sources of ignition. Store fuel
only for short periods, away from direct sunlight
and heat sources, and only in containers
specically designed for that purpose. Avoid
prolonged contact with the skin and inhalation
of petrol vapour.
Important: The engine unit MUST be in an upright
position when fuel is added.
To fuel the machine:
1. Disconnect the spark plug cover (21).
17Fig.
2. Twist the fuel tank cap (11) anticlockwise to
remove it.
18Fig.
WARNING! If the mower has been recently
used, hot steam may vent from the fuel tank
outlet. Take care when opening the fuel tank.
3. Using a funnel (not supplied), carefully pour the fuel
mixture into the fuel tank so that the level is just
below the ller neck.
CAUTION! DO NOT overll the fuel tank as
this may damage the engine. NEVER allow
dust, dirt, water or dirty fuel to enter the fuel
tank. Clean up any spillages IMMEDIATELY.
4. Reattach the fuel cap, ensuring it is properly tted
and securely tightened.
5. Reconnect the spark plug cover when the machine
is ready for use.
Using E10 Petrol
All Draper petrol products are compatible with E10
petrol. However, due to the increased ethanol level, E10
petrol is hygroscopic: this means that it attracts and
mixes with water from the air, which accumulates in the
engine and the petrol deteriorates more quickly. If E10
petrol is stored in a machine’s fuel tank for extended
periods, this build-up of water can form a corrosive gum
that rusts the fuel system from the inside.
Draper Tools recommends the use of petrol additives or
stabilisers when using E10 petrol. Additives and
stabilisers are widely available and can extend the length
of time that E10 petrol can be safely stored in a product
fuel tank.
(21)
(11)
– 17 –
EN
6. Preparing the Lawn Mower
The impact of additives or stabilisers on the lifespan of
the fuel varies with each product and will deteriorate over
time – always read the label. E10 petrol should not
remain in the fuel tank for more than four weeks without
an additive or stabiliser.
Even where additives or stabilisers are used, Draper Tools
recommends that E10 fuel is drained from the fuel tank
every three to four weeks to reduce the risk of damage to
the product. The fuel must be drained from the fuel tank
within the time limit specied by any additives or
stabilisers added to the fuel. If the machine will not be
used for longer than this time, drain it before putting it
into storage.
After draining the fuel tank, always run the engine until
the last of the fuel in the system is spent and drain the
oat bowl when the engine is cool.
E10 petrol should be used within 30 days of purchase.
Some petrol brands contain other quantities of ethanol.
Do not use fuels with more than 10% ethanol in Draper
products.
Always store and dispose of fuels responsibly and in
accordance with local regulations.
6.7 Checking and Topping Up the
Engine Oil
Important: This machine is supplied WITHOUT
engine oil.
CAUTION! Check the engine oil level before
EVERY use. Running the machine with a low oil
level may cause serious damage to the engine.
1. Position the lawn mower on a level surface, then
unscrew the oil ll cap and dipstick (15).
2. Wipe the dipstick clean and insert it back into the
reservoir.
Important: DO NOT rotate or tighten the dipstick
when checking the oil level.
3. Remove the dipstick again and observe the oil level
up from the bottom.
4. If required, pour additional oil into the reservoir and
check the level again.
Important: The oil level should reach the line at the
top of the hatched area of the dipstick when it is
inserted into the reservoir.
19 Fig.
Draper Tools recommends SAE 10W-30 oil for general
use in all temperatures.
CAUTION! DO NOT use non-detergent or
two-stroke engine oil as this may reduce the
working life of the engine.
6.8 Charging the Battery Pack
CAUTION! This battery MUST be charged for at
least three hours immediately after purchase
and at least once every three months thereafter.
CAUTION! ALWAYS ensure that the output
voltage of the charger matches the voltage of
the battery before use. Ensure that both the
battery pack and charger are not damaged in
any way. NEVER charge or use a damaged
battery or charger; contact Draper Tools for
support.
Important: Stock No. 08674 is supplied with an
appropriate battery and charger. DO NOT use any other
charger to charge batteries for use with this product.
1. Remove the battery pack (F) from the machine; see
6.9 Inserting and Removing the Battery Pack.
2. Connect the charger power cable to a power supply.
The green power indicator (30) illuminates when the
charger is powered.
3. Slide the battery fully into the charger.
(15)
– 18 –
6. Preparing the Lawn Mower
20Fig.
The green power indicator goes out and the red
charging indicator (29) illuminates to indicate that
the battery is charging.
4. When charging is complete, the red charging
indicator goes out and the green power indicator is
illuminated; slide the battery out of the charger to
remove it.
CAUTION! The battery and charger may be hot
after extended periods of charging. Disconnect
the power supply and allow the battery and
charger to cool before attempting to remove the
battery. Allow at least 15 minutes before reusing
the battery charger.
If the power indicator begins to ash during charging,
there may be a problem with the battery. Remove the
battery and check for obstructions and debris around the
charging contacts. If the problem is not resolved, stop
charging the battery immediately and contact Draper
Tools for support.
6.9 Inserting and Removing the
Battery Pack
The battery pack supplied with 08674 may be used as an
alternative to starting the engine using the recoil starter.
Important: ONLY use this tool with the battery and
charger supplied or identical replacements supplied by
Draper Tools.
Important: Ensure that the spark plug cover (21) is
removed when inserting and removing the battery.
• To install a battery pack (F), lift the cover of the
battery port (1) and slide the contacts fully into the
port, then allow the port cover to close.
Important: DO NOT force the battery, and ensure that
it is rmly secured before use.
• To remove the battery, open the cover of the battery
port then press down the battery release tab of the
battery port and slide the battery out of the machine.
21Fig.
To view the battery charge, press the charge indicator
button (27) at any time. The charge indicators illuminate
to present the relative charge of the battery pack.
22Fig.
(29)
(27)
(1)
(F)
(30)
– 19 –
EN
7. Operating Instructions
Important: Before operating this product, read
and understand all the safety instructions listed in
this manual.
WARNING! Using this mower can pose a danger
to wildlife. Before operating, check the area –
particularly in long grass and under bushes –
for signs of life and relocate any creatures found
there if necessary. Not all wildlife will be
deterred by the noise of this machine alone.
Inspect the area to be mowed and remove all obstacles
before starting the lawn mower. Avoid mowing near tree
stumps as this may cause damage to the blade and drive
mechanism.
7.1 Starting and Stopping the
Lawn Mower
CAUTION! This machine is NOT shipped with
fuel or engine oil. DO NOT attempt to start the
engine until both the fuel level and engine oil
have been checked and topped up as necessary.
WARNING! DO NOT start this engine until the
appropriate accessories have been installed
and the cutting mode and height have been set.
DO NOT start the engine if the rear discharge
cover is open and the collection bag has not
been installed.
Important: DO NOT start the machine until it is in its
operating position at the location to be mowed. NEVER
travel with the machine switched on.
Starting Stock No. 08673
1. Check and top up the fuel and engine oil levels as
appropriate and move the lawn mower to its starting
position.
2. Gently extend the recoil starter (18) and pass the
cable into the starter cable guide (22) so that the
starter handle is held near the upper handle.
23Fig.
Important: It may help to depress the engine
operation lever (8) when extending the recoil starter;
however, do this carefully and pull on the cord slowly
to ensure that the engine does not start.
3. Press the priming bulb (25) at least three times until
fuel can be seen owing through the clear hose.
24Fig.
CAUTION! Over-priming the engine will
cause it to be ooded with too much fuel,
which may immerse the spark plug and
prevent the engine from starting. The engine
will smell strongly of fuel if this occurs.
(25)
Stock No. 08673 shown
– 20 –
7. Operating Instructions
4. Stand behind the lawn mower and depress the engine
operation lever (8) to the foam handle.
25Fig.
5. Holding the engine operation lever in place, pull
slowly on the recoil starter until resistance is felt,
then pull it out sharply
26Fig.
CAUTION! DO NOT attempt to start the
engine when the recoil starter is fully
retracted. DO NOT allow the recoil starter
to snap back against the engine. Return it
gently to the starter cable guide to prevent
damage to the starter.
6. Do this several times until the engine starts.
Starting Stock No. 08674
1. Check and top up the fuel and engine oil levels as
appropriate and move the lawn mower to its starting
position.
2. Gently extend the recoil starter (18) and pass the
cable into the starter cable guide (22) so that the
starter handle is held near the upper handle.
27Fig.
Important: It may help to depress the engine
operation lever (8) when extending the recoil starter;
however, do this carefully and pull on the cord slowly
to ensure that the engine does not start.
3. To start the mower electrically:
a. Insert the battery pack into the battery port (1); see
6.9 Inserting and Removing the Battery Pack.
b. Stand behind the lawn mower and depress the
engine operation lever (8) to the foam handle.
28Fig.
c. Holding the engine operation lever in place, press
the electric start button (7).
29 Fig.
(8)
Stock No.
08673 shown
Stock No.
08673 shown
(7)
(8)
(18)
– 21 –
EN
7. Operating Instructions
4. To start the mower manually:
a. Stand behind the lawn mower and depress the
engine operation lever (8) to the foam handle.
b. Holding the engine operation lever in place, pull
slowly on the recoil starter until resistance is felt,
then pull it out sharply.
30Fig.
CAUTION! DO NOT attempt to start the
engine when the recoil starter is fully
retracted. DO NOT allow the recoil starter
to snap back against the engine. Return it
gently to the starter cable guide to prevent
damage to the starter.
c. Do this several times until the engine starts.
Stopping the Lawn Mowers
To stop the lawn mowers, release the engine operation
lever and allow the rotating blade to come to a complete
stop. Park the mower safely so as not to cause an
obstruction and remove the spark plug cover (21)
when leaving the mower unattended.
7.2 Mowing Tips
• The lawn mower can be pushed manually around the
lawn space or propelled by its self-drive mechanism.
Manual operation is recommended for tight
spaces, where the uninterrupted travel distance is
short or numerous obstacles are present; do not
depress the drive lever (6).
Self-drive operation is recommended for larger
open spaces and where the uninterrupted travel
distance is large; press the drive lever (6) to the
foam handle to enable the self-drive function.
To switch from self-drive mode to manual, release
the drive lever with plenty to time to allow the
mower drive to come to a stop safely.
• Take care when mowing rough or uneven ground and
increase the cutting height to prevent the mower deck
from dragging against the earth.
• For best results, mow when the grass is dry.
Wet grass may clog the blade, deck and discharge
openings more quickly and reduce performance.
To ensure that cuttings can be scattered
eectively, avoid mulching or side-discharging
when cutting wet or high grass as this may
smother areas of the lawn.
When cutting wet or high grass, stop and clean
the deck and blades more frequently during use.
• Aim to cut no more than one-third of the grass height
during each operation.
Draper Tools recommends that the lowest cutting
height is not used for the rst cut of the year and
during drought conditions.
Grass grows at dierent rate at dierent times of
the year – adjust the cutting height accordingly.
• Travel at a steady and consistent pace; DO NOT run
with the mower.
• Take care when mowing on sloped ground.
Where possible, mow across slopes rather than
following the gradient.
Avoid mowing on excessive slopes.
WARNING! DO NOT open the side or rear
discharge covers when the motor is running as
this will expose you to the spinning blade and
may cause serious injury.
(8)
Proper and regular maintenance of the lawn mower will
ensure a longer lifespan and consistent performance.
Failure to correctly maintain the product may result in
rapid deterioration of the machine.
Important: ALWAYS switch o the lawn mower, allow it
to completely stop and cool thoroughly, and disconnect
the spark plug cover before performing any
maintenance. NEVER attempt to perform any
maintenance with the blades rotating unless it is
specically stated in this manual.
8.1 General Maintenance
• Keep all air vents clean and free from obstructions at
all times.
• Clean the machine exterior with a damp cloth ONLY.
Important: DO NOT use solvents as this may damage
the plastic parts of the machine.
• Use ONLY spare parts supplied by Draper Tools.
• Clean the blades and deck interior after every use.
• Replace the blades and wheels when they become
damaged or excessively worn.
• Charge the battery pack for at least three hours
immediately after purchase and at least once every
three months thereafter.
8.2 Cleaning the Mower Deck
The mower deck should be cleaned after every use to
prevent clogging and damage caused by the
deterioration of plant matter.
To clean the deck interior:
1. Position the lawn mower in a location with suitable
drainage and adjust the cutting height so that the
blades are clear of the ground; see 6.5.
2. Attach a hose to the water nozzle (24) and turn on the
water supply.
3. Start the engine and hold the engine operation lever
down to cause the blades to rotate; see 7.1.
The blades automatically scatter water inside the
deck and clean any accumulated cuttings.
WARNING! DO NOT depress the drive lever
while the hose is attached to the mower.
4. Switch o the mower, allow the blades to completely
stop and disconnect the spark plug cover before
manually cleaning any residual or stubborn cuttings.
5. Allow the mower to dry thoroughly before storing it.
8.3 Maintaining and Replacing the Blades
Keep the blade clean to ensure that it remains in good
condition. Brush o loose debris with a sti brush and
lubricate around the bore with a light oil.
The cutting blade must be sharpened or replaced when it
becomes worn or damaged. Cutting performance is
reduced as the quality of the blade decreases. For safety
reasons, Draper Tools recommends that the blade is
sharpened, balanced and mounted by an authorised
service workshop. Draper Tools recommends that the
blades are inspected at least once a year and replaced
after 50 hours of use or every two years, regardless of
their condition.
Important: Protective gloves MUST be worn when
handling or working around the cutting blades to
prevent injury.
Remove the collection bag before replacing the blade.
To replace the blade:
1. Tip the lawn mower sideways so that the oil ll cap
(15) and exhaust are closer to the ground.
CAUTION! DO NOT invert the mower as this
may cause oil or fuel to access unintended
parts of the engine.
2. Holding the blade with one hand, use a spanner
to unscrew the central bolt and remove the washer
and blade.
3. Fit the new blade, ensuring the correct orientation,
and reinstall the washer and bolt.
4. Tighten the bolt securely, ensuing that the markers
align correctly.
CAUTION! DO NOT overtighten the bolt as
this will restrict the blade movement and
may damage the engine.
31Fig.
8. Maintenance & Troubleshooting
– 23 –
EN
8.4 Draining the Fuel
Important: Read all the Health and Safety guidance
for the use of petrol as a fuel before lling or using
this product.
1. With both control levers (6) and (8) disengaged,
loosen the fuel tube clip with pliers and remove the
fuel pipe from the fuel tank.
32Fig.
2. Drain the fuel into a suitable container.
3. Reattach the fuel tube to the carburettor and apply
the fuel tube clip to secure it tightly.
4. Loosen the oat bowl drain bolt and drain the fuel
into the container.
33Fig.
5. Tighten the oat bowl drain bolt and secure it tightly.
Important: Always drain the machine of fuel before
disposal or before returning it to Draper Tools.
Dispose of fuel according to local regulations.
6. Start the engine (see 7.1) and allow the motor to run
until the residual fuel is exhausted.
8.5 Draining and Replacing the Engine Oil
The engine oil should be changed after the rst ve
hours of use and then after every 24 hours thereafter.
Check the oil level before EVERY use.
Draper Tools recommends draining the fuel when the
motor is hot to allow the oil to drain more quickly and
thoroughly.
1. Unscrew and remove the oil ll cap (15).
2. Loosen the oil drain bolt and allow the old oil
to ow into a suitable container.
3. Wipe the aected parts clean and tighten the
drain bolt.
4. Pour new oil into the oil ller opening and replace
the cap, then check the oil level (see 6.7).
34Fig.
CAUTION! NEVER mix used and fresh oil or oils
of dierent types as this may damage internal
parts of the product.
Important: Dispose of used oil in accordance with
local regulations.
8. Maintenance & Troubleshooting
– 24 –
8.6 Air Filter Care
Clean the air lter chamber regularly to ensure a
consistent airow.
WARNING! NEVER use petrol or solvents to
clean the air lter elements as this may result
in a re when the machine is next used.
CAUTION! NEVER run the machine without the
air lter elements in place as this may cause the
engine to degrade rapidly.
1. Pull back on the air lter cover (26) and unclip
the cover.
35Fig.
2. Remove the lter and check it for holes, tears and
obstructions.
36Fig.
Important: If the lter is damaged, replace it with a
new one. DO NOT use the machine if the air lter is
damaged.
3. Wash the lter in warm soapy water and allow it
to dry thoroughly.
4. Clean the compartment and covers of any dust, dirt
or other obstructions.
5. Ret the air lter and clip the cover back on.
8.7 Spark Plug Care
Ensure that the spark plug is clean and the gap is correct.
The spark plug may become contaminated over time if
the machine is run with part-throttle for prolonged
periods.
Important: Replace the spark plug after every 36 hours
of use or at least once a year. ONLY use F7RTC or similar
compatible spark plugs with the same heat range.
1. Remove the spark plug cover (21).
Important: DO NOT use tools to remove the cover as
it may damage the HT lead.
2. Insert the spark plug spanner handle (M) through
the small holes in the spark plug spanner body (L)
and use it to loosen and remove the spark plug from
the socket.
37Fig.
3. Visually inspect the spark plug and replace it if the
ceramic insulator is cracked or chipped.
4. Measure the spark plug gap using a feeler gauge (not
supplied) and correct as appropriate by gently
bending the electrode into position.
Important: The gap should be 0.7–0.8mm.
5. Attach the spark plug washer and thread the plug into
place by hand.
Important: If mounting a new spark plug, use the
spark plug spanner to screw the spark plug an
additional half rotation after hand-tightening to the
point that the washer is compressed. If mounting an
old spark plug, screw no more than up to an
additional quarter rotation as appropriate.
6. Replace the spark plug cover securely.
(26)
8. Maintenance & Troubleshooting
– 25 –
EN
38Fig.
CAUTION! The spark plug MUST be securely
tightened. Loose spark plugs can become very
hot and cause damage to the engine. NEVER
use a spark plug with a heat range that is not
appropriate for the machine in which it is used.
8.8 Storing the Lawn Mower
Important: ALWAYS ensure that the engine has
completely cooled before storing the machine.
• Prepare the mower correctly for storage:
Disconnect the spark plug cover (21).
Drain the fuel (see 8.4 Draining the Fuel).
Clean the blades and deck interior.
The upper handle frame can be loosened and
folded over to reduce the size of the machine
if required.
Tighten all reservoir caps and leakage points.
Remove the battery pack from the port, if
applicable.
Cover the machine with a plastic sheet to protect
it against dust and moisture.
• Store the machine and its accessories in a dry and
dust-free environment, out of reach of children.
• Store the machine at a temperature of 0–30°C.
• Start the engine at periodic intervals to prevent
seizure within the engine and driveshaft.
• Charge the battery pack at least once every three
months to preserve the life of the battery.
If the mower is to be stored for a prolonged period,
ensure that the engine cylinder is suciently lubricated
to prevent it from seizing:
1. Remove the spark plug; see 8.7 Spark Plug Care.
2. Pour a few drops of SAE 10W-30 oil into the socket.
3. Pull the recoil starter (18) slowly to distribute the oil.
4. Return the spark plug securely to the socket.
5. When restarting after storage:
a. Remove the spark plug.
b. Hold a cloth around the spark plug socket opening.
Important: DO NOT smother or completely cover
the opening.
c. Pull on the recoil starter several times and catch
any ejected oil using the cloth.
Do this until no more oil is ejected from the
opening.
d. Return the spark plug securely to the socket
6. Start the engine in the usual way; see 7.1 Starting
and Stopping the Lawn Mower.
8. Maintenance & Troubleshooting
– 26 –
Problem Possible Cause Remedy
The engine will not start. The engine operation lever is not
depressed while operating the recoil
starter or electric start button.
Ensure that the upper lever is depressed
while switching on the mower.
The fuel level is too low. Top up the fuel tank as required
(see 6.6).
The engine has not been primed
(08673 only).
Press the priming bulb six times until
fuel can be seen in the fuel lines.
The fuel has been stored for too long. Drain the fuel (see 8.4) then rell the
fuel tank (see 6.6).
The spark plug electrode has been
fouled or the gap is set incorrectly.
Repair or replace the spark plug.
The spark plug H.T. lead is not connect-
ed correctly.
Press the spark plug cover on rmly
and ensure that the housing is not
interfering with the connection.
The air lter is clogged. Clean or replace the air lter (see 8.6).
The engine has ooded. Remove the spark plug (see 8.7) and
dry the electrode of fuel. Pull the recoil
starter several times without the spark
plug tted, then ret the spark plug and
try again.
The engine will not start
after refuelling.
The engine has not been primed
(08673 only).
Press the priming bulb three times until
fuel can be seen in the fuel lines.
The engine stutters or runs
roughly after starting.
Parts of the engine require
maintenance.
Clean or replace the air lter, fuel lter
and spark plug.
The fuel has been stored for too long
and has deteriorated.
Drain the fuel (see 8.4) and rell the fuel
tank as appropriate (see 6.6).
The engine stops
automatically during
operation.
The fuel level has dropped too low. Check and top up the fuel tank
(see 6.6).
The cutting blade has jammed or is
damaged.
Switch o the lawn mower, remove
the spark plug cover and check for
obstructions.
The recoil starter is too sti. Back pressure has accumulated
excessively.
Pull gently on the recoil starter to
dislodge it from its position and release
it back into place, then retry.
8.9 Troubleshooting
8. Maintenance & Troubleshooting
– 27 –
EN
Problem Possible Cause Remedy
The mower is leaking oil. An O-ring seal is damaged or failing. Replace the faulty part; contact
Draper Tools for support.
There are loose bolts in the engine. Tighten all bolts and ttings.
The mower delivers an
uneven nish.
The blade is blunt or damaged. Have the blade resharpened or
replaced; contact Draper Tools for
support.
The cutting height is set too low. Adjust the cutting height to a higher
position (see 6.5).
The mower does not collect
the grass cutting.
The blade is worn. Have the blade resharpened or
replaced; contact Draper Tools for
support.
The collection bag is full, clogged or
damaged.
Remove and empty or replace the
collection bag before continuing.
The cutting height is not suitable for
the grass to be cut.
Adjust the cutting height to a more
appropriate position (see 6.5).
The grass is too wet. Allow the grass to dry out before
operating.
The rear or side discharge port is
blocked.
Clean the deck interior and remove any
obstructions to the discharge ports.
The deck interior is clogged. Clean the deck interior.
The mower vibrates
excessively during use.
One or more xing screws have
become loose.
Check all xings and tighten them as
necessary.
The blade central bolt is loose or
damaged.
Check the blade fastening and have
parts repaired or replaced as necessary;
contact Draper Tools for support.
The blade is unbalanced. Have the blade replaced; contact
Draper Tools for support.
– 28 –
For spare parts, servicing, and repair and replacement
options, please contact the Draper Tools Product
Helpline for details of your nearest authorised agent.
Draper Tools will endeavour to hold any spare parts, if
applicable, for seven years from the date that it sells the
nal matching stock item.
Any servicing or repairs carried out by unauthorised
personnel or installation of spare parts not supplied by
Draper Tools will invalidate your warranty.
Important: For safety, ALWAYS drain and clean the
product of any oil, fuel, chemicals or other substances
before returning it to Draper Tools or its authorised
agent. Store these materials in suitable containers and
dispose of them in accordance with local regulations.
Draper Tools and its agents cannot be responsible for the
disposal of these substances.
At the end of its working life, dispose of the product
responsibly and in line with local regulations. Recycle
where possible.
• DO NOT dispose of this product with domestic waste;
most local authorities provide appropriate recycling
facilities.
• DO NOT burn or mutilate batteries; this may release
toxic or corrosive substances.
• Dispose of oil separately and in accordance with local
regulations; DO NOT abandon it in the environment.
9. Spares, Returns and Disposal
– 29 –
EN
Draper Tools products are carefully tested and inspected
before shipment and are guaranteed to be free from
defective materials and workmanship.
Should the tool develop a fault, return the complete tool
to your nearest distributor or contact Draper Tools
directly. Contact information can be found at the back of
this manual.
Proof of purchase must be provided.
If, upon inspection, it is found that the fault occurring is
due to defective materials or workmanship, repairs will
be carried out free of charge. This warranty period covers
parts and labour for 12 months from the date of
purchase. Where tools have been hired out, the warranty
period covers 90 days from the date of purchase.
This warranty does not apply to any consumable parts,
batteries or normal wear and tear, nor does it cover any
damage caused by misuse, careless or unsafe handling,
alterations, accidents, or repairs attempted or made by
any personnel other than the authorised Draper Tools
repair agent.
In all cases, to make a claim for faulty workmanship or
materials within the standard warranty period, please
contact or return the product to the place of purchase.
Proof of purchase may be required.
If the place of purchase is no longer trading or if you
experience any diculties with your warranty, please
contact Customer Services with the product details and
your proof of purchase. Contact details can be found at
the back of this manual.
If the tool is not covered by the terms of this warranty,
repairs and carriage charges will be quoted and charged
accordingly.
This warranty supersedes any other guarantees
expressed or implied and variations of its terms are not
authorised.
Your Draper Tools guarantee is not eective until you can
produce, upon request, a dated receipt or invoice to
verify your purchase within the guarantee period.
Please note that this warranty is an additional benet
and does not aect your statutory rights.
Draper Tools Limited
10. Warranty
– 30 –
Disconnect the spark plug cable before
maintenance
Keep hands away from spinning blades
Do not use on sloped ground
Do not use this product indoors
Engine displacement
Engine horsepower
4 Stroke engine
Cutting width (example)
Cutting depth
Fuel capacity
Indoor use only (charger only)
Class II construction
(Double insulated) (charger only)
Read the instruction manual
WARNING!
WARNING! Risk of danger to wildlife
WARNING! Hot surfaces
WARNING! Risk of re
Do not incinerate or throw onto re
Do not abandon in the environment
Beware of projectiles
Keep hands and feet away from the blade
during use
Wear suitable eye and ear protection
Wear protective footwear
Keep bystanders at a safe distance
11. Explanation of Symbols
– 31 –
EN
11. Explanation of Symbols
Product weight (gross)
WEEE –
Waste Electrical & Electronic Equipment
Do not dispose of Waste Electrical & Electronic Equipment
in with domestic rubbish
European conformity
UK Conformity Assessed
89
dB
Continuous A-weighted sound power level
© Published by Draper Tools Limited© Published by Draper Tools Limited
Delta International
Delta International BV
Oude Graaf 8
6002 NL
Weert
Netherlands
Contact Details
Draper Tools
Draper Tools Limited
Hursley Road
Chandler’s Ford
Eastleigh
Hampshire
SO53 1YF
UK
Website: drapertools.com
Email: sales@drapertools.com
Product Helpline: +44 (0) 23 8049 4344
Telephone Sales Desk: +44 (0) 23 8049 4333
General Enquiries: +44 (0) 23 8026 6355
General Fax: +44 (0) 23 8026 0784
Please contact the Draper Tools Product Helpline for repair and servicing enquiries.


Produkt Specifikationer

Mærke: Draper
Kategori: Plæneklipper
Model: 08674

Har du brug for hjælp?

Hvis du har brug for hjælp til Draper 08674 stil et spørgsmål nedenfor, og andre brugere vil svare dig