Eltako FUD61NPN-230V Manual

Eltako Lysdæmper FUD61NPN-230V

Læs gratis den danske manual til Eltako FUD61NPN-230V (3 sider) i kategorien Lysdæmper. Denne vejledning er vurderet som hjælpsom af 5 personer og har en gennemsnitlig bedømmelse på 5.0 stjerner ud af 3 anmeldelser. Har du et spørgsmål om Eltako FUD61NPN-230V, eller vil du spørge andre brugere om produktet?

Side 1/3
Universal dimmer switch, 300 W power
MOSFET. Automatic lamp detection. Only
0.7 watt standby loss. With adjustable
minimum brightness or dimming speed.
With switching operation for light alarm
clocks, children‘s rooms and snooze
function. Additionally with light scene
control. Encrypted wireless, bidirectional
switchable.
For installation.
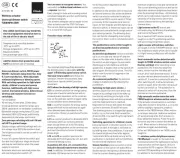
45 mm long, 45 mm wide, 33 mm deep.
Universal dimmer switch for lamps up to
300 W, dependent on ventilation conditions.
Dimmable energy saving lamps ESL and
dimmable 230 V-LED lamps, additionally
Zero passage switching with soft ON and
soft OFF to protect lamps.
Supply voltage, switching voltage and con-
trol voltage local 230 V. No minimum load.
The brightness level is stored on switch-off
(memory).
In case of a power failure the switch posi-
tion and the brightness stage are stored
and may be switched on when the power
supply is restored.
Automatic electronic overload protection
and overtemperature switch-off.
Wireless actuator
Universal dimmer switch
FUD61NPN-230V
GB
Temperature at mounting location:
-20°C up to +50°C.
Storage temperature: -25°C up to +70°C.
Relative humidity:
annual average value <75%.
30 100 835 - 10
Only skilled electricians may install this
electrical equipment otherwise there is
the risk of re or electric shock!
valid for devices from production week
46/17 (see bottom side of housing)
You can teach in encrypted sensors. You
can switch on bidirectional wireless and/or
a repeater function.
Every change in state and incoming central
command telegrams are then conrmed by
a wireless telegram.
This wireless telegram can be taught-in into
other actuators and the GFVS-Software.
The current dimming value is also displayed
in % in the GFVS-Software.
Function rotary switches
The minimum brightness (fully dimmed) or
the dimming speed is adjustable with the
upper %
/dimming speed rotary switch.
The lower rotary switch determines the
operation, whether the automatic lamp
detection or special comfort positions
should act:
AUTO allows the dimming of all light species.
EC1 is a comfort position for energy saving
lamps which must be switched on with in-
creased power dependent on the construc-
tion, so they will also switch on again safely
in cold condition when dimmed down.
EC2 is a comfort position for energy saving
lamps which will not be switched on again
when dimmed down dependent on the
construction. Memory is switched off in this
position.
LC1 is a comfort position for dimmable 230 V
LED lamps which are not being dimmed
down enough when set to AUTO (trailing
phase angle) dependent on the construction
and must therefore be forced to leading
phase angle.
LC2 and LC3 are comfort positions for
dimmable 230 V LED lamps like LC1, but with
different dimming curves.
In positions EC1, EC2, LC1, LC2 and LC3 no
inductive (wound) transformers should be
used. In addition, the maximum number of
dimmable LED lamps can be lower than in
the AUTO position dependent on the
construction.
In addition to the wireless control input via
an internal antenna, this universal dimmer
switch can also be controlled locally by a
conventional 230 V control switch if tted
previously. Either separate local control
inputs for dim brighter and dim darker as a
direction switch, or these two inputs can be
bridged and controlled with a single switch
as a universal switch. The dimming direc-
tion can then be changed by interrupting
the control. Short control commands switch
on/off.
The pushbuttons can be either taught-in
as direction pushbuttons or universal
pushbuttons:
As direction pushbutton 'switch on and dim
up' is on one side and 'switch off and dim
down' on the other side. A double-click on
the switch on side triggers the automatic
dimming up to full brightness with dim
speed time. A double-click on the switch off
side triggers the snooze function. The chil-
dren’s room function is triggered on the
switch on side.
As a universal pushbutton the direction
change is made by briey releasing the
pushbutton.
Switching for light alarm clocks: A
wireless signal of a time clock which was
taught-in accordingly starts the wake up
function by switching on the light at the
lowest brightness level and dims up slowly
until the maximum level is reached.
Dependent on the set dim speed the wake
up time is between 30 and 60 minutes.
The dimming process is stopped by tapping
briey, e.g. on the hand-held transmitter.
At setting ESL is no switching for light alarm
clocks possible.
Switching operation for childrens rooms
(universal switch or direction switch on the
switch-on side): If the light is switched on
by holding down the pushbutton, it starts at
the lowest brightness level after approx.
1 second and dims up slowly as long as the
pushbutton is held down without modifying
the last stored brightness level.
Snooze function (universal switch or direc-
tion switch on the switch-off side): With a
double impulse the lighting is dimmed down
from the current dimming position to the
minimum brightness level and switched off.
The current dimming position as well as the
adjustable minimum brightness level deter-
mine the dimming time (max. = 60 minutes)
which can be reduced as required. It can be
switched off at any time by short-time
control commands during the lighting is
dimmed down.
Light scenes on the PC are set and
retrieved using the Wireless Visualisation
and Control Software GFVS.
One or several FUD71 devices must be
taught in on the PC as dimming switches
with percentage brightness values.
Lights scenes with wireless switches
are taught in on the FUD61NPN device. Up to
four brightness values which can be taught-
in in light scene pushbuttons with double
rocker.
Semi-automatic motion detection with
taught-in FB65B wireless motion sensor
(factory setting): After switching on via
pushbutton, the 5 minutes delay time
starts, within this time the delay will
restart after each detected motion. 5 minu-
tes after the last detected motion it will
switch off. If a motion is detected 5 minutes
after switching off, it will automatically
switch on again. After this time only a push-
button can switch on. The pushbutton is
allowed to switch off at any time, then the
motions are no more evaluated.
Fully automatic motion detection with
FB65B taught-in wireless motion sensor:
If the actuator should switch on automati-
cally when motion is detected, e. g. in rooms
without daylight, replug the jumper to
'active' on the FB65B device. When motion
is no longer detected, thedevice switches
off automatically after the 5 minutes re-
lease delay time expires. Press the push-
button at any time to switch the device on
or off. When motion is detected, the device
switches on again automatically.
Either an FBH (Master) or an FHD60 can be
taught in.
If a wireless motion-brightness sensor
FBH (Master) is taught in, the switching
threshold at which the lighting with memory
value switches on (from approx. 30 lux in
the position AUTO to approx. 300 lux in the
position EC2) depending on the brightness
(in addition to the motion) is determined
with the lower rotary switch during teach-
in. If the FBH is taught in in position EC1, it is
only evaluated as a motion sensor (Slave). A
dropout delay of 1 minute is xed in the FBH.
If a brightness and twilight sensor FHD60
is taught in, the threshold at which the light-
ing switches on or off (from approx.
0 lux in the position AUTO to approx.
50lux in the position EC1) depending on the
brightness is determined with the lower
rotary switch. In the '%brightness' mode,
switching on takes place with the memory
value on dropping below the brightness
threshold. Switching off takes place at a
brightness of > 200 lux. In the 'dim speed'
mode the taught brightness threshold is not
evaluated. The lighting is switched on and
the dimmer turned up to maximum bright-
ness when it is dark. The lighting is dimmed
con tinuously as the surroundings become
brighter. The lighting is switched off at a
brightness of > 200 lux.
The LED performs during the teach-in
pro cess accord ing to the operation manual.
It shows wireless control commands by
short ickering during operation.
Typical connection
with direction pushbutton
with universal pushbutton
Technical data
Incandescent and up to 300 W
halogen
1)
lamps 230 V (R)
Inductive transformers (L) up to 300 W
2)3)
Electronic transformers (C) up to 300 W
2)3)
Dimmable energy up to 300 W
5)
saving lamps ESL
Dimmable 230 V LEDs up to 300 W
5)
Max./min. temperature +5C/-20°C
4)
at mounting location
Standby loss (activ power) 0,7 W
1)
For lamps with 150W max.
2)
Per dimmer it is only allowed to use max. 2 inductive
(wound) transformers of the same type, further-
more no-load operation on the secondary part is
not permitted. The dimmer might be destroyed.
Therefore do not permit load breaking on the
secondary part. Operation in parallel of inductive
(wound) and capacative (electronic) transformers is
not permitted!
3)
When calculating the load a loss of 20% for induc-
tive (wound) transformers and a loss of 5% for
capacitive (electronic) transformers must be
considered in addition to the lamp load.
4)
Affects the max. switching capacity.
5)
Usually applies for dimmable energy saving lamps and
dimmable 230 V LED lamps. Due to differences in the
lamps electronics, there may be limited dimming
range, switch on and off problems dependent on the
manufacturer and a restriction on the maximum num-
ber of lamps; especially if the connected load is very
low (for 5W-LEDs). The comfort positions EC1, EC2,
LC1, LC2 and LC3 optimize the dimming range, which,
however, only gives a maximum power up to 100W. No
inductive (wound) transformers may be dimmed in
these comfort positions.
Teaching-in wireless sensors
in wireless actuators
All sensors must be taught-in in the
actuators so that they can detect and
execute commands.
Teaching-in actuator FUD61NPN-230V
The teach-in memory is empty on delive-
ry from the factory. To ensure that a
device was not previously taught-in,
clear the memory completely:
Turn the upper rotary switch to CLR.
The LED ashes at a high rate. Within
10 seconds, turn the lower rotary switch
three times to right stop (turn clockwise)
and back again. The LED stops ashing
and goes out after 2 seconds. All taught-in
sensors are cleared; the repeater and the
conrmation telegrams are switched off.
Clear single taught-in sensors:
Turn the upper rotary switch to CLR. The
LED ashes at a high rate. Operate the
sensor. The LED goes out.
If all the functions of an encrypted
sensor are cleared, teach-in must be
repeat ed as described under Teach-in
encrypt ed sensors.
Teaching-in sensors:
1. Setting of the lower rotary switch to
the desired teaching-in function:
The ashing of the LED as soon as a
new setting range has been reached
when turning the rotary switch helps
to nd the desired position reliably.
EC2 = timer as wake-up light;
LC1 = teach-in 'central off';
LC2 = universal switch on/off and dim;
Universal switches must be taught-in
identically at top and bottom if the
switch is to have the same function at
top and bottom.
LC3 = teach-in 'central on';
EC1 = Direction switches;
Direction switches are fully taught-in
automatically when pressed. Where
you press denes the switch-on and
dim-up functions; the opposite side is
then for switch-off and dim-down.
AUTO = teach in light scene push-
button, a complete pushbutton with
double rocker is assigned automati-
cally;
The FB65B can be taught-in in any
position.
Rotary switches and GFVS can be
taught-in in any position, conrmation
telegrams are automatically activated
and sent. The percentage brightness
can be set in the GFVS between 0 and
100 per cent and saved. Several dimmer
switches can be linked to form a light
scene.
2. Set the upper rotary switch to LRN.
The LED ashes at a low rate.
3. Operate the sensor which should be
taught-in.
The LED goes out.
To teach-in further sensors, turn the
upper rotary switch briey away from
position LRN. Continue the procedure
from pos 1.
After teach-in, set the rotary switches of
the actuators to the required function.
To prevent unintentional teach-in,
teach in pushbuttons by 'double-
clicking' (pressing rapidly twice in
succession).
Within 2 seconds, turn the upper rotary
switch three times to right stop LRN (turn
clockwise). The LED ashes 'double'.
'Double-click' the pushbutton you want
to teach in. The LED goes out.
To change back to teach-in with a 'single
click', turn the upper rotary switch 3 times
to right stop LRN (clockwise) within
2 seconds. The LED ashes at a low rate.
After a power supply failure, the device
reverts automatically to teach-in with a
'single click'.
You can teach in unencrypted and
encrypted sensors.
Teach in encrypted sensors:
1. Turn the upper rotary switch to LRN.
2. Turn the lower rotary switch three
times to left stop (anticlockwise).
The LED ashes very rapidly.
3. Within 120 seconds, enable sensor en-
cryption. The LED goes out.
Caution: Do not switch off the power
supply.
4. Then teach in the encrypted sensor as
described in Teach in sensors.


Produkt Specifikationer

Mærke: Eltako
Kategori: Lysdæmper
Model: FUD61NPN-230V

Har du brug for hjælp?

Hvis du har brug for hjælp til Eltako FUD61NPN-230V stil et spørgsmål nedenfor, og andre brugere vil svare dig


Lysdæmper Eltako Manualer

Lysdæmper Manualer

Nyeste Lysdæmper Manualer