Emos E5018 Manual


Læs gratis den danske manual til Emos E5018 (28 sider) i kategorien Vejrstation. Denne vejledning er vurderet som hjælpsom af 10 personer og har en gennemsnitlig bedømmelse på 5.0 stjerner ud af 5.5 anmeldelser. Har du et spørgsmål om Emos E5018, eller vil du spørge andre brugere om produktet?

Side 1/28
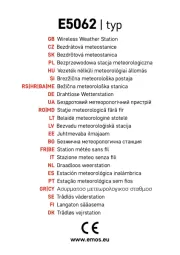
E5018 - AOK-5018B
GB WIRELESS WEATHER STATION
CZ BEZDRÁTOVÁ METEOSTANICE
SK BEZDRÔTOVÁ METEOSTANICA
PL BEZPRZEWODOWA STACJA METEOROLOGICZNA
HU VEZETÉK NÉLKÜLI METEOROLÓGIAI ÁLLOMÁS
SI
BREZŽIČNA METEOROLOŠKA POSTAJA
RS HR| |BA BEŽIČNA METEOROLOŠKA STANICA
DE DRAHTLOSE WETTERSTATION
UA БЕЗДРОТОВИЙ МЕТЕОРОЛОГІЧНИЙ ПРИСТРІЙ
RO STAŢIE METEO FĂRĂ FIR
www.emos.cz
2606126000_31-E5018 148 × 210 0-0-0-K
2
AOK-5018B WIRELESS WEATHER STATION
The weather station displays the time along with 2 alarm clocks with snooze function, the weather forecast, interior and exterior temperatures, humidity,
the atmospheric pressure, lunar phase, the sunrise and sunset times, and also the moonrise and moonset times.
It has a memory for the minimum and maximum measured values.
Please read this product guide thoroughly before using the device.
GB
Specications:
Radio controlled clock
Accuracy: ±2 °C
Interior/exterior temperatures: 0 °C to +50 °C; -50 °C to +70 °C
Temperature resolution: 0.1 °C
Wireless sensor: broadcast frequency 433 MHz
Radio signal range: up to 30 m in free space
Number of sensors: 3
Relative humidity: 20 % – 95 %
Resolution: 1 %
Accuracy: ±5 %
Barometer pressure scale: 850 hPa to 1050 hPa
Power supply:
a) main station: 2× 1.5 V AA battery (not included)
b) sensor: 2× 1.5 V AAA battery (not included)
Size and weight:
a) main station: 189 × × 139 30 mm; 306 g (without batteries)
b) sensor: 60 × 99 × 21 mm; 43 g (without batteries)
List of icons and buttons
Front display
A – interior temperature below
+4 °C
B – weather forecast icon
C – pressure trend
D – depleted battery icon
E – exterior sensor number
F – temperature trend
G – humidity trend
H – exterior temperature and
humidity
I – interior temperature and
humidity
J – physical comfort icon
K – date, day of the week, week
number
L – DCF77 radio signal reception
icon
M – alarm clock icons
N – current time
O – moonrise and moonset
P – country and city code
R – sunrise and sunset
S – lunar phase icon
T – pressure value and history
Rear side
Button push Button hold (3 seconds)
CHANNEL Sensor number Search for sensor No. 1,2 3
HISTORY Pressure history over the
last 12 hours
Setting of altitude above sea
level, pressure units, weather
icon
-
1 step back
Display temperatures in
°C or °F units
Thermal limit setting
+
1 step forward
Display max/min tem-
perature and humidity
values
MODE Alarm time No. 1, 2 Setting the alarm, time and
date
RESET Erase all values
Upper side
SNOOZE/LIGHT – Display light and snooze functions
Wireless sensor
Front side
- external temperature
- external humidity
CH1,2,3 – No. of channel reserved for communication of the sensor with
the weather station
Rear side
CH – switching for sensor channel
°C/°F – temperature units
Commissioning
1. First insert the battery into the weather station (2× AA), then to the
wireless sensor (2× AAA). When installing the batteries, ensure correct
polarity to avoid damaging the weather station or the sensor. Use alka-
line batteries of the same type only; do not use rechargeable batteries.
2. Position both units next to each other. The weather station will nd
the signal from the sensor within three minutes. If the sensor signal
is not found, hold the CHANNEL button to repeat the search.
3. If the external temperature value vanishes from the display, push
theRESET button on the weather station. The weather station resets
all values to zero and nds the sensor signal again.
4. We recommend positioning the sensor on the northern side
of the house. In built-up areas, the sensor range may drop rapidly.
5. The sensor is resistant to splash and dripping water; do not subject
it to permanent contact with adverse weather and rain.
6. Do not put the sensor on metal surfaces; it might weaken the signal.
7. If the weak battery icon (D eld) appears, replace the batteries in the
sensor or the weather station.
Channel change and connecting more sensors
1. Use the CHANNEL button on the rear of the weather station to choose
the desired sensor channel - 1, 2 or 3. Then hold the CHANNEL button
until the icon starts blinking.
2. On the rear side of the sensor, remove the battery compartment cover
and insert the batteries (2× AAA).
3. Set the required number of the sensor channel - 1, 2, 3 using the CH
button it will be shown on the front display. Within 3 minutes the
data from the sensor will be read.
4. If the sensor signal is not found, remove the battery and reinsert.
Radio controlled clock (DCF77)
After logging to the wireless sensor, the weather station starts to automa-
tically search for the DCF77 signal over 7 minutes, the L icon is blinking.
During the search no data on the display are updated and the buttons do
not function (except SNOOZE/LIGHT).
Signal found – the icon stops blinking and it shows the current time.
Signal not found – the icon disappears.
To start a new search for the DCF77 signal push the buttons + and at
the same time.
To cancel the DCF77 signal search, push the buttons + and – at the same
time again.
The DCF77 signal will be synchronised daily between 2:00 and 3:00 a.m.
To ensure correct signal reception, do not place the sensor near electrical
appliances and mobile phones.
Manual setting of the time, date and location to
show the time of sunrise, sunset, moonrise and
moonset
1. Hold the MODE button
2. Use the buttons + and to set the year month - day time shift day
language - 12/24 time format hour – minute city (country) code.
Other cities and countries are listed on page 22 - 23.
3. The week number is set automatically according to the set date.
4. You can move from one value to another by pushing the MODE button.
5. After setting the city code, the weather station will set the time of
sunrise and sunset (R eld) and moonrise, moonset (O eld).
Interior and exterior temperatures, humidity,
temperature unit
The interior temperature and humidity is displayed in eld I.
Exterior temperature and humidity is displayed in eld H.
Button – choose the temperature unit °C/°F.
Temperature and humidity trend
The arrow shows the trend in the measured values of temperature (F icon)
and humidity (G icon) for the specic sensor or station.
Indicators on the
display
Temperature and humi-
dity trend Rising Stable Falling


Produkt Specifikationer

Mærke: Emos
Kategori: Vejrstation
Model: E5018

Har du brug for hjælp?

Hvis du har brug for hjælp til Emos E5018 stil et spørgsmål nedenfor, og andre brugere vil svare dig


Vejrstation Emos Manualer
Emos

Emos E8614 Manual

14 December 2024
Emos

Emos E8620 Manual

13 December 2024
Emos

Emos E0531 Manual

13 December 2024
Emos

Emos E8670 Manual

10 August 2024
Emos

Emos E5111 Manual

10 August 2024
Emos

Emos E6018 Manual

2 August 2024
Emos

Emos E0387 Manual

1 August 2024
Emos

Emos E3003 Manual

31 Juli 2024
Emos

Emos E8647 Manual

29 Juli 2024
Emos

Emos E0389 Manual

28 Juli 2024

Vejrstation Manualer

Nyeste Vejrstation Manualer