EXSYS EX-1135 Manual

EXSYS USB HUB EX-1135

Læs gratis den danske manual til EXSYS EX-1135 (2 sider) i kategorien USB HUB. Denne vejledning er vurderet som hjælpsom af 2 personer og har en gennemsnitlig bedømmelse på 4.4 stjerner ud af 1.5 anmeldelser. Har du et spørgsmål om EXSYS EX-1135, eller vil du spørge andre brugere om produktet?

Side 1/2
6 5
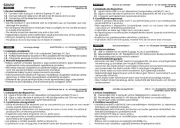
Mit der EX-1135 erweitern Sie einen USB 3.2 Gen 1 A Ausgang von Notebook oder Desktop -
Rechner auf vier weitere USB 3.2 Gen 1 A Ports. Es ist dann möglich bis zu vier externe USB -
2.0 oder 3.2 Gen 1 Peripheriegeräte an einen USB 2.0 oder 3.2 Gen 1 Port von Notebooks oder
Desktop Rechner anzuschließen. Er ist sehr kompakt und elegant und alle vier USB Ports sind
immer erreichbar. Das USB 3.2 Gen 1 Kabel ist 30cm lang. Der EX 1135 unterstützt ohne -
Netzteil keine größeren externen Peripheriegeräte wie zum Beispiel eine externe Festplatten.
Das Netzteil (EX 6993) ist optional erhältlich.-
Kompatibilität: USB 2.0 & 3.2
Betriebssysteme: Windows 98 / 2000 / XP / Vista / 7 / 8.x / 10 / 11 / Server 20xx / Linux /
Mac OS
Anschlüsse: 1x USB 3.2 Gen 1 A Stecker (Upstream), 4x USB 3.2 Gen 1 A Buchse - -
Lieferumfang: 1135, Anleitung EX-
1
BESCHREIBUNG & TECHNISCHE DATEN
AUFBAU
Anleitun
E 113
Switzerland:
EXSYS Vertriebs GmbH
Dübendorfstrasse 17
8602 Wangen
www.exsys.ch
Germany:
EXSYS Vertriebs GmbH
Industriestrasse 8
61449 Steinbach
www.exsys.de
Italy:
EXSYS Italia Srl
Via Belvedere, 45/B
I 22100 Como -
www.exsys.it
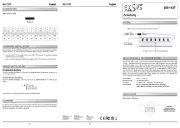
4x USB 3.2 Gen 1 A Buchsen für Endgeräte-
5V DC Buchse für -
optionales Netzteil
USB 3.2 Gen 1 A Stecker -
für den Anschluss an den PC
ANSCHLÜSSE
USB 3.2 Gen 1 A Stecker/Buchse:-
HARDWARE INSTALLATION
Because there are large differences between PC s, Laptops, Notebooks etc., we can give you
only a general installation guide for the EX 1135. Please refer your computer s reference manu--
al whenever in doubt.
1. -Connect the mounted USB 3.2 Gen 1 cable to the USB A Port on your PC, Laptop or
Notebook.
2. You can now connect the various end devices to the EX-1135.
3. 1135. - -Now connect the optional EX 6993 power supply to the 5V DC socket of the EX
CLEANING
For cleaning please use only a dry fluff less cloth and remove the dirt with gently pressure. In
the area of the connectors please make sure that no fibres from the cloth remain in the connect-
ors. Attention! Never use a moist or wet cloth for cleaning!
Alle Betriebssysteme
Once the hardware installation is complete, the operating system automatically recognizes the
EX- 1135 and install it.
CHECK INSTALLED DRIVER
Open the . Now you should see at >Device manager< USB Controller- the following new
entry s:
If you see this or a similar information the device is installed correctly.
DRIVER INSTALLATION
Achtung!
Stecker niemals umgekehrt
oder mit Gewalt einstecken.
StdB_SSTX -
StdB_SSTX+
GND_DR
VCC
StdB_SSTX +
StdB_SSTX -
D+
D-
GND
E 113
3 4
HARDWARE INSTALLATION
Beachten Sie bitte die folgenden Installationshinweise. Da es große Unterschiede zwischen
PCs, Laptops, Notebooks etc. gibt, können wir Ihnen nur eine generelle Anleitung zum An-
schluss des EX 1135 geben. Bei Unklarheiten halten Sie sich bitte an die Bedienungsanleitung -
Ihres Computersystems.
1. - -Verbinden Sie das an der EX 1135 montierte USB 3.2 Gen 1 Kabel mit einer USB A
Buchse an Ihrem PC, Laptop oder Notebook.
2. - Nun können Sie die verschiedenen Endgeräte an den EX 1135 anschließen.
3. - - - Schließen Sie nun das optionale Netzteil EX 6993 an die 5V DC Buche des EX 1135 an.
REINIGUNG
Zur Reinigung des Gerätes verwenden Sie bitte ausschließlich ein trockenes nicht faserndes
Tuch und entfernen Sie die Verschmutzung mit leichtem Druck. Im Bereich der Anschlüsse bitte
darauf Achten, dass keine Fasern des Tuchs in der Buchse hinterlassen werden. Verwenden
Sie bitte zu Reinigung in keinem Fall ein feuchtes oder nasses Tuch!
LAYOUT
Manua
Schweiz:
EXSYS Vertriebs GmbH
Dübendorfstrasse 17
8602 Wangen
www.exsys.ch
Deutschland:
EXSYS Vertriebs GmbH
Industriestrasse 8
61449 Steinbach
www.exsys.de
Italien:
EXSYS Italia Srl
Via Belvedere, 45/B
I 22100 Como -
www.exsys.it
2
Alle Betriebssysteme
Nach Abschluss der Hardware Installation erkannt das Betriebssystem den EX 1135 automa--
tisch und installiert diesen.
ÜBERPRÜFEN DES INSTALLIERTEN TREIBER
Öffnen Sie den >Geräte-Manager<. Jetzt müssten Sie unter USB Controller-folgende Einträge
sehen:
Sind diese oder ähnliche Einträge vorhanden, ist der EX 1135 richtig installiert.-
TREIBER INSTALLATION
With the EX 1135 you expand one USB 3.2 Gen 1 A Output of notebook or desktop computer - -
to four additional USB 3.2 Gen 1 ports. It is then possible to connect up to four external USB 2.0
or 3.2 Gen 1 peripherals to one USB 2.0 or 3.2 Gen 1 port of notebooks or desktop computers.
It is very compact and elegant and all four USB ports are always accessible. The USB 3.2 Gen
1 cable is 30cm long. The EX 1135 does not support larger external peripherals such as an -
external hard drive without the power supply. The power supply (EX 6993) is optionally availab--
le.
Compatibility: USB 2.0 & 3.2
Operating Systems: Windows 98 / 2000 / XP / Vista / 7 / 8.x / 10 / 11 / Server 20xx / Linux /
Mac OS
Connectors: 1x USB 3.2 Gen 1 A Plug (Upstream), 4x USB 3.2 Gen 1 A Port - -
Extent of delivery: 1135, Manual EX-
DESCRIPTION & TECHNICAL INFORMATION
4x USB 3.2 Gen 1 A Port for Devices-
5V DC Jack for -
optional Power Supply
USB 3.2 Gen 1 A Plug -
for connection to the PC
CONNECTORS
USB 3.2 Gen 1 A Plug/Port:-
Attention!
Never plug in with force or
in wrong direction.
StdB_SSTX -
StdB_SSTX+
GND_DR
VCC
StdB_SSTX +
StdB_SSTX -
D+
D-
GND


Produkt Specifikationer

Mærke: EXSYS
Kategori: USB HUB
Model: EX-1135

Har du brug for hjælp?

Hvis du har brug for hjælp til EXSYS EX-1135 stil et spørgsmål nedenfor, og andre brugere vil svare dig