Festo AK-8KL Manual


Læs gratis den danske manual til Festo AK-8KL (2 sider) i kategorien Ikke kategoriseret. Denne vejledning er vurderet som hjælpsom af 2 personer og har en gennemsnitlig bedømmelse på 4.6 stjerner ud af 1.5 anmeldelser. Har du et spørgsmål om Festo AK-8KL, eller vil du spørge andre brugere om produktet?

Side 1/2
AK-8KL
Covering
Festo SE & Co. KG
Ruiter Straße 82
73734 Esslingen
Deutschland
+49 711 347-0
Assembly instructions
8173428
2022-05a
[8173430]
Translation of the original instructions
© 2022 all rights reserved to Festo SE & Co. KG
1
Applicable documents
All available documents for the product
è
www.festo.com/sp.
2 Safety
2.1 Safety instructions
Only mount the product on components that are in a condition to be safely
operated.
2.2 Intended use
Cover for cable entry with dust protection to a connection block or electronic
module.
The cover runs cables to a connection block or electronic module and protects
against dust.
2.3 Training of qualified personnel
Work on the product may only be carried out by qualified personnel who can
evaluate the work and detect dangers. The qualified personnel are trained in
electrical engineering.
3 Additional information
Contact the regional Festo contact if you have technical problems
è
www.festo.com.
Accessories
è
www.festo.com/catalogue.
4 Product Range Overview
4.1 Scope of delivery
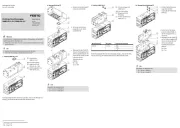
2
1
3
4
Fig.1
1
Blind caps (8x)
2
Seal (1x)
3
Covering (1x)
AK-8KL
4
Screws (4x)
4.2 Not in scope of delivery
5
6
7
8
Fig.2
5
Fittings kit (1x)
VG-K-M9
includes:
- pressure screw (8x)
- clamping cage (8x)
- sealing ring (8x)
6
Lock nut (1x)
M16x1.5
7
Cable connector (1x)
M16x1.5
8
Connection block, e.g. CPX-AB-8-KL
5 Assembly
5.1 Preparation
2
1
Fig.3
Carefully separate the seal and the blind caps from the net.2 1
1
3
2
Fig.4
Place the seal in the groove of the covering .2 3
The blind caps
1 serve as dust protection. If the thread is open and the blind cap
is inserted, degree of protection IP65/67 is not achieved.
Press the blind caps into the unused threads of the covering .1 3
5.2
Sensor cable
3
Fig.5
Cut out the trunnions on the desired threads of the covering with a suit-3
able tool, e.g. screwdriver 3 mm.<
3
8
5
Fig.6
1.
Pass the cables through the fittings .5
2. Route the cables through appropriate threaded holes on the cover .3
3.
Wire the cables to the connection block .8
3
4
8
Fig.7
1. Put the cover on the connection block .3 8
2.
Tighten the screws . Tightening torque: 0.5 Nm ± 10% 4
5
3
Fig.8
Tighten the fittings on the covering . Tightening torque: 0.7 Nm ± 10% 5 3
5.3
Multi-pin cable
A
3
B
Fig.9
1. Break out the covering (B) of the hole (A).
2. Deburr the predetermined breaking point.
7
8
3
Fig.10
1.
Route the cables though the cable connector
7.
2. Wire the cables to the connection block .8
3
6
7
8
4
Fig.11
1. Place covering on the connection block .3 8
2. Tighten the screws . Tightening torque: 0.5 Nm ± 10% 4
3. Fasten the cable connector with the lock nut . Tightening torque:7 6
according to manufacturer specifications


Produkt Specifikationer

Mærke: Festo
Kategori: Ikke kategoriseret
Model: AK-8KL

Har du brug for hjælp?

Hvis du har brug for hjælp til Festo AK-8KL stil et spørgsmål nedenfor, og andre brugere vil svare dig