Festo EAPM-G1-35-SLS Manual

Festo Ikke kategoriseret EAPM-G1-35-SLS

Læs gratis den danske manual til Festo EAPM-G1-35-SLS (2 sider) i kategorien Ikke kategoriseret. Denne vejledning er vurderet som hjælpsom af 24 personer og har en gennemsnitlig bedømmelse på 4.9 stjerner ud af 12.5 anmeldelser. Har du et spørgsmål om Festo EAPM-G1-35-SLS, eller vil du spørge andre brugere om produktet?

Side 1/2
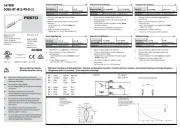
Montageanleitung (de)
749 979 / 2010-02NH
†‡
Schaltfahne
EAPM-G1-...-SLS
Festo SE & G Co. K
Postfach
D-73726 Esslingen
www.festo.com
1. Teileliste
14519d_1
1 Schaltfahne (1x)
EAPM-G1-...-SLS
2 Zylinderschraube (2x)
( Tabelle)
Bestimmungsgemäß dient die Schaltfahne 1 daz
u, die
Näherungs-
schalter (C) die in den Sensornuten der Achse befestigt sind zu schalten.
2. Schraubengrößen und Anziehdrehmomente M
A
1)
EAPM-G1- 35-S
LS 45-SLS 55-SLS 75-SLS
2 Schraube M4x6 M5x8 M5x8 M6x10
M
A
[Nm] 2,9 5,9 5,9 9,9
1)
Toleranzen für nicht tolerierte Anziehdrehmomente M
A
M
A
> 1 Nm: ± 20%
3. Montage
Vorsicht
Quetsch- und Abschergefahr durch Falschmontage.
Verletzung der Finger!
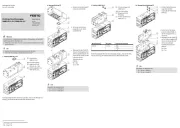
Montieren Sie die Schaltfahne 1 wie folgt:
14519d_3
Stellen Sie sicher, dass die
Schaltfahne 1 nicht im vor-
deren Bereich (A) der Füh-
rung montiert wird.
14519d_2
Platzieren Sie die Schalt-
fahne 1 nach rechts oder
links an den Befestigungs-
bohrungen (B).
Drehen Sie die Schrau-
ben 2 fest. Halten Sie das
zulässige Anziehdreh-
moment ein.
Hinweis
Es verbleibt ein Abstand S = 0,5 … 2 mm zwischen dem Näherungs-
schalter (C) und der Schaltfahne 1.
Vermeiden Sie eine Fremdbeeinflussung im Nahbereich der Näherungs-
schalter, durch andere magnetische oder ferritische Teile als die Schalt-
fahne 1.
C
1
A
2
1
B
2
Assembly instructions (en)
749 979 / 2010-02NH
†‡
Switch lug
EAPM-G1-...-SLS
Festo SE & G Co. K
Postfach
D-73726 Esslingen
www.festo.com
1. Parts list
14519d_1
1 Switch lug (1x)
EAPM-G1-...-SLS
2 Socket head screw (2x)
(Table)
The intended use of the switch lug 1 is
to switch the proximity sensors (C)
that are fastened in the sensor slots of the axis.
2. Screw sizes and tightening torques M
A
1)
EAPM-G1- 35-SLS
45-S
LS
55-S
LS
75-S
LS
2 Screw M4x6 M5x8 M5x8 M6x10
M
A
[Nm] 2.9 5.9 5.9 9.9
1)
Tolerance for non-toleranced tightening torques M
A
M
A
> 1 Nm: ± 20%
3. Mounting
Caution
Danger of crushing and cutting from incorrect mounting.
Incorrect mounting can result in crushed or cut fingers. Mind your fingers!
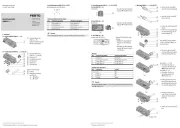
Mount the switch lug 1 as follows:
14519d_3
Make sure that the switch
lug 1 is not mounted in the
front area (A) of the guide.
14519d_2
Place the switch lug 1 to the
right or left on the mounting
holes (B).
Tighten the screws 2. Main-
tain the permitted tightening
torques.
Note
A space S = 0.5 ... 2 mm remains between the proximity sensor (C) and the
switch lug 1.
Avoid external influence in the vicinity of the proximity switches caused
by magnetic or ferritic parts other than the switch lug 1.
C
1
A
2
1
B
2


Produkt Specifikationer

Mærke: Festo
Kategori: Ikke kategoriseret
Model: EAPM-G1-35-SLS

Har du brug for hjælp?

Hvis du har brug for hjælp til Festo EAPM-G1-35-SLS stil et spørgsmål nedenfor, og andre brugere vil svare dig


Ikke kategoriseret Festo Manualer

Ikke kategoriseret Manualer

Nyeste Ikke kategoriseret Manualer

Kimo

Kimo LR 110 Manual

2 September 2025
HMS Premium

HMS Premium LPD02 Manual

2 September 2025
AVer

AVer E1008 Manual

2 September 2025
Biltema

Biltema 17-547 Manual

2 September 2025
Groen

Groen AH/1E Manual

2 September 2025
ACOPower

ACOPower HY-P30 Manual

2 September 2025
Globe

Globe RG30 Manual

2 September 2025
Neutrik

Neutrik NLT4FXX Manual

2 September 2025