Festo EAPR-E11-30 Manual


Læs gratis den danske manual til Festo EAPR-E11-30 (2 sider) i kategorien Ikke kategoriseret. Denne vejledning er vurderet som hjælpsom af 12 personer og har en gennemsnitlig bedømmelse på 3.5 stjerner ud af 6.5 anmeldelser. Har du et spørgsmål om Festo EAPR-E11-30, eller vil du spørge andre brugere om produktet?

Side 1/2
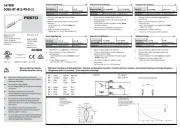
Montageanleitung (Original: de)
8025126
1305NH
†‡
Sensorbefestigung
EAPR-E11-30
Festo SE & Co. KG
Postfach
73726 Esslingen
Deutschland
+49 711 347-0
www.festo.com
1. Teileliste
18930d_1
Sensorbefestigung
EAPR-E11-30:
1 Sensorhalter
(Nut 8)
2 Schaltfahne
Y-Hub
3 Schaltfahne
X-Hub
4 Senkschraube
M3x6
5 Zylinderschraube
M2,5x5
6 Scheibe
B2,7
(1x)
(1x)
(1x)
(2x)
(4x)
(4x)
Nicht im Lieferumfang:
18930d_2
7 Flächenportal
EXCM-30
8 Näherungsschalter
( Zubehör)
(1x)
(2x)
18930d_3
Bestimmungsgemäß dient die Sensorbefestigung dazu die Näherungs-
schalter 8 als Referenzschalter am Flächenportal 7 zu befestigen.
Wählen Sie bitte das entsprechende Zubehör aus unserem Katalog
( www.festo.com/catalogue).
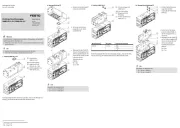
2. Montage
18930d_4
Platzieren Sie den Sensor-
halter 1 am Flächen-
portal 7.
Drehen Sie die Schrau-
ben 4 fest.
Halten Sie das zulässige An-
ziehdrehmoment ein.
18930d_5
Platzieren Sie die Schalt-
fahne 2 am Schlitten (A)
des Flächenportals 7.
Verwenden Sie die Schei-
ben 6.
Drehen Sie die Schrau-
ben 5 zunächst nur leicht
an.
18930d_6
Platzieren Sie die Schalt-
fahne 3 an der Y-Achse des
Flächenportals 7.
Verwenden Sie die Schei-
ben 6.
Drehen Sie die Schrau-
ben 5 zunächst nur leicht
an.
18930d_8
Beim Flächenportal 7 existie-
ren 2 Montagevarianten:
(U) Motor unten
(O) Motor oben
Montieren Sie die Nähe-
rungsschalter 8 so, dass
der Kabelabgang der Nähe-
rungsschalter in Richtung
Motor zeigt.
18930d_7
Positionieren Sie die Nähe-
rungsschalter 8 bei beiden
Montagevarianten zunächst
so, dass die Näherungs-
schalter 8 wie folgt im
Sensorhalter 1 ausge-
richtet sind:
Y-Hub: oben bündig
X-Hub: unten bündig
Beachten Sie die zugehöri-
gen Bedienungsanleitungen
der Näherungsschalter.
18930d_9
Justieren Sie die Schaltfah-
nen 2 und 3 über die
Langlöcher, bis die Nähe-
rungsschalter sicher schal-
ten.
Drehen Sie die Schrau-
ben 5 fest.
Halten Sie das zulässige An-
ziehdrehmoment ein.
1
2
3
4
5
6
1
4
1,2 Nm _ 10 %
7
7
6
5
2
5
6
3
U
8
8
O
8
Y
X
3
5
0,8 Nm
_ 10 %
0,8 Nm
_ 10 %
2
5
Y
X
Y
X
7
8
A
Assembly instructions (original: de)
8025126
1305NH
†‡
Sensor mounting
EAPR-E11-30
Festo SE & Co. KG
Postfach
73726 Esslingen
Germany
+49 711 347-0
www.festo.com
1. Parts list
18930d_1
Sensor mounting
EAPR-E11-30:
1 Sensor bracket
(slot 8)
2 Switch lug
Y-stroke
3 Switch lug
X-stroke
4 Countersunk screw
M3x6
5 Socket head screw
M2.5x5
6 Washer
B2.7
(1x)
(1x)
(1x)
(2x)
(4x)
(4x)
Not included in delivery:
18930d_2
7 Planar surface gan-
try
EXCM-30
8 Proximity sensor
( Accessories)
(1x)
(2x)
18930d_3
The sensor mounting is intended to be used to fasten the proximity sen-
sor 8 as reference switch to the planar surface gantry 7.
Please select the corresponding accessories from our catalogue
( www.festo.com/catalogue).
2. Assembly
18930d_4
Place the sensor bracket 1
on the planar surface gan-
try 7.
Tighten the screws 4.
Comply with the permissible
tightening torque.
18930d_5
Place the switch lug 2 on
the slide (A) of the planar
surface gantry 7.
Use the washers 6.
Tighten the screws 5 only
lightly at first.
18930d_6
Place the switch lug 3 on
the Y-axis of the planar sur-
face gantry 7.
Use the washers 6.
Tighten the screws 5 only
lightly at first.
18930d_8
For the planar surface gan-
try 7, there are 2 mounting
variants:
(U) Motor underneath
(O) Motor on top
Mount the proximity sen-
sor 8 so that the cable out-
let of the proximity sensor
points in the direction of the
motor.
18930d_7
With both mounting vari-
ants, first position the prox-
imity sensors 8 so that the
proximity sensors 8 are
aligned in the sensor
bracket 1 as follows:
Y-stroke: on top, flush
X-stroke: underneath, flush
Observe the relevant oper-
ating instructions for the
proximity sensors.
18930d_9
Adjust the switch lugs 2
and 3 via the elongated
holes until the proximity
sensors switch reliably.
Tighten the screws 5
.
Comply with the permissible
tightening torque.
1
2
3
4
5
6
1
4
1.2 Nm _ 10 %
7
7
6
5
2
5
6
3
U
8
8
O
8
Y
X
3
5
0.8 Nm
_ 10 %
0.8 Nm
_ 10 %
2
5
Y
X
Y
X
7
8
A


Produkt Specifikationer

Mærke: Festo
Kategori: Ikke kategoriseret
Model: EAPR-E11-30

Har du brug for hjælp?

Hvis du har brug for hjælp til Festo EAPR-E11-30 stil et spørgsmål nedenfor, og andre brugere vil svare dig