Festo PEV-1/4-WD-LED-24 Manual

Festo Ikke kategoriseret PEV-1/4-WD-LED-24

Læs gratis den danske manual til Festo PEV-1/4-WD-LED-24 (3 sider) i kategorien Ikke kategoriseret. Denne vejledning er vurderet som hjælpsom af 11 personer og har en gennemsnitlig bedømmelse på 4.6 stjerner ud af 6 anmeldelser. Har du et spørgsmål om Festo PEV-1/4-WD-LED-24, eller vil du spørge andre brugere om produktet?

Side 1/3
PEV-1/4-WD-LED-24
Angled plug socket
Festo SE & Co. KG
Ruiter Straße 82
73734 Esslingen
Germany
+49 711 347-0
www.festo.com
Assembly instructions
8189936
2023-12
[8189938]
8189936
Translation of the original instructions
© 2024 all rights reserved to Festo SE & Co. KG
1 Applicable Documents
All available documents for the product
èwww.festo.com/sp.
2 Safety
2.1 Safety instructions
Before working on the product: Switch off the power supply, ensure that it is off
and secure it against being switched on again.
2.2 Intended use
The angled plug socket is a plug connector that can be assembled and connects
the pressure switch PEV-1/4-B(-OD), PEV-1/4-SC-OD or PEV-1/4-A- SW27-B-OD
with a controller.
2.3 Training of qualified personnel
Work on the product may only be carried out by qualified personnel who can
evaluate the work and detect dangers. The qualified personnel are trained in
electrical engineering.
3 Additional information
Contact the regional Festo contact if you have technical problems
èwww.festo.com.
Accessories and spare parts èwww.festo.com/catalogue.
4 Product Range Overview
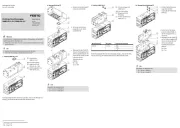
4.1 Scope of delivery
1 2 3
4
5
6
Fig.1
1
Pressure screw (1x)
2
Washer (1x)
3
Seal (1x)
4
Central screw (1x)
5
Housing (1x)
6
Contact holder (1x)
with screw terminals,
LEDgreen, LEDyellow
4.2 Not in scope of delivery
7 8
Fig.2
7
Pressure switch (1x)
PEV-1/4-B(-OD),
PEV-1/4-SC-OD
or PEV-1/4-A-SW27-B-OD
8
Cable (1x)
5 Contact assignment
Pin allocation Pin Connection
1 Operating voltage
2 N/C contact
3 N/O contact
4 LED
Earthing
Tab. 1: Contact assignment
Electrical connec-
tion1
Field device side
Circuit diagram Electrical connec-
tion2
Controller side
Tab. 2: Circuit diagram
LED green Yellow LED Meaning
green
light
off Measured relative pressure is below the threshold value.
off yellow
light
Measured relative pressure is above the threshold value.
Tab. 3: Switching status indication
6 Assembly
6.1 Preparation
4
5
Fig.3
Screw the central screw out of the housing .4 5
5
6
Fig.4
Press the contact holder out of the housing .6 5
1 2 3
5
Fig.5
1. Unscrew the pressure screw .1
2. Remove the washer and the seal from the housing .2 3 5
6.2 Assembling
1 2 3
5
8
Fig.6
1. Push the pressure screw , the washer and the seal onto the1 2 3
cable .8
2. Run the cable through the housing .8 5
6
7
Fig.7
Plug the contact holder onto the pressure switch . Note the orientation6 7
of the contacts.
8
6
Fig.8
1. Strip the cable by 40mm.8
2. Strip 5mm of insulation from the conductors. Use wire ferrules with flexible
wires.
3. Guide the conductors into the screw terminals of the contact holder .6
Tighten the screws of the screw terminals. Tightening torque:0.2Nm±20%
8
6
7
5
Fig.9
1. Run the cable through the housing .8 5
2. Do not cover the hole for the central screw.
3. Plug the housing on the pressure switch with the contact holder .5 7 6
4
Fig.10
Tighten the central screw . Tightening torque:0.55Nm±10%4
1 2 3
5
Fig.11
1. Push the seal , the washer and the pressure screw into the3 2 1
housing .5
2. Tighten the pressure screw . Tightening torque:0.3Nm±20%1


Produkt Specifikationer

Mærke: Festo
Kategori: Ikke kategoriseret
Model: PEV-1/4-WD-LED-24

Har du brug for hjælp?

Hvis du har brug for hjælp til Festo PEV-1/4-WD-LED-24 stil et spørgsmål nedenfor, og andre brugere vil svare dig