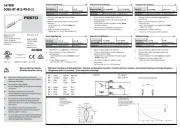
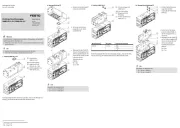
Festo SDE5 Manual


Læs gratis den danske manual til Festo SDE5 (4 sider) i kategorien Ikke kategoriseret. Denne vejledning er vurderet som hjælpsom af 15 personer og har en gennemsnitlig bedømmelse på 4.5 stjerner ud af 8 anmeldelser. Har du et spørgsmål om Festo SDE5, eller vil du spørge andre brugere om produktet?

Side 1/4
SDE5
Pressure sensor
Festo AG & Co. KG
Ruiter Straße 82
73734 Esslingen
Germany
+49 711 347-0
+49 711 347-2144
service_interna-
tional@festo.com
www.festo.com
Instructions| Operating
8110091
2019-06f
[8110093]
8110091
Translation of the original instructions
© 2023 all rights reserved to Festo SE & Co. KG
1 About this document
1.1 Further applicable documents
All available documents for the product
èwww.festo.com/pk.
2 Safety
2.1 General safety instructions
Only use the product in original status without unauthorised modifications.
Only use the product if it is in perfect technical condition.
Observe labelling on the product.
Condensation, oil mist, foreign matter and other contaminants in the com-
pressed air can damage the product. Only use media in accordance with the
specifications Technical data.è
This product can generate high frequency interference, which may make it nec-
essary to implement interference suppression measures in residential areas.
2.2 Intended use
The SDE5 is intended for pressure monitoring of gaseous media in piping systems
or terminal equipment in industry.
2.3 Training of qualified personnel
Installation, commissioning, maintenance and disassembly should only be con-
ducted by qualified personnel.
2.4 Area of application and approval
The information in this section, in combination with the UL marking on the
product, must be observed in order to ensure compliance with the certification
conditions of Underwriters Laboratories Inc. (UL) for USA and Canada. Observe
the following information in English by UL:
In determining the acceptability of the combination, the following details should
be examined:
The mounting suitability shall be determined in the end-use.
These devices shall be mounted in an enclosure having adequate strength and
thickness.
Devices should be used within its recognized ratings as specified under section
RATINGS.
Devices have to be supplied from:
A Class 2 power source or Class 2 transformer in accordance with UL1310 or
UL1585, or
An isolating device such that the maximum open circuit voltage potential
available to the circuit is not more than 30 Vdc and the current is limited to a
value not exceeding 8 amperes measured after 1 minute of operation, or
A suitable isolating source in conjunction with a fuse in accordance with
UL248. The fuse shall be rated max. 3.3 A and be installed in the 30 Vdc
power supply to the device in order to limit the available current.
Note that, when more than one power supply or isolating device is used, connec-
tion in parallel is not permitted.
The devices have not been investigated for field-wiring.
The suitability should be determined in the end-use application.
UL approval information
Product category code NRNT2 (USA) and NRNT8 (Canada)
File number E253738
UL approval information
Considered standards UL 508, 17th edition, C22.2 No.14-05
UL mark
Tab. 1: UL approval information
3 Further information
Accessories èwww.festo.com/catalogue.
Spare parts èwww.festo.com/spareparts.
4 Service
Contact your regional Festo contact person if you have technical questions
èwww.festo.com.
5 Product overview
5.1 Configuration
5.1.1 Product design
1
2
3
4
5
Fig. 1: Product design SDE5
1 Electrical connection
2LED indicator (continuous trans-
mission of the LED indicator
through fibre-optic cable)
3Connection 2 for compressed air
or vacuum
4Connection 1 for compressed air
or vacuum
5 Edit button (not on SDE5-...X)
MS series service unit component with pressure sensor SDE5
The pressure sensor SDE5 on the series MS service unit component is already
permanently attached and pneumatically connected in the delivery status.
1
2
3
Fig. 2: SDE5 installed on the MS series
service unit component
1 Edit button
2LED indicator (continuous trans-
mission of the LED indicator
through fibre-optic cable)
3Electrical connection
MS series service unit component Attached pressure sensor
MS4/6-...-AD7 SDE5-D10-O-...-P-M8
MS4/6-...-AD8 SDE5-D10-C-...-P-M8
MS4/6-...-AD9 SDE5-D10-O3-…-P-M8
MS4/6-...-AD10 SDE5-D10-C3-...-P-M8
Tab. 2: Assignment of service unit component MS and attached pressure sensor
5.1.2 LED display
LED Meaning
LED illuminated
(yellow)
SDE5-...-P/-N-... (switching output): pressure p > switching pressure
LED off SDE5-...-P/-N-... (switching output): pressure p < switching pressure
LED flashes quickly
(yellow)
Teach procedure
LED Meaning
LED flashes slowly
(yellow)
Only SDE5-...-FP: display and setting of the switching function
LED illuminated
(green)
Only SDE5-...-V (analogue output): ready status (RUN mode)
Tab. 3: Meaning of the LED indicator
5.2 Function
5.2.1 Functional principle
The SDE5 converts pneumatic pressure values into a voltage proportional to the
pressure. Depending on the design of the pressure sensor, the voltage signal is
converted into a digital switching signal (SDE5-...-P-.../SDE5-...-N-..) or amplified
for an analogue output (SDE5-...-NF-...-V).
The monitored pressure values record either the relative pressure or the differen-
tial pressure (SDE5-...-Z-...).
SDE5 with switching output: when the switching point is reached, the pressure
sensor closes or opens a circuit.
The SDE5 is available with different switch/teach functions . The switching func-
tion is preset ex works and can only be changed for the SDE5-...-FP-... .
6 Mounting
6.1 Mount SDE5 with wall bracket
NOTICE
Accumulation of condensate in the product can impair its functionality.
Install the product in such a way that condensate from the compressed air lines
cannot collect in the product.
Mounting several wall brackets
1
2
1. Push the dovetail of the wall bracket into the connecting groove of the next
wall bracket (push away the strap).
2. Fasten first and last wall bracket with 2screws each ( 4mm).Æ
If more than 3 wall holders are being used: mount every second wall holder
with 2screws each.
1
2
3. Press SDE5 into the wall bracket.
Ä4 snap latches engage audibly.
Individual mounting
To make it easier to see the LED light, break out the strap of the wall bracket
when mounting individually.
7 Installation
7.1 Pneumatic installation
Push-in connector
Fig. 3: Push-in connector
Push-in connector at one end
Mount the hose to connection 1.
Push-in connector at both ends
1. Check pressure conditions.
With the pressure sensor for differential pressure (SDE5-...-Z-...), the higher
pressure must be applied to port 1 (differential pressure = p1 - p2).
2. Mount the hoses to connection 1 and 2.
7.2 Electrical installation
WARNING
Risk of injury due to electric shock.
For the electric power supply, use only PELV circuits that ensure a reliable
electric disconnection from the mains network.
Observe IEC60204-1/EN60204-1.
1. Use signal lines that are shorter than 30m.
2. Configure binary outputs according to the wiring èTab. 4 Pin allocation.
Tightening torque for the union nut at the plug connector: max. 0.3Nm
Pin Wire colour1) Allocation Plug
1 Brown (BN) Operating voltage
+24VDC
M8, 3-pin
4 Black (BK) Switching output A (Out
A) or analogue output
3 Blue (BU) 0V
1) When using the connecting cable as per Accessories.
Tab. 4: Pin allocation
Circuit diagrams
Cable connection Plug connection
SDE5-...-P-...-K SDE5-...-P-...-M8
BN
BK
BU
RL
+24 V
0 V
P
PNP
SDE5-...-N-...-K SDE5-...-N-...-M8
BN
BK
BU
RL
1
4
3
+24 V
0 V
P
NPN
BN
BK
BU
RL
1
4
3
+24 V
0 V
P
NPN
Tab. 5: Circuit diagrams for switching output
Cable connection Plug connection
SDE5-...-V-...-K SDE5-...-V-...-M8
BN
BK
BU
RL
+24 V
0 V
P
U
Tab. 6: Circuit diagrams analogue output
8 Commissioning
NOTICE
Voltage interruption during the storage process will make the product unusable.
After teaching, the values are written to the internal memory. If the save process is
aborted due to power interruption, the transfer process to the memory cannot be
completely carried out and the device becomes unusable.
Ensure power supply for at least 10seconds after teaching.
èFig. 4 shows an overview of the possible settings and displays. The activities
are described in the subsequent sections.


Produkt Specifikationer

Mærke: Festo
Kategori: Ikke kategoriseret
Model: SDE5

Har du brug for hjælp?

Hvis du har brug for hjælp til Festo SDE5 stil et spørgsmål nedenfor, og andre brugere vil svare dig