Festo VABB-P3-1 Manual


Læs gratis den danske manual til Festo VABB-P3-1 (2 sider) i kategorien Ikke kategoriseret. Denne vejledning er vurderet som hjælpsom af 18 personer og har en gennemsnitlig bedømmelse på 5.0 stjerner ud af 9.5 anmeldelser. Har du et spørgsmål om Festo VABB-P3-1, eller vil du spørge andre brugere om produktet?

Side 1/2
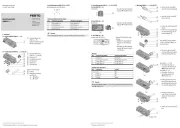
Montageanleitung (de)
737 575/ 2008-08NH
†‡
Abdeckplatte
VABB-P3-1
Festo SE & Co. KG
Postfach
D-73726 Esslingen
++49/(0)711/347-0
www.festo.com
1. Teileliste
12804d_1
1 Abdeckplatte (1x)
VABB-P3-1
2 Schraube (6x)
M3x14 (Torx T10)
3 Dichtung
(aufgeklebt)
Bestimmungsgemäß dient die Abdeckplatte 1 zur Abdeckung der Abluft-
kanäle am Proportional-Wegeventil VPWP-… (B).
Vorsicht
Verletzungsgefahr durch unkontrollierte Bewegungen von Bauteilen!
Vor der Montage bzw. Demontage:
Stellen Sie sicher, dass im strom- und drucklosen Zustand montiert wird.
2. Demontage
12804d_2
Entfernen Sie die montierte
Komponente (A) vom Pro-
portional-Wegeventil (B).
3. Montage
12804d_3
Platzieren Sie die Abdeck-
platte 1 auf den offenen Ab-
luftkanälen des Proportional-
Wegeventils (B).
Drehen Sie die Schrauben 2
fest, mit einem TORX-
Schraubendreher T10. Hal-
ten Sie das zulässige An-
ziehdrehmoment ein.
12804d_4
Drehen Sie die Blindstop-
fen (C) aus den Abluftan-
schlüssen 3 und 5 (D) he-
raus.
Drehen Sie in die Abluft-
anschlüsse 3 und 5 (D) des
Ventils (B) wahlweise fol-
gendes:
Schalldämpfer, z.B. U-1/8-B
Verschraubungen für
Schläuche mit ausreichen-
den Querschnitten
(z. B. für gefasste Abluft)
Proportional-Wegeventil Gewinde (D)
VPWP-4/6 G1/8
VPWP-8 G1/4
Wählen Sie bitte das entsprechende Zubehör aus unserem Katalog
www.festo.com/catalogue.
A
B
2
1
3
B
2
1
0,7 Nm _ 10%
B
C
D
Assembly instructions (en)
737 575/ 2008-08NH
†‡
Cover plate
VABB-P3-1
Festo SE & Co. KG
Postfach
D-73726 Esslingen
++49/(0)711/347-0
www.festo.com
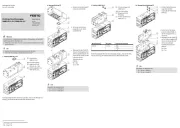
1. Parts list
12804d_1
1 Cover plate (1x)
VABB-P3-1
2 Screw (6x)
M3x14 (Torx T10)
3 Seal
(glued)
The cover plate has been designed for covering the exhaust channels on 1
the proportional directional control valve VPWP-…(B).
Caution
There is a danger of injury due to uncontrolled movements of components!
Before assembly or disassembly:
Make sure that assembly is carried out when the device is disconnected
from the power and compressed air supplies.
2. Disassembly
12804d_2
Remove the assembled
component (A) from the
proportional directional
control valve (B).
3. Assembly
12804d_3
Place the cover plate 1 on
the open exhaust channels
of the proportional
directional control valve (B).
Tighten the screws 2 with a
TORX screwdriver size T10.
Maintain the permitted
tightening torque.
12804d_4
Unscrew the blanking plug
(C) from the exhaust
connections 3 and 5 (D).
Screw into the exhaust
connections 3 and 5 (D) of
valve (B) the following:
silencer, e.g. U-1/8-B
screw connectors for tubing
with sufficient cross section
(e.g. for ducted exhaust)
Proportional directional
control valve
Threads (D)
VPWP-4/6 G1/8
VPWP-8 G1/4
Please select the appropriate accessories from our catalogue
www.festo.com/catalogue.
A
B
2
1
3
B
2
1
0.7 Nm _ 10%
B
C
D


Produkt Specifikationer

Mærke: Festo
Kategori: Ikke kategoriseret
Model: VABB-P3-1

Har du brug for hjælp?

Hvis du har brug for hjælp til Festo VABB-P3-1 stil et spørgsmål nedenfor, og andre brugere vil svare dig