ROBERT H. PETERSON CO. • 14724 East Proctor Avenue • City of Industry, CA 91746
INSTALLER: Leave these instructions with consumer.
CONSUMER: Retain for future reference.
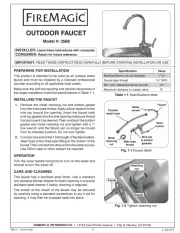
Fig. 1-2 Tighten retaining nut
PREPARING FOR INSTALLATION
This product is intended to be used as an outdoor water
faucet and must be installed by a licensed professional
plumber according to all applicable local codes.
Make sure the sink top opening and vertical clearances in
the target installation meet the specifi cations in Table 1-1.
1. Remove the metal retaining nut and bottom gasket
from the male pipe thread. Apply silicon sealant to the
sink top around the opening. Insert the faucet (with
sink top gasket) into the sink opening male pipe thread
fi rst and orient it as desired. Then re-attach the bottom
gasket and metal retaining nut and tighten with a 1"
box wrench until the fi xture can no longer be moved
from its intended position. Do not over tighten.
2. Connect one end of the 1 foot length of fl exible braided-
steel hose to the male pipe fi tting at the bottom of the
faucet. Then connect the other end to the water source.
Use Tefl on tape or other sealant as required.
Turn the valve handle horizontal to turn on the water and
vertical to turn the water off.
This faucet has a stainless steel fi nish. Use a standard
non-abrasive kitchen cleaner for basic cleaning or a quality
stainless-steel cleaner if heavy cleaning is required.
The screen at the mouth of the faucet may be removed
by carefully using a standard screwdriver to pry it out for
cleaning. It may then be snapped back into place.
Table 1-1 Specifi cations table
Nominal fi xture cut-out diameter 1
Min. vert. clearance above counter 12"
Maximum distance to supply valve 8"
IMPORTANT: READ THESE INSTRUCTIONS CAREFULLY BEFORE STARTING INSTALLATION OR USE