Fujitsu fi-4340C Manual

Fujitsu Scanner fi-4340C

Læs nedenfor 📖 manual på dansk for Fujitsu fi-4340C (114 sider) i kategorien Scanner. Denne guide var nyttig for 13 personer og blev bedømt med 4.5 stjerner i gennemsnit af 2 brugere

Side 1/114
Operator's Guide
fi-4340C Image Scanner
P3PC-E832-01EN
ix
This section describes precautions to follow when installing the scanner.
To ensure the longevity and proper functioning of your scanner, do not install the
scanner in the places and environments described below.
Warning
Important warnings employed in this manual are as follows.
Do not damage the power cable.
Use only the specified power cable or extension cable.
Use only at the specified voltage. Ensure that too many cables
are not connected to the same socket.
Wipe all dust from plug on the power supply cable.
Damage to the power cable may result in fire or electric shock.
Do not place heavy objects on, pull, tightly bend, twist, heat, or
modify the power cable.
Do not use the power cable or socket if it is damaged, or if the plug
is loose in the socket.
Use only the specified power cable or extension cable. Use of other
cables may result in electric shock or malfunction.
Use at other than the specified voltage may result in fire or electric
shock.
Ensure that too many cables are not connected to the same socket.
Using a dry cloth, remove all dust on the metal components of the
plug, and on all surfaces to which the metal components are
attached.
Presence of dust may result in fire or electric shock.
Precautions
xi
Do not open the equipment without good reason.
Always remove the plug from the socket before fitting or
removing optional equipment.
Do not move the equipment alone.
Switch power OFF if the equipment is damaged.
Do not place in wet areas.
The equipment contains high-voltage components, and should not
be dismantled or modified.
Switch the equipment power supply OFF, and remove the plug from
the socket, before fitting or removing optional equipment in
accordance with the specified procedure.
Grip the plug to remove the power cable from the socket.
Never move the equipment alone.
If the equipment is dropped, or covers etc. have been damaged,
switch power supply OFF, remove the plug from the socket, and call
your dealer or maintenance service center.
Do not place the scanner where liquid spills may occur.
1-2
These high precision components must be handled carefully.
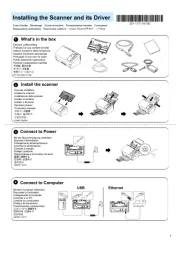
Confirm that all the components shown in the following figure have been received.
If any component is missing, please contact your sales agent.
NOTICE
The CD-ROMs contains “Cleaning and Maintenance” and this manual.
Checking the Components
1-3
This section shows the exterior view and assemblies of the scanner. This section also provides the name
of each part and describes its functions.
Units
NOTICE
The transport lever should be switched to the operating position when the scanner is to be used. Refer to
Chapter2 "Placing the Transport Lever (page 2-3)" for details.
Units and Assemblies
1-5
Assemblies
1-8
2-2
This section describes how to check the labels.
Position of two labels
Label A (Example; your actual label may differ)
Indicates regulations and standards to which this scanner conforms.
Label B (Example; your actual label may differ)
Indicates product information as follows:
Confirm of the Manufacturing Labels
2-6
4-2
This section describes how to turn the power On.
Press the “I” side of the power switch. The power turns On and the green Power lamp at the operator panel
lights.
Turning the Power On
4-3
This section describes how to wake up the
scanner from the Low Power Mode.
To wake up the Scanner, simply press a button,
set the papers on the ADF, or send a command to
scan from the host computer.
NOTICE
As an E
NERGY STAR® partner, PFU Limited declares that this scanner meets the ENERGYSTAR® guidelines
for energy efficiency.
Waking up the Scanner from the Low Power Mode
4-8
Set the guides so that there is a small
clearance between the document edges and
the guides. Load the document face down on
the ADF paper chute and adjust the guides
to the document width.
NOTICE
Squeeze the guide lever to free the guides.
Do not load document stacks thicker than 8 mm.
Set the guides so that they touch the document sides.
After the read command is issued from the host system and the documents are read, scanned
documents are expelled into the stacker for removal.
4-9
Open the document cover.
Place the document face down and
align the top left corner with the
reference mark.
Slowly close the Document cover.
Issue the read command from the host system.
CAUTION
Do not look directly at the light source during the read operation.
Loading Documents on the Document bed
4-10
Open the Document cover to an angle of approximately
90 degrees, and lift up the cover (in the direction of the
arrow) to remove it.
Place the document face down on the Document bed.
Issue the read command from the host system.
After the read operation, remove the document, re-attach the Document cover and close it gently.
CAUTION
Do not look directly at the light source during the read operation.
Loading Documents Larger than the Document bed
4-11
Open the Document cover.
Place the book face down on the Document bed.
Issue the read command from the host system. Keep
the cover open for the reading operation.
NOTICE
Do not move the book during the read operation.
CAUTION
Do not look directly at the light source during the read operation.
Reading a Page from a Thick Book
5-6
With the ADF, perforations in the shaded areas may cause errors. If you must read data from such a paper,
use the Document bed:
Areas not to be Perforated
5-7
The shaded area in the Figure below should have paper grounding color (white) or drop-out color. If not,
turn the white level following Off when reading.
Grounding Color Areas
6-2
The displays for the Paper and Abrasion counters are shown below:
Simultaneously press the and arrow buttons for at least 1 second, to switch to the Life counter
panel display as shown below:
NOTICE
When the counter value is 0, no number is displayed.
Counter Function
Paper counter When the
button is pressed
for at least 1 sec-
ond
The paper counter counts the number of scanned sheets from
the start of reading until Paper Empty or an error is detected.
The counter is automatically reset at the start of reading. The
counter is used for checking the number of the sheets scanned
in one batch.
When the
button is pressed
for at least 1 sec-
ond
This counter increments each time a document is scanned. It is
not initialized until the power is turned off. The counter can be
used, for example, for checking the number of sheets that have
been scanned in one day.
Abrasion counter The abrasion counter counts the accumulated number of scanned sheets. This
counter increments every 10 sheets. It is useful to check the cleaning cycle or the
parts replacement cycle. How to reset it is described in Chapter7 "SETUP MODE".
Life Counter Keeps a cumulative count of the number of scans made after shipping.
This counter increments by 1 after every 10 scans and may be used to estimate of
the device's remaining scan life.
Counter Display


Produkt Specifikationer

Mærke: Fujitsu
Kategori: Scanner
Model: fi-4340C

Har du brug for hjælp?

Hvis du har brug for hjælp til Fujitsu fi-4340C stil et spørgsmål nedenfor, og andre brugere vil svare dig


Scanner Fujitsu Manualer
Scanner Manualer

Nyeste Scanner Manualer