Gemini 7350 Manual


Læs gratis den danske manual til Gemini 7350 (10 sider) i kategorien Bilalarm. Denne vejledning er vurderet som hjælpsom af 12 personer og har en gennemsnitlig bedømmelse på 3.6 stjerner ud af 6.5 anmeldelser. Har du et spørgsmål om Gemini 7350, eller vil du spørge andre brugere om produktet?

Side 1/10
GEMINI 7350
7350 7350US
Car
...................................
...........................................................
INSTALLATION CERTIFICATE
The undersigned,qualified installer,attests to have personally fitted the here described Vehicule
Security Following the manufacturer instructions.
Signature.............................................................
Type of product :
By :
Sold on :
by GEMINI TRADING S.r.l. Via Luigi Galvani 12 21020 Bodio Lomnago (VA) Italia
Tel. +39 0332 943211 - Fax +39 0332 948080
E-mail : info@gemini-alarm.com
INTRODUCTION
GEMINI 7350.
The system 7350 is a self-powered compact alarm unit that includes sensors and siren. It's suitable to be
fitted on vehicles equipped with 12 Volts battery (negative ground).
DESCRIPTION
- Remote controlled compact alarm unit with self-powered electronic siren and dynamic code transmission
(433.92MHz).
- Direction lights outputs.
- Additional siren negative output.
- Universal central door locking control, electric windows and sunroof control on vehicles equipped with
"Comfort Closing System".
- Doors, boot and bonnet protection.
- External sensors input (Volumetric protection).
- Engine immobilisation (Not available for Belgium model - V.V.3 rules).
- Alarm passive arming with casual re-arming feature and "GARAGE" position.
- LED alarms memory.
- Arming vehicle check.
- Diagnostic Mode feature (for the installer).
- Remote controlled "PANIC" alarm / "ELECTRIC BOOT" release. (Selectable).
The alarm system is equipped with two codified remote transmitter and two codified electronic keys.
FITTING INSTRUCTIONS (reserved to the installer).
- The alarm unit must be installed in the bonnet in vertical position, with the connectors turned upwards, in a
place far from heat sources, water ingress, ignition control unit and coils.
- Be sure that the alarm wiring harness is far from high-tension wires of the original vehicle plant in order to
avoid interference which could generate a wrong functioning.
- On vehicles equipped with catalytic muffler the engine immobilisation must be carried out on fuel pump.
- If the alarm system is equipped with a ultrasonic module (ref. 5123), the ultrasonic cells must be fitted at
the top of each windscreen pillar, far from the ventilation or air-conditioning outputs and pointed at each
opposite diagonal corner.
- Connect the positive power supply of the alarm unit to the positive pole of the vehicle battery and connect
the negative power supply of the alarm unit to the negative pole of the battery or to the vehicle frame.
- IMPORTANT : In order to obtain the properly working of the passive arming / door protection it's
mandatory to connect the GREEN-BROWN wire to the door pin switches.
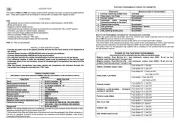
DIP SWITCHES PROGRAMMING TABLE
1 ON Panic alarm ON / Boot release OFF
1 OFF Panic alarm OFF / Boot release ON
2 ON Central Door Locking Pulse 6"
2 OFF Central Door Locking Pulse 0,5"
3 ON Central Door Locking Comfort Pulse ON ( 25" )
3 OFF Central Door Locking Comfort Pulse OFF
4 ON Alarm Passive Arming ( with casual re-arming ) ON *
4 OFF Alarm Passive Arming OFF *
5 ON Diagnostic Mode ON
5 OFF Diagnostic Mode OFF ( Normal Mode )
6 ON Remote Controls / Electronic Keys self-learning ON
6 OFF Remote Controls / Electronic Keys self-learning OFF ( Normal Mode )
IMPORTANT : THE DIP-SWITCHES MUST BE SELECTED BEFORE TO CONNECT THE POWER
SUPPLY TO THE ALARM UNIT. ( SEE ALSO "DIP-SWITCHES RE-SETTING" CHAPTER).
* For the Belgium market unit it's no possible to switch OFF the Alarm Passive Arming feature ( V.V.3 Rules ).
DIP-SWITCHES RE-SETTING.
It's possible to change the dip-switch settings, after the power supply connection , by the following instructions :
1. Disarm the alarm unit by a remote control / electronic key.
2. Set the dip-switches in order to program the features required.
3. Turn the ignition switch to ON position ( without start the vehicle engine !! ).
4. Insert , for more than 3 seconds, an electronic key in the LED / Socket . To confirm the new dip-switch settings a LED
flash /audible tone will be emitted.
5. Turn the ignition switch to OFF position.
DIAGNOSTIC MODE ( final check for the installer or quick check during after sale service ).
This feature allows to the installer / service personnel to quickly verify the correct working of the alarm unit and the
electrical connections to the vehicle plant.
DIAGNOSTIC SET-ON.
To enter in the Diagnostic Mode it's possible to follow two different ways :
1. During the installation of the alarm system : Set on the dip-switch no. 5 before to connect the power supply of the alarm
unit and then connect the power supply.
2. For post-installation services : Set on the dip-switch no. 5 following the instructions described in the "DIP-SWITCHES
RE-SETTING" chapter.
To confirm the diagnostic mode will be emitted four indicator lights flashes / audible tones. At the end of the signalling the
LED and the external module output ( +A / PINK wire) will be switched on.
In this condition it's possible to test each alarm input, and if the external connection and/or the internal alarm unit circuit
works properly an audible tone / indicator lights flash will be emitted each time the input of the alarm system will be
triggered. It's important to have a delay time of 1 second ( or more ) between each alarm input triggering.
In the diagnostic mode it's possible to verify the right working / transmission range of the remote controls by pressing the
push button no.1 of the handsets. If the device works properly an audible tone / indicator lights flash will be emitted.


Produkt Specifikationer

Mærke: Gemini
Kategori: Bilalarm
Model: 7350

Har du brug for hjælp?

Hvis du har brug for hjælp til Gemini 7350 stil et spørgsmål nedenfor, og andre brugere vil svare dig


Bilalarm Gemini Manualer
Gemini

Gemini 7463 Manual

23 September 2024
Gemini

Gemini 7090 Manual

20 September 2024
Gemini

Gemini 7502 Manual

15 September 2024
Gemini

Gemini 823 Manual

22 August 2024
Gemini

Gemini 7673 Manual

14 August 2024
Gemini

Gemini 861 Manual

13 August 2024
Gemini

Gemini 822 Manual

13 August 2024
Gemini

Gemini 862 Manual

12 August 2024
Gemini

Gemini 5260TN Manual

12 August 2024
Gemini

Gemini 7501 Manual

12 August 2024

Bilalarm Manualer

Nyeste Bilalarm Manualer