W W W . G O L D E N A G E P R O J E C T . C O M
Congratulations on choosing the Golden Age Project PRE-73 Jr MKII microphone preamplifier!
The PRE-73 Jr MKII is a one-channel vintage style microphone- and instrument preamplifier. The signal path
uses only discrete components like resistors, capacitors and transistors. The in- and output is transformer
balanced, using two different transformers, each one optimized for its purpose. This is the way audio compo-
nents were built before integrated circuits became available.
Integrated circuits are small and cheap and widely used in most modern designs. It is clear though that audio
components built with modern technology doesn´t always provide the best perceived sound quality or the type
of character that the modern user desires.
On the contrary, the subjective sound quality delivered by vintage equipment is often prefered over the one
delivered by modern units, a situation that is even more obvious now when music is recorded with clean-
sounding digital audio equipment.
This is the reason why so many vintage audio components are cloned and produced again and also why the
vintage originals are often very expensive on the second hand market.
The circuit used in the is similar to the preamp section in the classical 1073 module with a PRE-73 Jr MKII
corresponding sound character that is warm, punchy, sweet and musical. These classic characteristics have
been heard on countless recordings through the years and it is a versatile sound that works very well on
most sound sources and in most genres.
The essence of this sound is now available at a surprisingly low cost, making it available to nearly everyone.
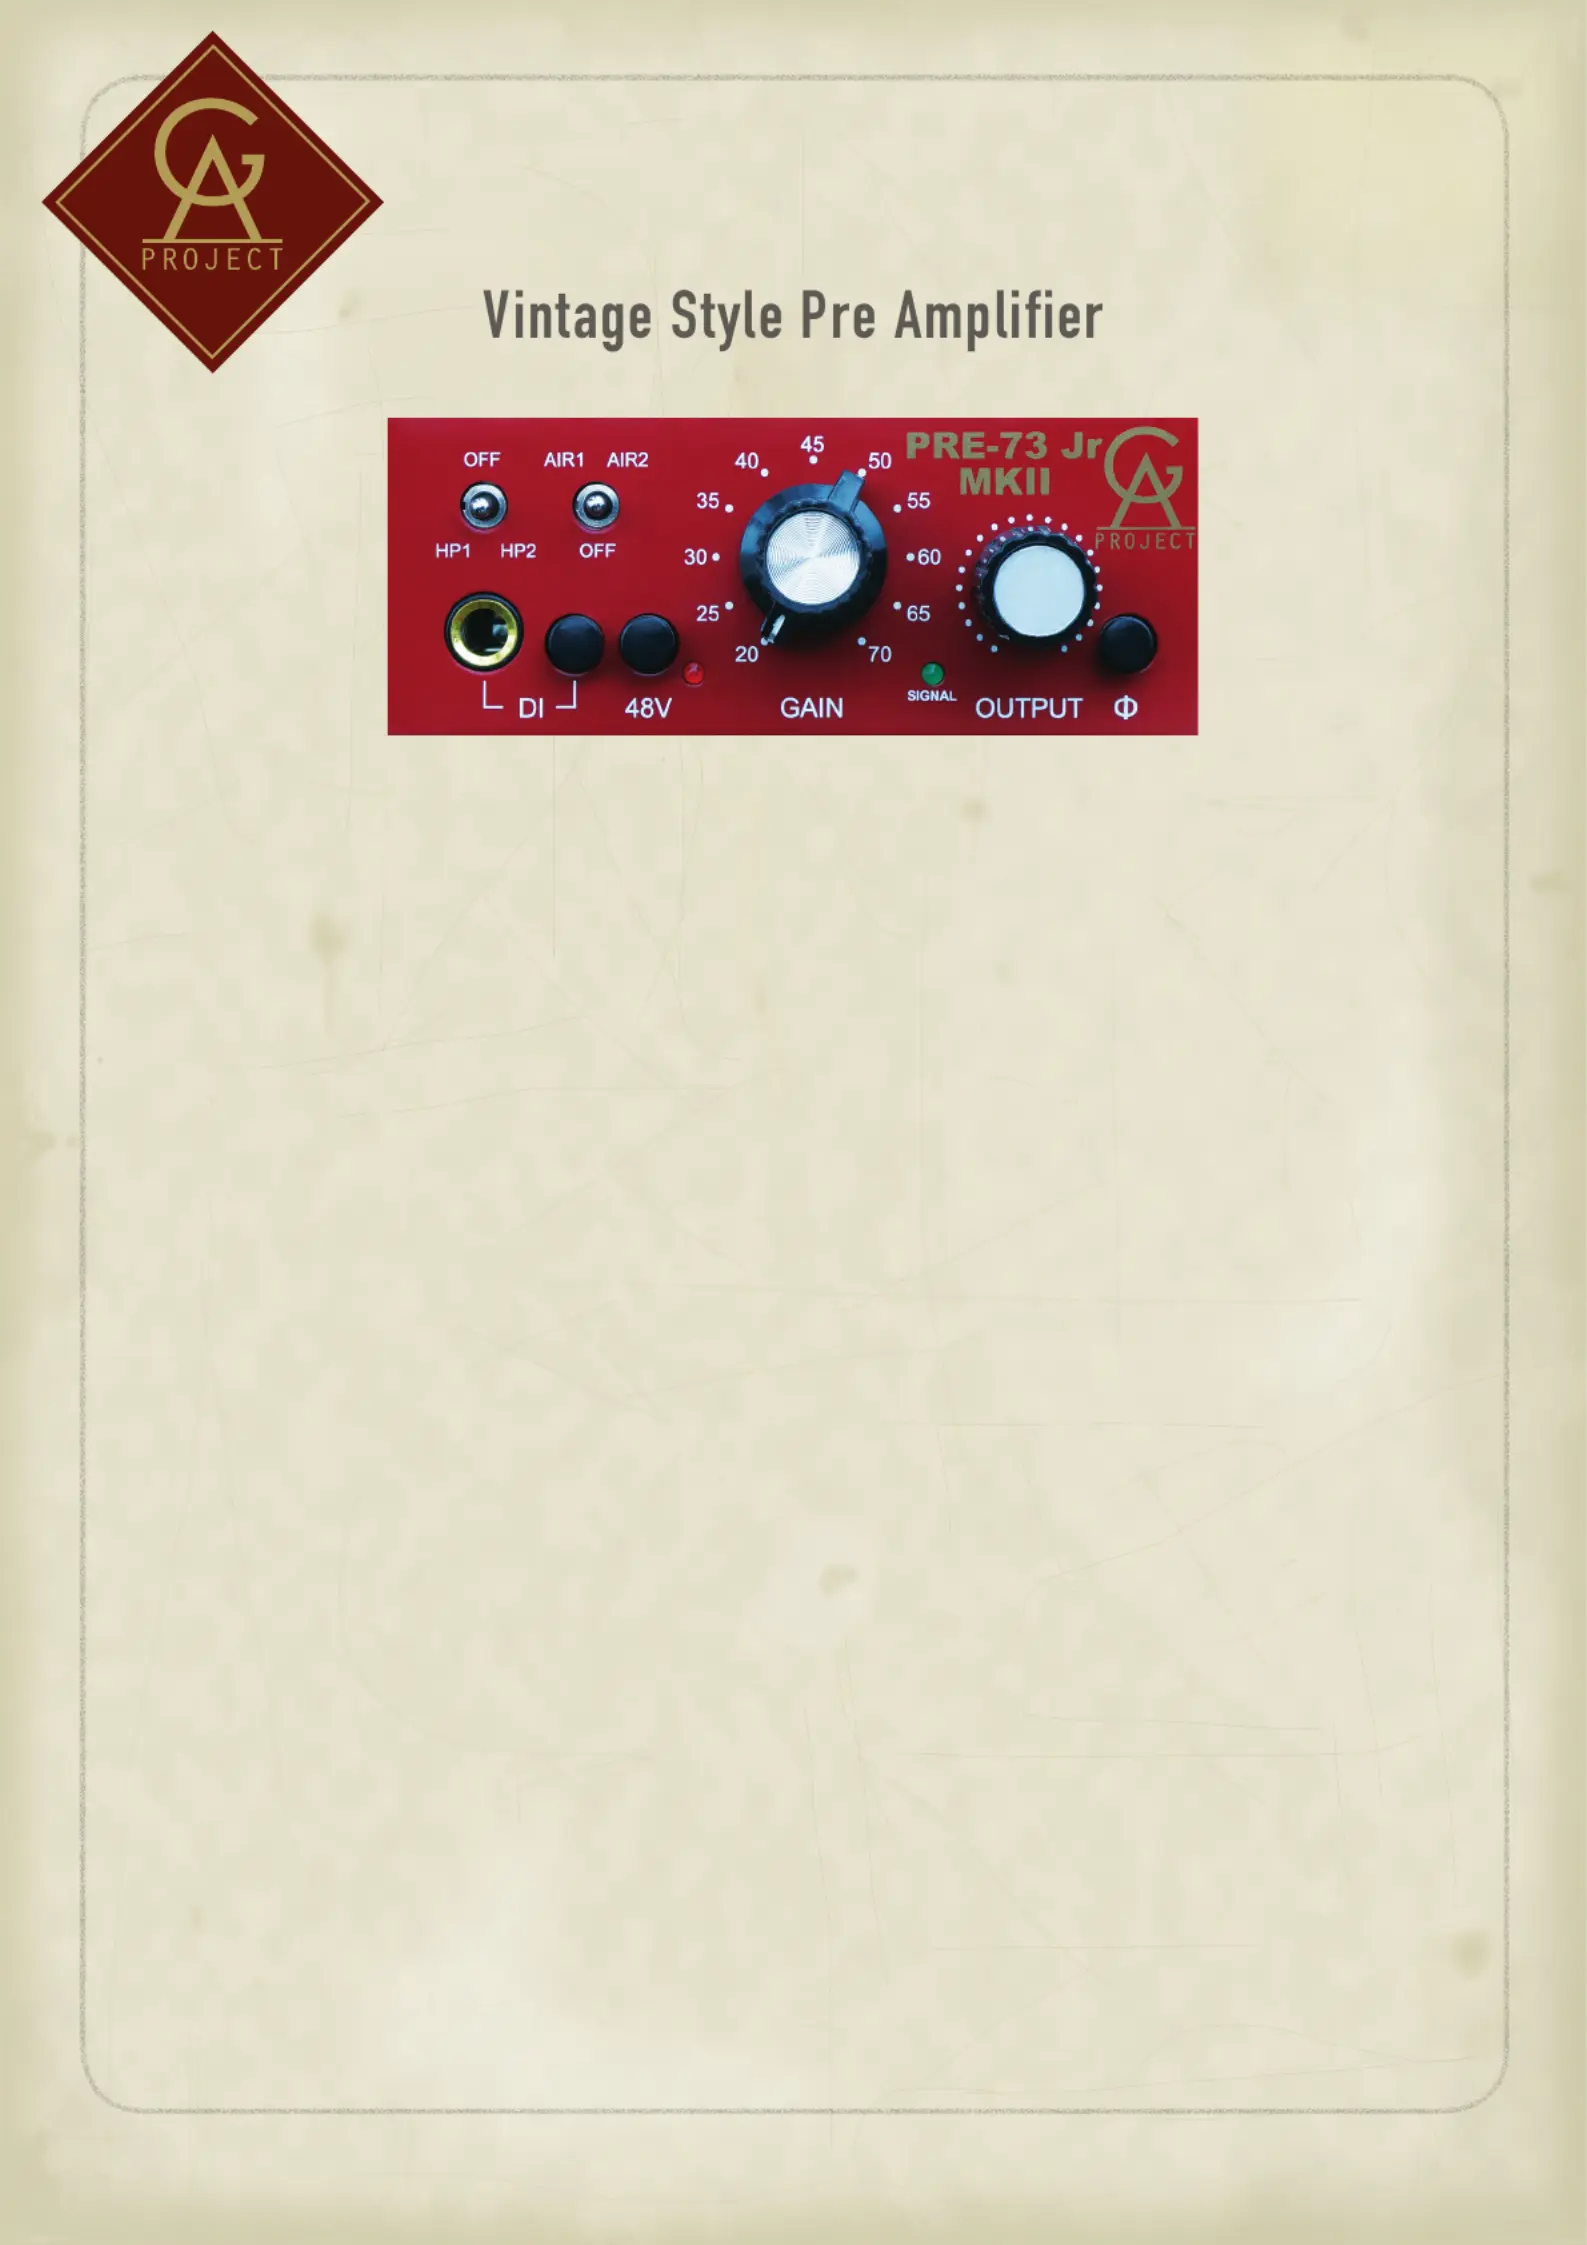
- Vintage Style class-A electronics. No integrated circuits in the signal path. No surface mount components.
- GAIN switch range 20 - 70 dB.
- Selectable two position high frequency AIR boost eq, 3 or 6 dB @ 30 kHz.
- Selectable 6 dB/octave two frequency high pass filter at around 40 (HP1) and 170 Hz (HP2).
- Switchable phantom power and absolute phase.
- A high-impedance instrument input for any sound module, electric guitar or bass.
- A simple signal LED indicator.
- The output level control makes it possible to do fine gain adjustments and also to overload the main gain stage for more character and then
lower the signal to a suitable level before the output stage.
- Combo XLR/TRS input jack and separate output XLR and TRS jacks for flexible connections.
- Insert jack for inserting EQ´s and other units.
- The circuit board is prepared for the Carnhill input transformer.
- External power supply to avoid interaction with the audio circuits and transformers.
- The small format makes it possible to mount 4 units in our 19-inch rack kit, the UNITE MKII.
- A solid build quality that will last many years of normal use.