Operation Manual
คูมือการใชงาน
HITACHI PUMP
เครื่องปมนํ้าฮิตาชิ
MODEL : WT-P100GX2, 150GX2, 200GX2, 250GX2, 300GX2
MODEL : WT-P350GX, 400GX
MODEL : WM-P150GX2, 200GX2, 250GX2, 300GX2, 350GX2
Thank you for choosing to use the HITACHI pump and supporting the various products of the company.
ขอขอบคุณที่ทานไดกรุณาไววางใจเลือกใชผลิตภัณฑปมนํ้าฮิตาชิ และใหการสนับสนุนผลิตภัณฑตางๆ ของบริษัท ดวยดีเสมอมา
• Please read and understand the manual before using the pump.
กรุณาอานทําความเขาใจคูมือการใชงานฉบับนี้ใหเขาใจกอนการใชงาน
• Please keep this manual after reading it along with the warranty card as reference.
หลังจากอานทําความเขาใจดีแลว กรุณาเก็บคูมือใชงานนี้ไวพรอมกับใบรับประกันเปนสําคัญตอไป
CONTENTS
สารบัญ
• Precautions on safe use
ขอควรระวังในการใชงานอยางปลอดภัย .............................. 2
• Part names and structure
ชื่อชิ้นสวนและโครงสราง .................................................... 5
• Caution
ขอควรระวัง ....................................................................... 6
• Specifications
ขอมูลจําเพาะ ..................................................................... 7
• Inspection before installation
การตรวจเช็คกอนการติดตั้ง ................................................ 8
• Precautions before installation
ขอควรระวังกอนการติดตั้ง .................................................. 9
• Installation routing the harness
การติดตั้งเดินสายไฟ ........................................................ 10
• How to install the pump
วิธีการติดตั้งปมนํ้า ........................................................... 11
• Problems and repairs
ปญหาและการแกไข ......................................................... 12
• Wiring diagram
วงจรไฟฟา ....................................................................... 12
• In the installation of the pump it is necessary to implement it suitably, so the buyer should ask the seller to install it.
ในการติดตั้งปมนํ้าจําเปนตองดําเนินการใหเหมาะสม ดังนั้นใหรองขอการติดตั้งจากรานคาจําหนาย ดําเนินการติดตั้งตอไป /
• Should you want to know the name of the pump model, please read it from the nameplate on the body or the case.
ในการตรวจสอบชื่อรุนของปมนํ้าที่ทานเลือกซื้อไปนั้น โปรดเช็คจากแผนปายบริเวณตัวถัง หรือฝาครอบปม
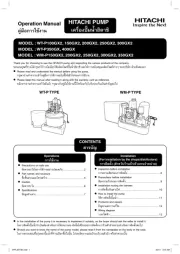
WT-P TYPE WM-P TYPE
Operations
การใชงาน Installation
(For installation by the shops/distributors)
การติดตั้ง สําหรับรานคา ตัวแทนจําหนาย ( / )
3PPL067465.indd 1
3PPL067465.indd 1
3PPL067465.indd 1
3PPL067465.indd 13PPL067465.indd 1 8/2/11 9:45 AM
8/2/11 9:45 AM
8/2/11 9:45 AM
8/2/11 9:45 AM8/2/11 9:45 AM