Hobby Zone Conscendo S RTF Manual
Hobby Zone
Radiostyret legetøj
Conscendo S RTF
Læs gratis den danske manual til Hobby Zone Conscendo S RTF (23 sider) i kategorien Radiostyret legetøj. Denne vejledning er vurderet som hjælpsom af 38 personer og har en gennemsnitlig bedømmelse på 4.6 stjerner ud af 19.5 anmeldelser. Har du et spørgsmål om Hobby Zone Conscendo S RTF, eller vil du spørge andre brugere om produktet?
Side 1/23

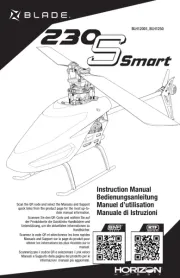
Instruction Manual • Bedienungsanleitung • Manuel d’utilisation • Manuale di Istruzioni
®
Conscendo® S

Conscendo™ S
®
EN
2
Safety Precautions and Warnings
As the user of this product, you are solely responsible for operating in a manner
that does not endanger yourself and others or result in damage to the product
or the property of others.
• Always keep a safe distance in all directions around your model to avoid
collisions or injury. This model is controlled by a radio signal subject to
interference from many sources outside your control. Interference can cause
momentary loss of control.
• Always operate your model in open spaces away from full-size vehicles, traf-
fi c and people.
• Always carefully follow the directions and warnings for this and any optional
support equipment (chargers, rechargeable battery packs, etc.).
• Always keep all chemicals, small parts and anything electrical out of the
reach of children.
• Always avoid water exposure to all equipment not specifi cally designed and
protected for this purpose. Moisture causes damage to electronics.
• Never place any portion of the model in your mouth as it could cause serious
injury or even death.
• Never operate your model with low transmitter batteries.
• Always keep aircraft in sight and under control.
• Always use fully charged batteries.
• Always keep transmitter powered on while aircraft is powered.
• Always remove batteries before disassembly.
• Always keep moving parts clean.
• Always keep parts dry.
• Always let parts cool after use before touching.
• Always remove batteries after use.
• Always ensure failsafe is properly set before fl ying.
• Never operate aircraft with damaged wiring.
• Never touch moving parts.
Charging Warnings
CAUTION: All instructions and warnings must be followed exactly. Mis-
handling of Li-Po batteries can result in a fi re, personal injury, and/or property
damage.
• Never leave charging batteries unattended.
• Never charge batteries overnight.
• By handling, charging or using the included Li-Po battery, you assume all
risks associated with lithium batteries.
• If at any time the battery begins to balloon or swell, discontinue use im-
mediately. If charging or discharging, discontinue and disconnect. Continuing
to use, charge or discharge a battery that is ballooning or swelling can result
in fi re.
• Always store the battery at room temperature in a dry area for
best results.
• Always transport or temporarily store the battery in a temperature range of
40–120º F (5–49º C). Do not store battery or aircraft in a car or direct sun-
light. If stored in a hot car, the battery can be damaged or even
catch fi re.
• Always charge batteries away from fl ammable materials.
• Always inspect the battery before charging and never charge dead or dam-
aged batteries.
• Always disconnect the battery after charging, and let the charger cool
between charges.
• Always constantly monitor the temperature of the battery pack
while charging.
• ONLY USE A CHARGER SPECIFICALLY DESIGNED TO CHARGE LI-PO BATTER-
IES. Failure to charge the battery with a compatible charger may cause fi re
resulting in personal injury and/or property damage.
• Never discharge Li-Po cells to below 3V under load.
• Never cover warning labels with hook and loop strips.
• Never charge batteries outside recommended levels.
• Never attempt to dismantle or alter the charger.
• Never allow minors under the age of 14 to charge battery packs.
• Never charge batteries in extremely hot or cold places (recommended be-
tween 40–120° F or 5–49° C) or place in direct sunlight.
NOTICE
All instructions, warranties and other collateral documents are subject to change at the sole discretion of Horizon Hobby, LLC. For up-to-date product
literature, visit www.horizonhobby.com and click on the support tab for this product.
Meaning of Special Language:
The following terms are used throughout the product literature to indicate various levels of potential harm when operating this product:
NOTICE: Procedures, which if not properly followed, create a possibility of physical property damage AND little or no possibility of injury.
CAUTION: Procedures, which if not properly followed, create the probability of physical property damage AND a possibility of serious injury.
WARNING: Procedures, which if not properly followed, create the probability of property damage, collateral damage, and serious injury OR create a high
probability of superfi cial injury.
WARNING: Read the ENTIRE instruction manual to become familiar with the features of the product before operating. Failure to operate the product
correctly can result in damage to the product, personal property and cause serious injury.
This is a sophisticated hobby product. It must be operated with caution and common sense and requires some basic mechanical ability. Failure to oper-
ate this Product in a safe and responsible manner could result in injury or damage to the product or other property. This product is not intended for use by
children without direct adult supervision. Do not use with incompatible components or alter this product in any way outside of the instructions provided by
Horizon Hobby, LLC. This manual contains instructions for safety, operation and maintenance. It is essential to read and follow all the instructions and warn-
ings in the manual, prior to assembly, setup or use, in order to operate correctly and avoid damage or serious injury.
14+AGE RECOMMENDATION:
Not for children under 14
years. This is not a toy.
WARNING AGAINST COUNTERFEIT PRODUCTS: If you ever need to replace your Spektrum receiver found
in a Horizon Hobby product, always purchase from Horizon Hobby, LLC or a Horizon Hobby authorized dealer to en-
sure authentic high-quality Spektrum product. Horizon Hobby, LLC disclaims all support and warranty with regards,
but not limited to, compatibility and performance of counterfeit products or products claiming compatibility with
DSM or Spektrum.

RTF
Conscendo™ S EN
3
20.5 oz (580 g)
59 inch (1500mm)
39.6 inch (1005mm)
Specifi cations
Transmitter Battery and Charger
Included in the Box
For more information and to register your product online, visit
www.hobbyzonerc.com
Table of Contents
Charging the Flight Battery .............................................................4
Transmitter .....................................................................................4
Transmitter Setup ...........................................................................5
Hi/Low Rate Switch (Dual Rates) .....................................................6
Transmitter and Receiver Binding ....................................................6
Assembly .......................................................................................7
Control horn and servo arm settings ...............................................9
Installing the Flight Battery and Electronic Speed Control (ESC) .......9
Control Direction Test ....................................................................10
Flight Control ................................................................................11
Trimming the Aircraft ....................................................................12
Choose a Flying Field ....................................................................12
Range Test ...................................................................................13
Prefl ight Checklist .........................................................................13
Center of Gravity (CG) ...................................................................14
Flying ...........................................................................................14
Post Flight ....................................................................................16
Post Flight Checklist .....................................................................16
Service of Power Components ......................................................17
Trouble Shooting Guide .................................................................18
AMA National Model aircraft Safety Code ......................................19
Limited Warranty ..........................................................................20
Contact Information ......................................................................21
FCC Information ............................................................................21
Compliance Information for the European Union ............................21
Replacement Parts ........................................................................79
Optional Pats ................................................................................79
AC Adapter
Motor: 370 Brushless outrunner
(PKZ6316) Installed Installed
ESC: Installed Installed18A (PKZ1814)
Servos: (2) Ailerons (PKZ1081),
(2) Rudder and Elevator (PKZ1080) Installed Installed
Receiver: Installed InstalledSPMAR636A
Battery: 2S 1300mAh Li-Po
(EFLB13002S20) Included Included
Battery Charger: DC powered 2S
balancing fast charger (EFLC3125) Included Included
AC Adapter: Included Included (EFLA112)
Transmitter: Spektrum™ DX4e
with full range DSMX® technology Included Required to
Complete
3 X 10mm

RTF
Conscendo™ S EN
5
IMPORTANT: The included AR636 receiver has been
programmed for operation specifi cally in this aircraft.
The programming in this receiver cannot be changed
by the user.
To operate the SAFE system in this aircraft, set up
your optional DSM2/DSMX transmitter using the chart
below.
- SAFE Flight mode is selected using Channel 5
signal (high, middle, low)
- Panic Recovery mode is selected with Channel 6
signal (high, low)
IMPORTANT: A transmitter with a 2-position Channel
5 switch will only allow the use of position 0 or posi-
tion 2 fl ight modes. If possible (refer to your transmit-
ter manual), assign Channel 5 in your transmitter to a
3-position switch to operate all 3 fl ight modes.
Refer to your transmitter’s manual for more informa-
tion about transmitter setup.
Transmitter Setup
Non Computerized Transmitter Setup (DX5e)
Transmitter SAFE mode switch SAFE Flight Modes Supported
Throttle, Aileron, Elevator and Rudder in Normal Position
DX5e
(2pos switch) CH 5 switch 2 Pos Flight Mode
DX5e
(3pos switch) CH 5 switch 3 Pos Flight Mode
Computerized Transmitter Setup
(DX6i, DX6, DX7, DX7S, DX8, DX9 and DX18)
Start all transmitter programming with a blank model (do a model reset), then name the
model.
Set Dual Rates to: HIGH 100%
LOW 70%
DX6i
1. Go to the SETUP LIST MENU
2. Set MODELTYPE: ACRO
3. Set REVERSE: Gear Channel
4. Go to ADJUST LIST MENU
5. Set TRAVEL ADJ: Gear/Fmode (0) 100%; Gear/Fmode (1) 40%
6. Set FLAPS: Norm 100; LAND 100
7. Set MIX 1: ACT; Gear Gear ACT, RATE D 0%; U + 100%, SW MIX,
TRIM INH
Resulting in: The Gear and Mix switches operate the 3 SAFE modes
Gear 0; Mix 0 = Beginner Mode
Gear 1; Mix 0 = Intermediate Mode
Gear 1; Mix 1 = Experienced Mode
The Flap switch operates Panic Recovery:
Position 0=Off, Position 1=On. (not a momentary
switch)
DX7S
DX8
1. Go to the SYSTEM SETUP
2. Set MODEL TYPE: AIRPLAN
3. Set SWITCH SELECT: Change all to INH then TRAINER: AUX1, FLAP:
GEAR
4. Go to the FUNCTION LIST
5. Set SERVO SETUP: Reverse AUX1
Resulting in: Flap/Gyro Switch operates the 3 SAFE modes
-0 Beginner
-1 Intermediate
-2 Experienced
The Trainer/Bind button operates Panic Recovery
DX6
DX7
DX9
DX18
1. Go to the SYSTEM SETUP
2. Set MODEL TYPE: AIRPLANE
3. Set CHANNEL ASSIGN:
click NEXT to go to Channel Input Confi g:
GEAR: B, AUX1: i
4. Go to the FUNCTION LIST
5. Set SERVO SETUP: Reverse AUX1
Resulting in:
Switch B operates the 3 SAFE modes
-0 Beginner
-1 Intermediate
-2 Experienced
The Bind/I button operates Panic Recovery

®
Conscendo™ SEN
6
Transmitter and Receiver
Binding
IMPORTANT: The included receiver has been
programmed for operation only in this aircraft.
The included RTF transmitter should be bound to the
aircraft at the factory, but if you need to re-bind, follow
the binding procedure as shown.
You need to ‘bind’ your chosen Spektrum™ DSM2®/
DSMX® technology equipped aircraft transmitter to the
receiver for proper operation. Please refer to the optional
parts list in this manual or visit www.bindnfl y.com for a
list of compatible transmitters.
Refer to your transmitter instructions for binding to a
receiver.
Please visit www.bindnfl y.com for a complete list of
compatible transmitters.
* The throttle will not arm if the transmitter’s throttle
control is not put at the lowest position. If you encounter
problems, follow the binding instructions and refer to the
transmitter troubleshooting guide for other instructions. If
needed, contact the appropriate Horizon Product
Support offi ce.
6
22
6
4
9Binding Procedure Reference Table
1. Make sure the transmitter is powered off.
BIND PLUG
2. Make sure the transmitter controls are neutral,
the throttle and throttle trim are in the low posi-
tion and the aircraft is immobile.
3. Install a bind plug in the receiver bind port.
4. Connect the fl ight battery to the ESC. Ensure
that the aircraft is upright.The ESC will
produce a series of sounds. One long tone, then
2 short tones confi rm that the LVC is set for the
ESC.
5. The receiver LED will begin to fl ash rapidly.
6. Power on the transmitter while holding the
transmitter bind button or switch. Refer to
your transmitter’s manual for binding button or
switch instructions.
7. When the receiver binds to the transmitter, the
orange bind light on the receiver will turn solid
and the ESC will produce ascending tones. The
tones indicate the ESC is armed, provided the
throttle stick and throttle trim are low enough to
trigger arming.
8. Remove the bind plug from the bind port.
9. Safely store the bind plug (some owners attach
the bind plug to their transmitter using two-part
loops and clips).
The receiver should retain the binding instructions re-
ceived from the transmitter until another binding is done.
The included DSM2/DSMX full range transmitter features
dual rates to allow you to select the amount of travel that
you want from the control surfaces.
Hi/Low Rate Switch (Dual Rates)
Dual Rate High Rate Low Rate
Aileron 100% 70%
Elevator 100% 70%
Rudder 100% 70%

RTF
Conscendo™ S EN
7
Assembly
Installing the Tail
1. Slide the horizontal stabilizer tube ( ) into the hole in A
the rear of the fuselage.
2. Install the 2 piece (left and right) horizontal stabilizer
as shown. Ensure the control horn faces down.
3. Secure the 2 piece tail in place with the 2 included
pieces of tape ( ). Install a piece of tape on the top B
and bottom of each horizontal tail section as shown.
Attaching the Clevis to the
Control Horn
Finish the installation of the tail by connecting the control
rod with the clevis on the tail control horn under the
elevator.
1. Open the clevis and put the pin in the outermost hole
(A) of the control horn.
2. If needed, remove the clevis from the control horn.
- Turn the clevis (as shown) on the control rod (also
called a pushrod).
- Close the clevis onto the control horn and slide the
tube towards the horn to secure the clevis.
Wing Installation
Wing Assembly
1. Slide the left and right wing halves over the wing tube
( ) as shown. A
2. Secure the wing halves together with the wing
bracket ( ).B
A
1
2
A
12
B
1
Clevis Control
Horn
2
A
B

®
Conscendo™ SEN
10
Control Direction Test
Perform the Control Direction Test with the transmitter
SAFE fl ight mode switch set to mode Experienced
(position 2).
Restrain the aircraft so it does not escape your control
while you are testing your transmitter controls.
Move the sticks on the transmitter* to ensure the aircraft
responds as shown.
If your model does not respond as shown, DO NOT FLY!
Refer to the Troubleshooting Guide in this manual for
more information. If you need more assistance, contact
the appropriate Horizon Hobby Product Support depart-
ment.
If the aircraft responds as shown, move the SAFE fl ight
mode switch to mode (position 0) to prepare Beginner
to fl y.
Experienced Mode
E
pe
ri
en
ce
d
Mo
de
CH 5
CH 5
Beginner Mode
* Mode 2 transmitter shown. For Mode 1, Elevator control is on the LEFT stick
and Throttle control is on the RIGHT stick.
Rudder Left
Ailerons Right
Ailerons Left
Up Elevator
(climb)
Down Elevator
(descend)
Rudder Right

RTF
Conscendo™ S EN
13
Range Test
Before each fl ying session, and especially with a new
model, you should perform a range check. The DX4e
incorporates a range testing system. Placing the trans-
mitter in RANGE CHECK mode reduces the output power,
allowing a range check.
1. Power on the transmitter for 5 seconds or more with
the throttle stick and trim low. Plug in the aircraft bat-
tery and keep the aircraft immobile for 5 seconds.
2. Face the model with the transmitter in your normal
fl ying position. Push and hold the BIND/Panic
button while toggling the HI/LO Rate switch four
times. The LEDs will fl ash and the alarm will sound.
The system is in range check mode.
IMPORTANT: You must hold the BIND/Panic button during
the entire range check process. Releasing the button will
exit the range check mode.
3. With the system powered on and the model restrained
on the ground*, stand 28 meters (90 feet) away from
the model.
CAUTION: In some aircraft, when the model is placed
on the ground, the antenna(s) can be within inches
of the ground. Close proximity of the antenna(s) to
the ground can reduce the effectiveness of the range
check. If you experience issues during the range
check, restrain the model on a non-conductive stand
or table up to 2ft (60cm) above the ground, then
range check the system again.
4. Move the transmitter rudder, elevator, aileron and
throttle controls to ensure they operate smoothly at
28 meters (90 feet).
5. If control issues exist, do not attempt to fl y. Refer
to the contact table at the end of the this manual to
contact Horizon Hobby product support. Also, see the
Spektrum website for more information. CAUTION: While holding the aircraft during the Range Test, always keep
body parts and loose items away from the propeller. Failure to do so could cause
personal injury.
2
3
2
1 3
4
1
Keep upright, im-
mobile and out of
the wind for
5 seconds
Prefl ight Checklist 9
1. Find a safe and open area.
2. Charge fl ight battery.
3. Install fully charged fl ight battery in aircraft.
4. Make sure linkages move freely.
5. Perform Control Direction Test.
6. Perform SAFE Control Direction Test.
7. Perform a Range Check.
8. Plan fl ight for fl ying fi eld conditions.
9. Set a fl ight timer for 8-10 Min.
10. Have fun!
90 ft
(28 m)

RTF
Conscendo™ S EN
15
Wind 0–12 mph
(0–19km/h)
Slowly advance the throttle.
No additional stick inputs are
required.
Sl
ow
ly
a
dv
an
ce
t
he
t
hr
ot
tl
e
50% throttle
Full throttle Reduced throttle
Full throttle
R d d th ttl
50% throttle
Takeoff
Hand Launch
Hand launch in Beginner mode for fi rst fl ights. Get help
to hand launch your aircraft so you can concentrate on
fl ying. If you must hand launch the aircraft alone, hold the
model in your dominant hand and the transmitter in
your other hand. An optional neck strap (SPMP610, sold
separately) can help you hold the transmitter.
Easy Launching
Launching is easier
in Beginner mode.
Increase the throttle
to 100%. and launch
the aircraft. When the
aircraft is up where you
want to fl y, decrease the
throttle to 50–60%.
In fl ight
In Beginner mode, when properly trimmed, your
aircraft will climb at full throttle without use of the eleva-
tor stick.
1. Let the aircraft climb at full throttle, into the wind,
until the aircraft gets about 300 feet (91m) above the
ground, then decrease the throttle to half (50%).
2. Make small and gentle stick movements to see how
the aircraft responds.
Flying with the nose pointed toward you is one of the
hardest things to do when learning to fl y. Practice fl ying in
large circles high off the ground.
If you lose orientation of the aircraft, release both sticks
and the aircraft will return to level fl ight. If in Intermediate
or Experienced Mode, switch to Beginner Mode and then
release both sticks.
CH 5
Beginner Mode

RTF
Conscendo™ S EN
17
Service of Power Components
CAUTION: Always disconnect the fl ight battery from
the model before removing the propeller.
Disassembly
1. Remove the 2 screws ( ) and spinner-prop unit ( ) A B
from the motor.
2. Carefully remove the 4 screws ( ) and cowling ( ) C D
from the fuselage.
3. Remove the 4 screws ( ) and x-mount ( ) with the E F
motor from the fuselage.
4. Disconnect the motor connectors from the ESC con-
nectors.
5. Remove the 4 screws ( ) to separate the X-mount G
from the motor ( ).H
6. Assemble in reverse order.
Assembly Tips
• Correctly align and connect the motor wire colors with
the ESC wires.
• Ensure that all screws are tight and secure.
Service and Repair
NOTICE: If you replace the receiver, install the new re-
ceiver in the same orientation and manner as the original
receiver or damage may result.
Thanks to the Z-Foam™ material in the wing and
fuselage of this aircraft, repairs to the foam can be made
using virtually any adhesive (hot glue, regular CA (cyano-
acrylate adhesive), epoxy, etc).
A
AB
D
C
EF
H
G
Produkt Specifikationer
Mærke: | Hobby Zone |
Kategori: | Radiostyret legetøj |
Model: | Conscendo S RTF |
Har du brug for hjælp?
Hvis du har brug for hjælp til Hobby Zone Conscendo S RTF stil et spørgsmål nedenfor, og andre brugere vil svare dig
Radiostyret legetøj Hobby Zone Manualer
29 August 2024
29 August 2024
29 August 2024
29 August 2024
29 August 2024
29 August 2024
29 August 2024
29 August 2024
29 August 2024
29 August 2024
Radiostyret legetøj Manualer
- Parrot
- FlySky
- Little Tikes
- E-flite
- XciteRC
- Traxxas
- Ninco
- Tamiya
- Velleman
- Maverick
- Sharper Image
- PowerBox Systems
- Carrera
- Axial
- Sky Rider
Nyeste Radiostyret legetøj Manualer
25 Juli 2025
25 Juli 2025
25 Juli 2025
19 Juli 2025
17 Juli 2025
16 Juli 2025
16 Juli 2025
11 Juli 2025
11 Juli 2025
10 Juli 2025