DE
EN FR
ES IT
Anweisungen zum Gebrauch
Instructions for use
Livret d’instructions d’utilisation
Instrucciones de uso
Istruzioni per l’uso
DE
Liebe Kundin, lieber Kunde,
wir freuen uns, dass du dich für unseren Hoberg Insekten-
Baldachin entschieden hast. Bei Fragen zum Produkt kontak-
tiere gern unseren Kundenservice über die Website:
www.hoberg-shop.de
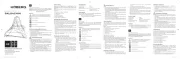
Symbole
Gefahrenzeichen: Dieses Symbol zeigt Verletzungs-
gefahren an. Die dazugehörenden Sicherheitshin-
weise aufmerksam durchlesen und an diese halten.
30 °C Pfl egeleicht
Nicht bleichen
Nicht im Trommeltrockner trocknen
Nicht bügeln
Nicht mit Lösungsmitteln behandeln
Bestimmungsgemäßer Gebrauch
• Das Produkt eignet sich als Insektenschutz für Betten zum
Anbringen an der Decke.
• Das Produkt ist für den privaten Gebrauch, nicht für eine
gewerbliche Nutzung bestimmt.
• Nutze das Produkt nur wie in den Anweisungen zum Ge-
brauch beschrieben. Jede weitere Verwendung gilt als be-
stimmungswidrig.
Sicherheitshinweise
■ Kinder und Tiere von Folien und Polybeuteln fernhalten. Es
besteht Erstickungsgefahr!
■ Zum Aufhängen das mitgelieferte Befestigungsmaterial
verwenden. Bei Unsicherheit, ob das mitgelieferte Befes-
tigungsmaterial für die Decke geeignet ist, im Fachhandel
beraten lassen.
■ Vor dem Bohren sicherstellen, dass hinter der beabsichtig-
ten Bohrstelle keine Rohre oder Leitungen verlaufen.
■ Das Produkt von Wärmequellen, offenem Feuer sowie
scharfen und spitzen Gegenständen fernhalten.
■ Das Produkt regelmäßig auf Beschädigungen über prüfen.
Nicht benutzen, wenn das Produkt beschädigt ist.
■ Zum Reinigen keine ätzenden oder scheuernden Reini-
gungsmittel verwenden. Diese können das Produkt be-
schädigen.
Lieferumfang
Überprüfe den Lieferumfang auf Vollständigkeit und die
Bestandteile auf mögliche Transportschäden. Verwende das
Produkt bei Schäden nicht, sondern kontaktiere den Kunden-
service.
Nimm eventuelle Folien, Aufkleber oder Transportschutz vom
Produkt ab.
1 x Insektenschutz-Netz mit Spannring
1 x Deckenhaken mit Dübel
3 x Klebehaken
9 x Ersatz-Klebestreifen
1 x Aufbewahrungsbeutel
1 x Anweisungen zum Gebrauch
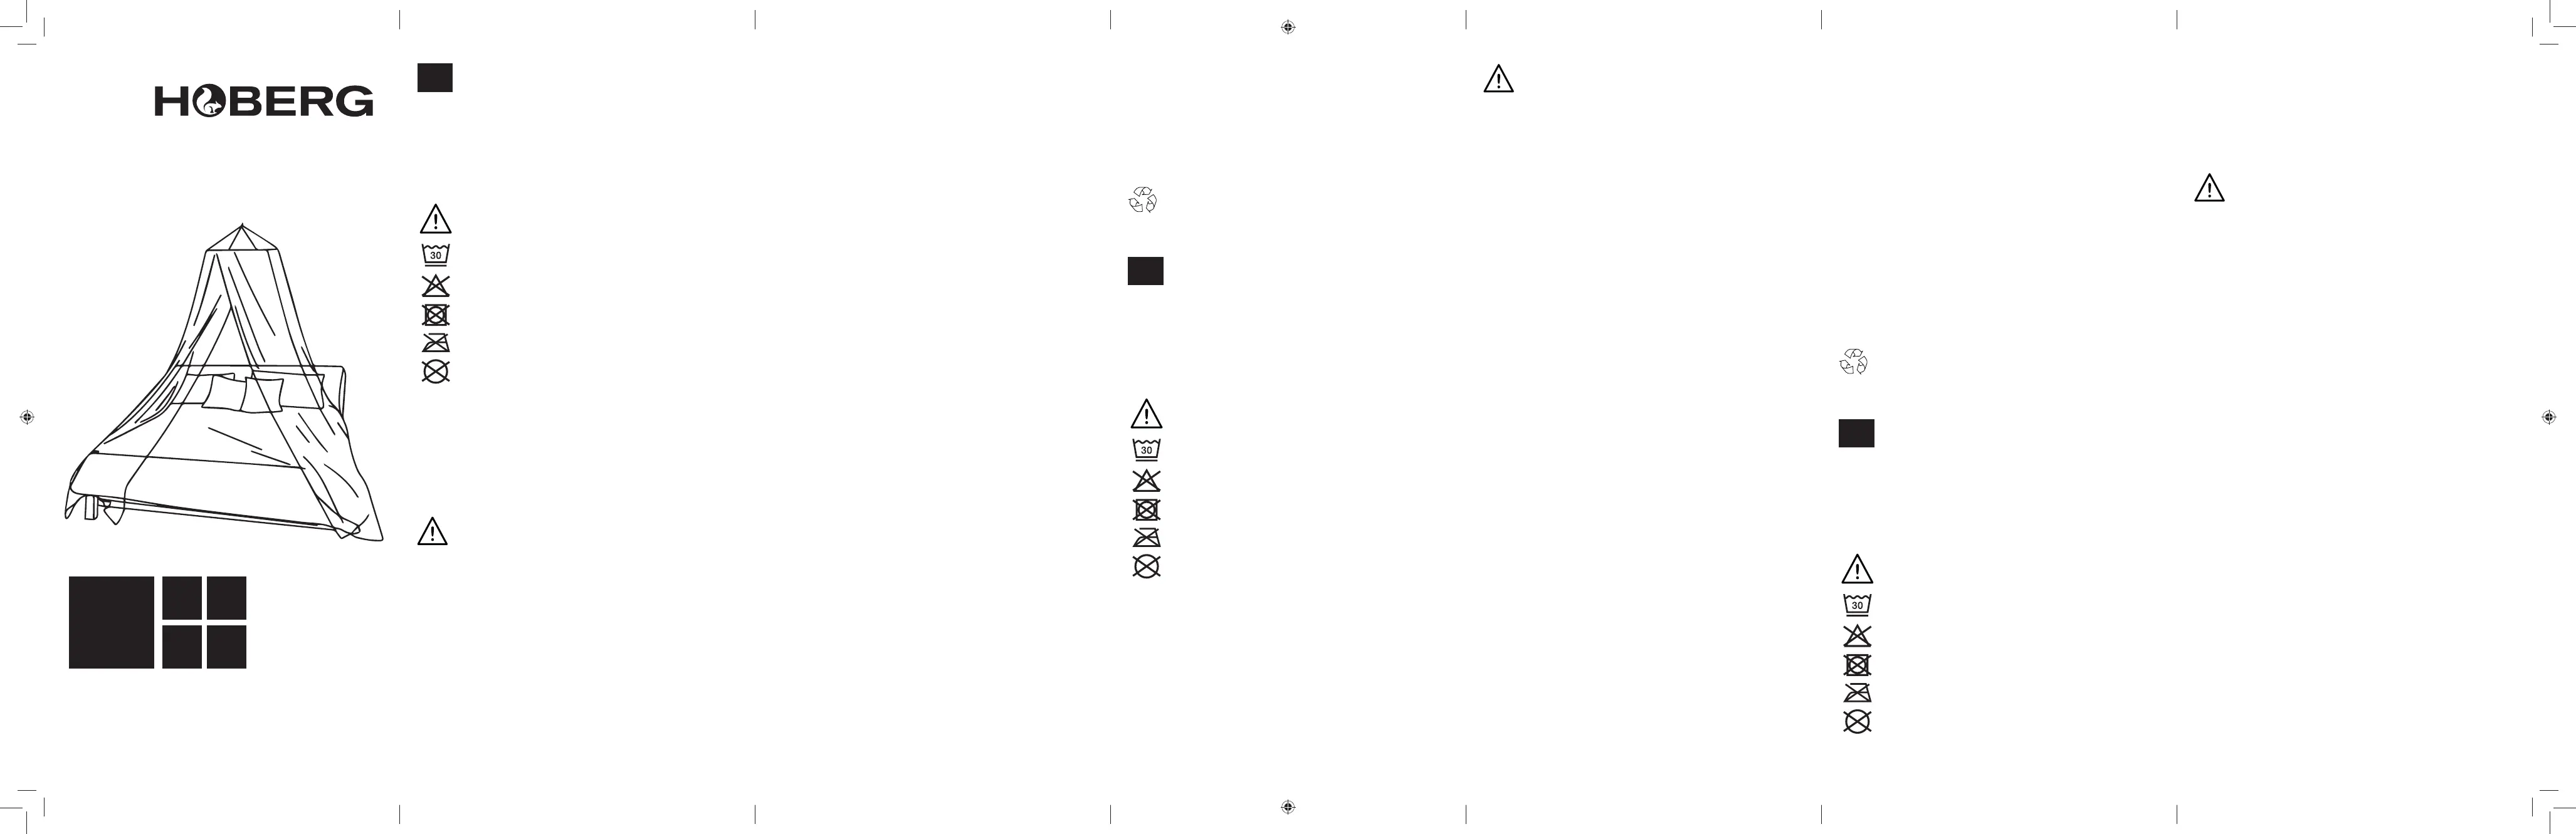
Anbringung und Benutzung
Das Insektenschutz-Netz kann entweder an einem in der De-
cke festgeschraubten oder einem Klebehaken angebracht
werden. Die Klebehaken können wieder von der Decke ent-
fernt werden und eignen sich dadurch ideal für temporäre An-
wendung, z. B. auf Reisen.
1. Das Insektenschutz-Netz sollte mittig über dem Bett ange-
bracht werden. Markiere
die Stelle an der Decke.
2. Klebe den Klebehaken an die markierte Stelle bzw. bohre
ein Loch.
3. Setze bei der Benutzung des Deckenhakens den Dübel in
das gebohrte Loch und schraube den Haken in die Decke.
4. Hänge das Insektenschutz-Netz mit der Öse in den Haken
ein.
5. Stecke das Insektenschutz-Netz auf allen Seiten des
Bettes unter die Matratze.
Reinigung und Aufbewahrung
• Vor der Reinigung, muss der Spannring entfernt werden:
– Im Bund, in dem sich der Spannring befi ndet, ist eine
Öffnung. Schiebe das Verbindungsstück bis zu dieser
Öffnung;
– Ziehe ein Ende des Spannringes aus dem Verbindungs-
stück;
– Entnimm den Spannring aus dem Netz.
• Wasche das Insektenschutz-Netz unter Beachtung der An-
gaben des Waschlabels. Wasche es mit ähnlichen Farben
und verwende keinen Weichspüler.
• Setze den Spannring nach dem Waschen wieder in das In-
sektenschutz-Netz ein, hänge es auf und lasse es an der
Luft vollständig trocknen. Benutze keinen Haartrockner.
• Verstaue das Produkt bei Nichtgebrauch im Aufbewah-
rungsbeutel trocken an einem für Kinder und Tiere unzu-
gänglichen Ort.
INSEKTEN-
BALDACHIN
Produktdaten
Artikelnummer: 03092
Modellnummer: TS-25103
Maße Insektenschutz-Netz: ca. 12 m Breite, 2,5 m Länge
Ø Spannring: 60 cm
ID Anweisungen: Z 03092 M HO V1 0421 dk
Entsorgung
Entsorge das Verpackungsmaterial umweltgerecht und
führe es der Wertstoffsammlung zu.
Wenn das Produkt nicht mehr benutzt werden kann,
entsorge auch dieses umweltgerecht.
EN
Dear Customer,
We are delighted that you have chosen our Hoberg insect
baldachin. If you have any questions about the product,
please contact our customer service department via the web-
site: www.hoberg-shop.de
Symbols
Danger symbol: This symbol indicates dangers of
injury. Read through the associated safety notices
carefully and follow them.
30 °C Easy-care
Do not bleach
Do not dry in a tumble dryer
Do not iron
Do not treat with solvents
Intended Use
• The product is suitable for attachment to the ceiling as
insect protection for beds.
• The product is for personal use only and is not intended for
commercial applications.
• The product should only be used in the manner described
in the instructions for use. Any other use is deemed to be
improper.
Safety Notices
■ Keep children and animals away from fi lms and plastic
bags. There is a danger of suffocation!
■ Use the fastening material supplied to hang up the product.
If you are unsure whether the fastening material which is
supplied is suitable for the ceiling, seek advice from a spe-
cialist stockist.
■ Before drilling, ensure that there are no pipes or cables be-
hind the intended drilling point.
■ Keep the product away from heat sources, naked fl ames as
well as sharp and pointed objects.
■ Check the product for any damage on a regular basis. Do
not use the product if it is damaged.
■ Do not use any corrosive or abrasive cleaning agents to
clean the product. These may cause damage to the product.
Items Supplied
Check the items supplied for completeness and the compo-
nents for possible transport damage. If you fi nd any damage,
do not use the product but contact our customer service de-
partment.
Remove any possible fi lms, stickers or transport protection
from the product.
1 x insect protection net with clamping ring
1 x ceiling hook with anchor
3 x adhesive hooks
9 x replacement adhesive strips
1 x storage bag
1 x instructions for use
Attachment and Use
The insect protection net can be attached either on a hook
which is fi rmly screwed in the ceiling or an adhesive hook. The
adhesive hooks can be removed from the ceiling again and are
thus ideally suited to temporary use, e. g. when travelling.
1. The insect protection net should be attached centrally over
the bed. Mark
the location on the ceiling.
2. Stick the adhesive hook on the marked location or drill a
hole.
3. When the ceiling hook is used, place the anchor in the
drilled hole and screw the hook into the ceiling.
4. Hang the insect protection net with the lug into the hook.
5. Tuck the insect protection net under the mattress on all
sides of the bed.
Cleaning and Storage
• The clamping ring must be removed prior to cleaning:
– In the collar containing the clamping ring there is an
opening. Slide the connecting piece up to this opening;
– Pull one end of the clamping ring out of the connecting
piece;
– Remove the clamping ring from the net.
• Wash the insect protection net by following the instructions
on the washing label. Wash it with similar colours and do
not use fabric softener.
• After washing, insert the clamping ring back into the insect
protection net, hang it up and allow it to dry completely in
the air. Do not use a hair dryer.
• When the product is not in use, store it in its storage bag in
a dry place that is not accessible to children and animals.
Product Data
Article number: 03092
Model number: TS-25103
Dimensions
of insect protection net:
approx. 12 m wide, 2.5 m long
Ø of clamping ring: 60 cm
ID of instructions: Z 03092 M HO V1 0421 dk
Disposal
Dispose of the packaging material in an environmentally
friendly manner so that it can be recycled.
If the product can no longer be used, it should also be
disposed of in an environmentally friendly way.
FR
Chère cliente, cher client,
Nous vous félicitons d’avoir fait l’acquisition de notre mousti-
quaire baldaquin Hoberg. Pour toute question concernant ce
produit, vous pouvez contacter notre service après-vente sur
le site Internet: www.hoberg-shop.de
Symboles
Symbole de danger: ce symbole signale les risques
de blessures. Lire et observer attentivement les
consignes de sécurité correspondantes.
30 °C synthétiques
Ne pas décolorer
Ne pas sécher au sèche-linge à tambour
Ne pas repasser
Ne pas traiter avec des solvants
Utilisation conforme
• Le produit, qui s’applique au plafond, est approprié à
l’usage en tant que moustiquaire de lit.
• Ce produit est conçu pour un usage domestique, non pro-
fessionnel.
• Le produit s’utilise uniquement tel qu’indiqué dans les ins-
tructions d’utilisation. Toute autre utilisation est considérée
comme non conforme.
Consignes de sécurité
■ Ne pas laisser les sacs en polyéthylène et les fi lms en plas-
tique à la portée des enfants ou des animaux. Risque de
suffocation!
■ Pour la suspension du produit, utiliser le matériel de fi xation
fourni. S’il n’est pas sûr que le matériel de fi xation fourni soit
bien adapté au plafond, se faire conseiller par un revendeur
spécialisé.
■ Avant de percer, s’assurer qu’aucun tuyau ou conduite ne
passe derrière l’emplacement prévu.
■ Maintenir le produit éloigné de toute fl amme, source de
chaleur et objets pointus ou tranchants.
■ Vérifi er régulièrement que le produit ne présente aucun
dommage. Ne pas utiliser le produit s’il est endommagé.
■ Pour le nettoyage, ne pas utiliser d’agents nettoyants cor-
rosifs ou abrasifs qui risqueraient d’endommager le produit.
Composition
Assurez-vous que l’ensemble livré est complet et que les
composants ne présentent pas de dommages imputables au
transport. En cas de dommages, n’utilisez pas le produit et
contactez le service après-vente.
Enlevez du produit les éventuels fi lms protecteurs, adhésifs et
protections de transport.
1 x moustiquaire avec cercle de serrage
1x crochet de plafond avec cheville
3x crochets auto-adhésifs
9 x bandes adhésives de rechange
1 x pochon de rangement
1 x instructions d’utilisation
Pose et utilisation
La moustiquaire peut s’appliquer soit à un crochet vissé au
plafond, soit à un crochet auto-adhésif. Les crochets auto-
adhésifs peuvent s’enlever du plafond et sont donc parfaits
pour une utilisation temporaire, par ex. en voyage.
1. La moustiquaire doit être centrée au-dessus du lit. Repérez
l’endroit correspondant au plafond.
2. Collez le crochet auto-adhésif à l’endroit repéré ou bien
percez-y un trou.
3. En cas d’utilisation du crochet de plafond, insérez la che-
ville dans le trou puis vissez le crochet au plafond.