Hotpoint FA2 840 P IX HA Manual
| Mærke: | Hotpoint |
| Kategori: | Ovn |
| Model: | FA2 840 P IX HA |
| Afrimningsfunktion: | Ingen |
| Vekselstrømsindgangsspænding: | 220 - 240 V |
| Vekselstrømsindgangsfrekvens: | 50 - 60 Hz |
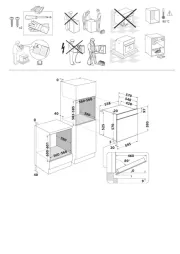
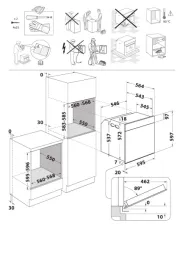
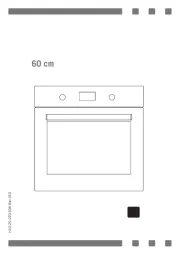
| Bredde: | 595 mm |
| Dybde: | 551 mm |
| Højde: | 595 mm |
| Vægt: | 30350 g |
| Produktfarve: | Rustfrit stål |
| Kontroltype: | Dreje |
| Indbygget skærm: | Ja |
| Strøm: | 16 A |
| Ledningslængde: | 1 m |
| Pakkevægt: | 35000 g |
| Pakkedybde: | 640 mm |
| Pakkebredde: | 670 mm |
| Pakkehøjde: | 650 mm |
| Placering af apparat: | Indbygget |
| Indvendig belysning: | Ja |
| Dørhængsel: | Ned |
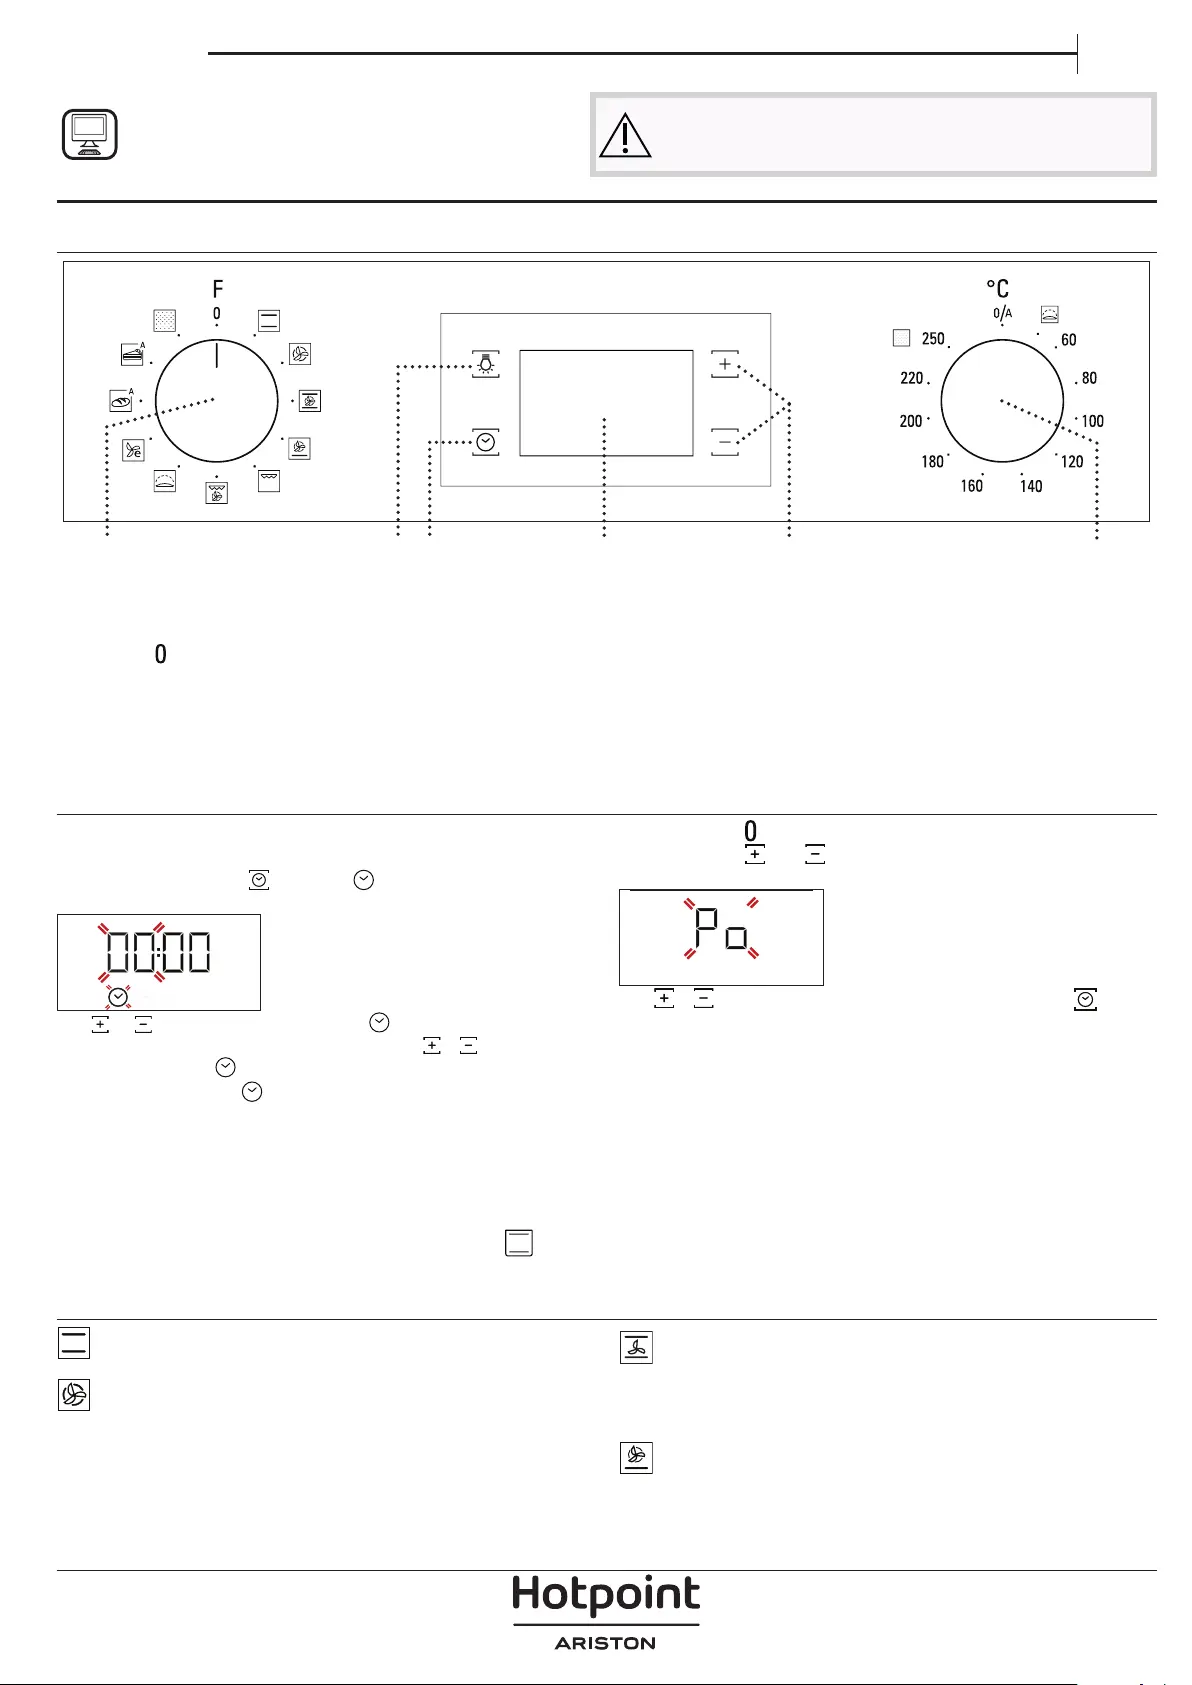
| Integreret ur: | Ja |
| Urtype: | Elektronisk |
| Installationsrum bredde: | 568 mm |
| Installationsrum dybde: | 560 mm |
| Installationsrum højde: | 585 mm |
| Tilsluttet belastning: | 3300 W |
| Grill: | 2200 W |
| Damp madlavning: | Ingen |
| Rotisserie: | Ingen |
| Konvektion madlavning: | Ja |
| Børnesikring: | Ja |
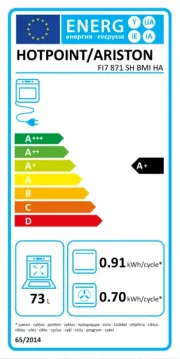
| Energieffektivitetsskala: | A+++ til D |
| Selvrensende: | Ja |
| Installationsrum højde (min.): | 583 mm |
| Kontrolposition: | Top forside |
| Timer type: | Digital |
| Wi-Fi kontrolleret: | Ingen |
| Rengøringstype: | Pyrolyse |
| Antal glasdørpaneler: | 3 |
| Antal gitre: | 1 |
| Ovn - størrelse: | Medium |
| Ovntype: | Elektrisk ovn |
| Samlet indvendig ovn kapacitet: | 66 L |
| Strøm for samtlige ovne: | - W |
| Antal ovne: | 1 |
| Ovn nettokapacitet: | 66 L |
| Konventionel madlavning: | Ja |
| Holde varm funktion: | Ingen |
| Pizza fremstillingsfunktion: | Ja |
| Antal lamper: | 1 Lampe( r) |
| Energiforbrug (konventionel): | 0.89 kWh |
| Energiforbrug (tvungen konvektion): | 0.67 kWh |
| Hurtig varme: | Ingen |
| Bageplade: | Ja |
| Automatiske programmer, antal: | 11 |
| Opvarmning i både top og bund: | Ja |
| Mikroovn madlavning: | Ingen |
| Blæser grillfunktion: | Ja |
| Antal bageplader: | 2 |
| Strømstiktype: | Intet stik |
| Aftaglig ovndør: | Ja |
| Dørmateriale: | Glas |
| Brødfremstilling kapacitet: | Ja |
| Installationsrum bredde (min.): | 560 mm |
| Maksimal temperatur (konventionel): | 250 °C |
| Stegetermometer: | Ingen |
| Programmer til at forberede brød & dej: | Dej |
| Indvendig materiale: | Emalje |
Har du brug for hjælp?
Hvis du har brug for hjælp til Hotpoint FA2 840 P IX HA stil et spørgsmål nedenfor, og andre brugere vil svare dig
Ovn Hotpoint Manualer
8 Oktober 2025
13 August 2025
13 August 2025

12 August 2025
12 August 2025
1 August 2025
1 August 2025
1 August 2025
1 August 2025
30 Juli 2025
Ovn Manualer
- Vollrath
- Bartscher
- Arendo
- Axis
- Kucht
- Verona
- Mora
- Thetford
- Montiss
- AGA
- DCG
- Rex
- Faber
- Ikea
- Efbe-Schott
Nyeste Ovn Manualer
4 November 2025

3 November 2025

3 November 2025

3 November 2025

3 November 2025
2 November 2025
1 November 2025
1 November 2025
1 November 2025
31 Oktober 2025