Hotpoint HAO3 K38HU X Manual

Hotpoint Ovn HAO3 K38HU X

Læs gratis den danske manual til Hotpoint HAO3 K38HU X (8 sider) i kategorien Ovn. Denne vejledning er vurderet som hjælpsom af 4 personer og har en gennemsnitlig bedømmelse på 3.8 stjerner ud af 2.5 anmeldelser. Har du et spørgsmål om Hotpoint HAO3 K38HU X, eller vil du spørge andre brugere om produktet?

Side 1/8
EN
Quick guide
THANK YOU FOR BUYING A HOTPOINT-ARISTON
PRODUCT
In order to receive a more complete assistance, please
register your product on www . register10 . eu
PLEASE SCAN THE QR CODE ON
YOUR APPLIANCE IN ORDER TO
Before using the appliance carefully read the Safety
Instruction.
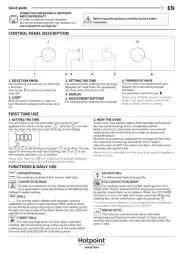
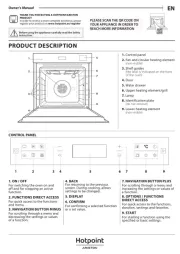
CONTROL PANEL
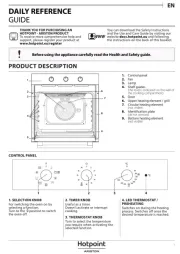
1. SELECTION KNOB
For switching the oven on by selecting a function. Turn to the
position to switch the oven off.
2. TIMER KNOB
Useful as a timer.
3. THERMOSTAT KNOB
Turn to select a desired temperature, activating the selected function.
4. LED THERMOSTAT/PREHEATING
Switches on during the heating process. Switches off once the desired
temperature reached.
Please note: Type of knob may vary from model type. If the knobs are
push-activated, push down on the center of the knob to release it from
seating.
ACCESSORIES
WIRESHELF
Use to cook food or as a support for pans, cake tins
and other ovenproof items of cookware.
DRIP TRAY*
Use as an oven tray for cooking meat, fish,
vegetables, focaccia, etc. or position underneath the
wire shelf to collect cooking juices.
BAKING TRAY*
Use for cooking all bread and pastry products, but
also for roasts, fish en papillotte, etc.
SLIDING RUNNERS*
To facilitate inserting or removing accessories.
* Availble only on certain models
The number and the type of accessories may vary depending on which model
is purchased. Other accessories can be purchased separately from the After-
sales Service.
INSERTING THE WIRE SHELF AND OTHER ACCESSORIES
Insert the wire shelf onto the level you require by holding it tilted
slightly upwards and resting the raised rear side (pointing upwards)
down first. Then slide it horizontally along the runners as far as
possible. Other accessories, like the baking tray, are to be inserted
horizontally, letting them slide on the runners.
1
2
1
2
[c] [d][a]
[b]
SLIDING SHELVES AND SHELF GUIDES
Before using the oven remove the protective tape [a] and then remove
the protective foil [b] from the sliding runners.
REMOVING THE SLIDING RUNNERS [c]
Pull the lower part of the sliding runner to uncouple the lower hooks
(1) and pull the the sliding runners upwards, removing them from the
upper hooks (2).
REFITTING THE SLIDING RUNNERS [d]
Hook the upper hooks on the shelf guides (1) then press the lower part
of the sliding runners against the shelf guides, until the lower hooks
are clicking (2).
REMOVING AND REFITTING THE SHELF GUIDES
To remove the shelf guides, firmly grip the external part of the guide,
and pull it towards you to extract the support and the two internal pins
from the lodging.
To reposition the shelf guides, position them near the cavity and
initially insert the two pins into their lodgings. Next, position the
external part near its lodging, insert the support, and firmly press
towards the wall of the cavity to make sure the shelf guide is properly
secured.
FIRST TIME USE
A new oven may release odours that have been left behind during
manufacturing: this is completely normal.
Before starting to cook food, we therefore recommend heating the
oven with it empty in order to remove any possible odours.
Remove any protective cardboard or transparent film from the oven
and remove any accessories from inside it.
Heat the oven to 250 °C for about one hour. The oven must be empty
during this time.
Please note: It is advisable to air the room after using the appliance for the
first time.
1
2
3
4
DAILY USE
1. SELECT A FUNCTION
To select a function, turn the to the symbol for the selection knob
function you require: the display will light up and an audible signal will
sound.
2. ACTIVATE A FUNCTION
MANUAL
To start the function you have selected, turn the thermostat knob to set
the temperature you require.
DIAMOND CLEAN
To activate the “Diamond Clean” cleaning function, pour 100 - 120
ml of drinking water into the bottom of the oven, then turn all the 3
knobs (selection knob, timer knob, thermostat knob) to icon
. The
function will activate automatically and its duration is 35 minutes.
3.
PREHEATING
Once the function starts, an audible signal and a flashing icon
on
the display indicate that the preheating phase has been activated.
At the end of this phase, an audible signal and the fixed icon
on the
display will indicate that the oven has reached the set temperature: at
this point, place the food inside and proceed with cooking.
4. SETTING THE TIMER
The timer knob can be used to set a cooking time of between 1 and
60 minutes. To set cooking time, after selecting the required cooking
function, turn the knob right round in a clockwise direction and then
turn it back in the opposite direction to the desired cooking duration.
NOTES
Do not cover the inside of the oven with aluminium foil.
Never drag pots or pans across the bottom of the oven as this
could damage the enamel coating.
Do not place heavy weights on the door and do not hold on to
the door.
CLEANING AND MAINTENANCE
EXTERIOR SURFACES
Clean the surfaces with a damp microfibre cloth. If they are very dirty,
add a few drops of pH-neutral detergent. Finish off with a dry cloth.
Do not use corrosive or abrasive detergents. If any of these products
inadvertently comes into contact with the surfaces of the appliance,
clean immediately with a damp microfibre cloth.
INTERIOR SURFACES
After every use, leave the oven to cool and then clean it, preferably
while it is still warm, to remove any deposits or stains caused by
food residues. To dry any condensation that has formed as a result
of cooking foods with a high water content, leave the oven to cool
completely and then wipe it with a cloth or sponge.
The door can be easily removed and refitted to facilitate cleaning of the
glass. Clean the glass in the door with a suitable liquid detergent.
ACCESSORIES
Soak the accessories in a washing-up liquid solution after use, handling
them with oven gloves if they are still hot. Food residues can be
removed using a washing-up brush or a sponge.
F CTIONSUN
OFF
LIGHT
For switching on the light in the compartment.
CON NALVENTIO
For cooking any kind of dish on one shelf only.
DIAMOND CLEAN (AVAILABLE ONLY ON CERTAI MODELS)N
TURBO ILLGR
For roasting ge ints of meat (legs, roast ef, chicken). We lar jo be
recommend using a dri ing pan to collect the cooking juices: position pp
the pan on any of the levels below the wire shelf and add 200 ml of
drinking water.
DEFROST
For defrosting food re ickly. To act ate the defrosting mo qu iv
function turn the selection k b to the icon no
then turn the
the ostat knob clockwise to any temperature. This function does not rm
heat so any temperature can be used. When defrosting is completed
turn the two controls to the
and positions.
The action of the steam released during this special low-
temperature cle ing cycle allows dirt and food residues to be an
rem ed with ease. Pour 100-120 ml of drinking water on the bottom ov
of the en then turn the selection k b and the the ostat k b to ov no rm no
the
icon. It is best to use the function for 35 minutes.
Act ate the function en the en is cold and let it cool down iv wh ov
for 15 minutes ce the cycle ends. The position of the icon does not on
corresp d to the temperature reached during the cle ing cycle.on an
BOTTOM
CONVEC T N BAKEIO
FORCED AIR
To cook on a maximum of two shelves at the same time. It is
a good idea to swap the position of the baking trays lfway t ough ha hr
cooki .ng
GRILL
PIZZA
For grilling st ks, keb s and sausages, cooking vegetables ea ab
au gratin or toasting bre . When grilling meat, we recommend using ad
a dri ing pan to collect the cooking juices: position the pan on any of pp
the levels below the wire shelf and add 200 ml of drinking water.
For browning the bottom of the dishes. The function can also
be used for slow cooking, to finish cooking very liquid dishes (sweet or
savour) or to thicken sauces and gravies.
For cooking different foods that require the same cooking
temperature on several shelves (maximum three) at the same time. This
function can be used to cook different foods without odours being
transferred from one food to another.
For baking different types and sizes of pizza or focaccia. It is
advisable to place food on 2nd level. Preheat the oven before cooking.


Produkt Specifikationer

Mærke: Hotpoint
Kategori: Ovn
Model: HAO3 K38HU X

Har du brug for hjælp?

Hvis du har brug for hjælp til Hotpoint HAO3 K38HU X stil et spørgsmål nedenfor, og andre brugere vil svare dig