Hotpoint MS 998 IX H Manual

Hotpoint Ovn MS 998 IX H

Læs gratis den danske manual til Hotpoint MS 998 IX H (12 sider) i kategorien Ovn. Denne vejledning er vurderet som hjælpsom af 37 personer og har en gennemsnitlig bedømmelse på 4.5 stjerner ud af 19 anmeldelser. Har du et spørgsmål om Hotpoint MS 998 IX H, eller vil du spørge andre brugere om produktet?

Side 1/12
1
EN
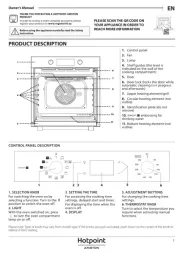
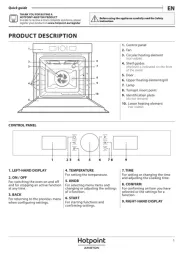
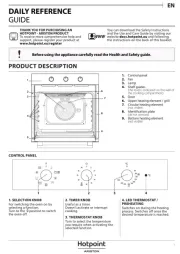
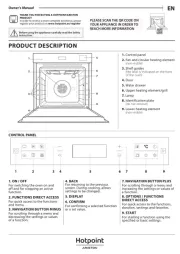
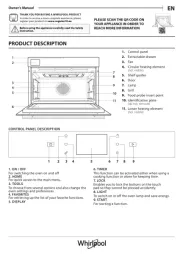
PRODUCT DESCRIPTION
DAILY REFERENCE
GUIDE
CONTROL PANEL
1. Control panel
2. Light
3. Connection for food probe
4. Shelf guides
5. Identification plate
(do not remove)
6. Temperature sensor
7. Steam inlet valve
8. Water reservoir
9. D oor
1. ON / OFF / PAUSE
For switching the oven on or o and
for pausing or stopping a function.
2. MENU
For gaining quick access to the main
menu.
3. FAVOURITES
For accessing the 10 most used
functions.
4. BACK
For returning to the previous menu.
5. DISPLAY
6. NAVIGATION BUTTONS
For navigating through menus,
moving the cursor and changing
settings.
7. OK / SELECT
For selecting functions and
conrming settings.
8. START
For starting the function that has
been selected.
1
2
3
4
8
7
9
Read the safety instructions carefully before using the product
1 4
32 5 76 8
THANK YOU FOR PURCHASING A
HOTPOINT PRODUCT
To receive more comprehensive help and
support, please register your product at
www.hotpoint-ariston.com/register
You can download the Use and Care Guide
by visiting our website www.hotpoint.eu
and following the instructions on the back
of this booklet.
6
5
2
ACCESSORIES
WWW
Download the Use and Care Guide at
www.hotpoint.eu for more information
Before purchasing other accessories that are available
on the market, make sure that they are heat-resistant
and suitable for steaming.
Make sure that there is a gap of at least 30 mm
between the top of any container and the walls of the
cooking compartment in order to allow steam to ow
suciently.
WIRE SHELF
This allows the hot air to
circulate effectively. Place food
directly on the wire shelf or use
it to support baking trays and
tins or other heat-resistant
ovenware. When cooking food
directly on the wire shelf, place the dripping pan
on the level below it.
It can also be placed on top of either the dripping
pan or the steamer tray on the same level.
DRIPPING PAN
This is used as a baking tray
with the Convection Bake
function to cook meat, fish,
vegetables, or different types of
bread and pastries.
It is also useful for supporting
heat-resistant ovenware as it means you do not have
to place items on the bottom of the oven.
It collects the cooking juices when placed below the
wire shelf or the steamer tray.
STEAM TRAY
This makes it easier for steam to
circulate, which helps cook the
food evenly. Place the dripping
pan on the level below to collect
the cooking juices.
WATER CONTAINER
The water reservoir can be
easily accessed by opening the
door. Remove it by lifting it
slightly upwards and then
pulling it towards you.
Fill the water reservoir with
drinking water up to the “MAX” mark.
Once full, put the water reservoir back in its holder.
Make sure that it is positioned correctly: The top and
the right-hand side of the water reservoir should be
touching the sides of the holder.
Insert the water reservoir fully and then push it
downwards until it clicks into place.
Carefully remove the water reservoir and empty it
after every use. Take care to pour water out of the
tube as well.
FOOD PROBE
For measuring the core
temperature of food during
cooking.
SPONGE
For removing any condensation
that forms during
cooking
PLACING ACCESSORIES ON THE SHELF GUIDES
Insert the wire shelf horizontally by sliding it across
the shelf guides, making sure that the side with the
raised edge is facing upwards.
The levels (shelf guides) on which the wire shelf and
other accessories can be placed are numbered, with 1
being the lowest and 4 being the highest.
REMOVING AND REFITTING THE SHELF GUIDES
To remove the shelf guides, slide them forwards and
pull them towards you to unhook them from the
brackets (fig. a).
To refit the shelf guides, hook them into the brackets
by pushing down on them gently until they click into
place. (fig. b).
a. b.
3
2
1
4


Produkt Specifikationer

Mærke: Hotpoint
Kategori: Ovn
Model: MS 998 IX H

Har du brug for hjælp?

Hvis du har brug for hjælp til Hotpoint MS 998 IX H stil et spørgsmål nedenfor, og andre brugere vil svare dig