Imarflex CVO-230FT Manual

Imarflex Ovn CVO-230FT

Læs gratis den danske manual til Imarflex CVO-230FT (2 sider) i kategorien Ovn. Denne vejledning er vurderet som hjælpsom af 5 personer og har en gennemsnitlig bedømmelse på 4.4 stjerner ud af 3 anmeldelser. Har du et spørgsmål om Imarflex CVO-230FT, eller vil du spørge andre brugere om produktet?

Side 1/2
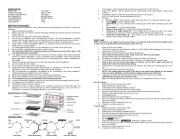
SPECIFICATION:
MODEL NO. : CVO-230FT
RATED VOLTAGE : 230Va.c. 60Hz
POWER CONSUMPTION : 1500 watts
BOX DIMENSION : 440*405*380mm
UNIT DIMENSION : 405*385*350mm
GROSS WEIGHT : 8.9Kg
UNIT WEIGHT : 7.7Kg
IMPORTANT SAFEGUARDS:
When using electrical appliances, basic safety precautions should always be followed, including the
following:
2. Before using the oven toaster, check if the voltage indicated corresponds with the convenience
outlet (230Va.c.).
3. Do not use a two-way socket with another appliance.
4. Do not use any appliance with a damaged cord or plug. If the cord is damaged it should be
replaced with the same type and size or bring the unit to the neare
st authorized service center.
5. Put the unit on stable surface; keep it away from the edge of counter to avoid accident.
6. Keep curtains, furniture, flammable materials, etc. away from the unit and from the convenience
outlet where the unit is plugged in.
7. To protect against electric shock, do not immerse the unit in water or any other liquid.
8. Do not place the appliance near gas stove or electric stove.
9. The unit needs at least 10 cm clearance space on all sides and at least
30 cm above. This
is to allow adequate air circulation.
10. This appliance is not intended for use by persons (including children) with reduced physical,
sensory or mental capabilities, or lack of experience and knowledge, unless they have been
given supervision or instruction concerning use of the appliances by a person responsible for
their safety.
11. Children should be supervised to ensure that they do not play with the appliance.
12. Do not immerse the unit in water.
1
3. Do not use this unit other than its intended use.
14. Avoid touching the appliance surface while cooking is in progress or even after use. While the
appliance is in use avoid the glass from getting wet to avoid breakage.
15. Use of accessories or equipment not supplied by the manufacturer may cause damage or
malfunctioning of your appliance or result in injuries.
16. Switch off the appliance before removing or replacing its accessories.
17. Minor metal contraction sound ma
y occur during operation but this is normal.
18. For household use only; not intended for any business purposes.
19. In case of malfunctions, please bring the unit to the nearest Authorized Imarflex Service Center.
20. This appliance is not intended for outdoor use.
21. Save this instruction for future reference.
22. CAUTION: In order to avoid a hazard due to inadvertent resetting of the thermal cutout, this
appliance must not be supplied through an external switching devi
ce, such as a timer, or
connected to a circuit that is regularly switched on and off by the utility.
DESCRIPTION OF PARTS:
CONTROL PANEL
1. Timer Setting - Set the desired time for all function except for the Toast function.
2. Toast Timer Setting - Set the desired time for Toast function only (Light, Medium, Dark) bread
outcome.
3. Temperature Setting - Select the desired temperature from C to 230°C.
Note: For Toast function: Set the temperature to 140°C.
4. Function
a. Use for chicken, french fries, pata, fish, etc. It makes the outcome crispy.Air-Fry
b. Use for toasting breads.Toast
c. - It is normally use for cooking top part of the foods, reheating, pizza, broil,Upper Heater
etc.
d. Lower
Heater - Use for baking breads.
e. - Use for grilling meats, seafood, etc.Upper & Lower Heater
f. - It is normally use for cooking top part of the foods,Convection & Upper Heater
reheating, pizza, broil, etc.; the fan is working together with the upper heater only.
g. - This setting is use for baking cakes; the fan is workingConvection & Both Heater
together with the upper and lower heater.
HOW TO USE
:
NOTE: For the first use, preheat the oven for at least 3 to 5 minutes until burnt smell and light smoke
is gone. This is to prevent this smell and smoke mix to the food.
1. Place the unit on flat surface.
2. Check if the timer and function selector switch is at OFF position before plugging the oven into the
convenience outlet. Plug the unit.
3. Set the Upper & Lower Heater to your desired temperature.
Note: If you will only use one heater, make sure to turn OFF the other heater.
4. Set the
function switch to desired setting.
5. For baking, use edible oil or butter to keep the food from sticking into the pan.
6. Turn the timer to pre-heat the unit for at least 5 minutes or as required by the cooking recipe.
Note: If you need to set the time below 10 minutes, set the timer switch more than 10
minutes first then set to desired time setting.
7. Place the food on the grill rack or tray and close the door. Be careful when putting food, the unit is
hot.
8. Turn the timer switch to des
ired cooking time.
NOTE: The cooking time and result of the food to be cooked may depend on the amount
and size, trial is advisable to get the desired setting and doneness of the food.
9. A beep sound will be heard and the unit will stop cooking once the set time is finished.
CAUTION Do not touch the unit when its hot.:
Tips: For better performance, let the unit cool down for 15 minutes after every hour of use.
Air-Fry Function
1. Plug the unit into the convenience outlet.
2. Place the g
rill rack inside the oven.
3. Preheat the unit for at least 5 minutes at 230°C.
4. After preheat, place the food inside the air fryer basket.
5. Put the air fryer basket on the top of the grill rack inside the unit and close the door.
Note: Be careful when putting bread, the unit is hot.
6. Set function.
7. Select the desired time and temperature.
8. Once the cooking cycle ends, a beep sound will be heard and the unit will stop cooking once the
set time is finished.
9. Remove the air-fryer
basket from the unit.
10. Unplug the unit after every use.
Toast Function
1. Plug the unit into the convenience outlet.
2. Place the grill rack inside the unit.
3. Preheat the unit for at least 5 minutes at 230°C.
4. After preheat, place the sliced bread inside the unit and close the door.
Note: Be careful when putting bread, the unit is hot.
6. Set the function.
7. Select the desired time in . Select light, medium or dark.
8. Once the cooking cycle ends, a
beep sound will be heard and the unit will stop cooking once the
set time is finished.
9. Remove the toasted bread from the unit.
10. Unplug the unit after every use.
Time Setting Temperature Setting Function Setting Toast Timer Setting
Convection Function
1. Set the temperature control to the desired temperature.
2. Set the function selector switch to for convection + both heater or for
convection + upper heater only.
3. Set the timer to desired cooking time.
COOKING GUIDE:
MENU
SIZE/
WEIGHT
FUNCTION
TEMPERATURE
(°C)
TIME (MIN) OIL
Potatoes
Hand-cut Fries
1 lb.
Air-Fry
200°C
20mins.
Yes
Hand-cut Sweet Potato
Fries
1 lb. Air-Fry 200°C 20mins. Yes
Frozen Hash Brown
1.3 lbs.
Air-Fry
200°C
20mins.
No
Frozen Fries (Thick Cut)
1.5 lbs.
Air-Fry
230°C
20-25mins.
No
Frozen Fries (Thin Cut)
1 lb.
Air-Fry
230°C
10-15mins.
No
Meat/ Poultry / Fish
Chicken Wings
1.7 lbs.
Air-Fry
200°C
25mins.
No
Steak
8 oz.
Air-Fry
230°C
5-8mins.
No
Porkchop
8 oz.
Air-Fry
200°C
20mins.
No
Hamburger
4oz.
Air-Fry
200°C
10-15mins.
No
Breaded Chicken Breast
1 lb.
Air-Fry
180°C
10mins.
No
Breaded Fish
1 lb.
Air-Fry
200°C
10mins.
No
Bacon
8 oz.
Air-Fry
200°C
8-10mins.
No
Snacks
Frozen Chicken Nuggets
1 lb.
Air-Fry
200°C
10-15mins.
No
Frozen Mozzarella Sticks
1 lb.
Air-Fry
200°C
8-10mins.
No
Frozen Onion Rings
10 oz.
Air-Fry
200°C
10mins.
No
Fresh Mixed Vegetables
1.5 lbs.
Air-Fry
200°C
20mins.
Yes
Bake
Muffins
-
Lower Heater
150°C
35mins.
No
Brownies
-
Lower Heater
180°C
30-40mins.
No
Chocolate Chips Cookies
2 dozen
Lower Heater
180°C
15-20mins.
No
Chocolate Cake -
Convection +
Both Heaters
180°C 45-50mins. No
Buko Pie
-
Lower Heater
200°C
30mins.
No
Roasted Chicken
4 lbs.
Both Heaters
230°C
60mins.
No
Porchetta
3 lbs.
Both Heaters
230°C
45-60mins.
No
Chicken Galantina
4 lbs.
Both Heaters
200°C
45-60mins.
No
CLEANING AND MAINTENANCE:
1. It is important that you clean the unit after every use to prevent grease accumulation and
avoid unpleasant odors.
2. Turn off the appliance and unplug into the convenience outlet
3. Let the unit cool down before moving or cleaning the appliance.
4. Use a wet damp cloth inDo not immerse appliance in water or wash it under waterspout.
cleaning the unit.
5. Wash the grill racks, baking trays, air fryer basket, crumb tray with soap and water, Let it
dry.
6. Do not use abrasive mater
ials to avoid scratches.
7. Let all parts dry before use.
Reminder: Please do not forget to fill up and send the warranty card with receipt to our
email address imarflexfb@evergoodinc.com
Distributed By: Evergood Unlimited Corp.
901 G.Masangkay St., Manila
Made in China


Produkt Specifikationer

Mærke: Imarflex
Kategori: Ovn
Model: CVO-230FT

Har du brug for hjælp?

Hvis du har brug for hjælp til Imarflex CVO-230FT stil et spørgsmål nedenfor, og andre brugere vil svare dig


Ovn Imarflex Manualer

Imarflex

Imarflex CVO-230FT Manual

31 August 2025
Imarflex

Imarflex IG-388BL Manual

21 August 2025
Imarflex

Imarflex IT-432CR Manual

2 Februar 2025
Imarflex

Imarflex IT-460CR Manual

2 Februar 2025
Imarflex

Imarflex IT-455CR Manual

2 Februar 2025
Imarflex

Imarflex IG-366G Manual

6 September 2024
Imarflex

Imarflex IG-377GL Manual

6 September 2024
Imarflex

Imarflex IDX-3250B Manual

4 September 2024
Imarflex

Imarflex IT-95S Manual

4 September 2024

Ovn Manualer

Nyeste Ovn Manualer

Meireles

Meireles MM 20 BL Manual

14 September 2025
Schock

Schock SFP52IX2 Manual

14 September 2025
Belling

Belling BFS60DOGG Manual

14 September 2025
Belling

Belling BCC900DFB Manual

14 September 2025
Siemens

Siemens HB23A1520S Manual

14 September 2025
Belling

Belling BI902G Manual

14 September 2025
Belling

Belling BCC1100GTGSS Manual

14 September 2025
Belling

Belling BMR60DOINDW Manual

14 September 2025
Schock

Schock SFN54BKN Manual

14 September 2025