Insignia NS-SB512 Manual
| Mærke: | Insignia |
| Kategori: | Soundbar |
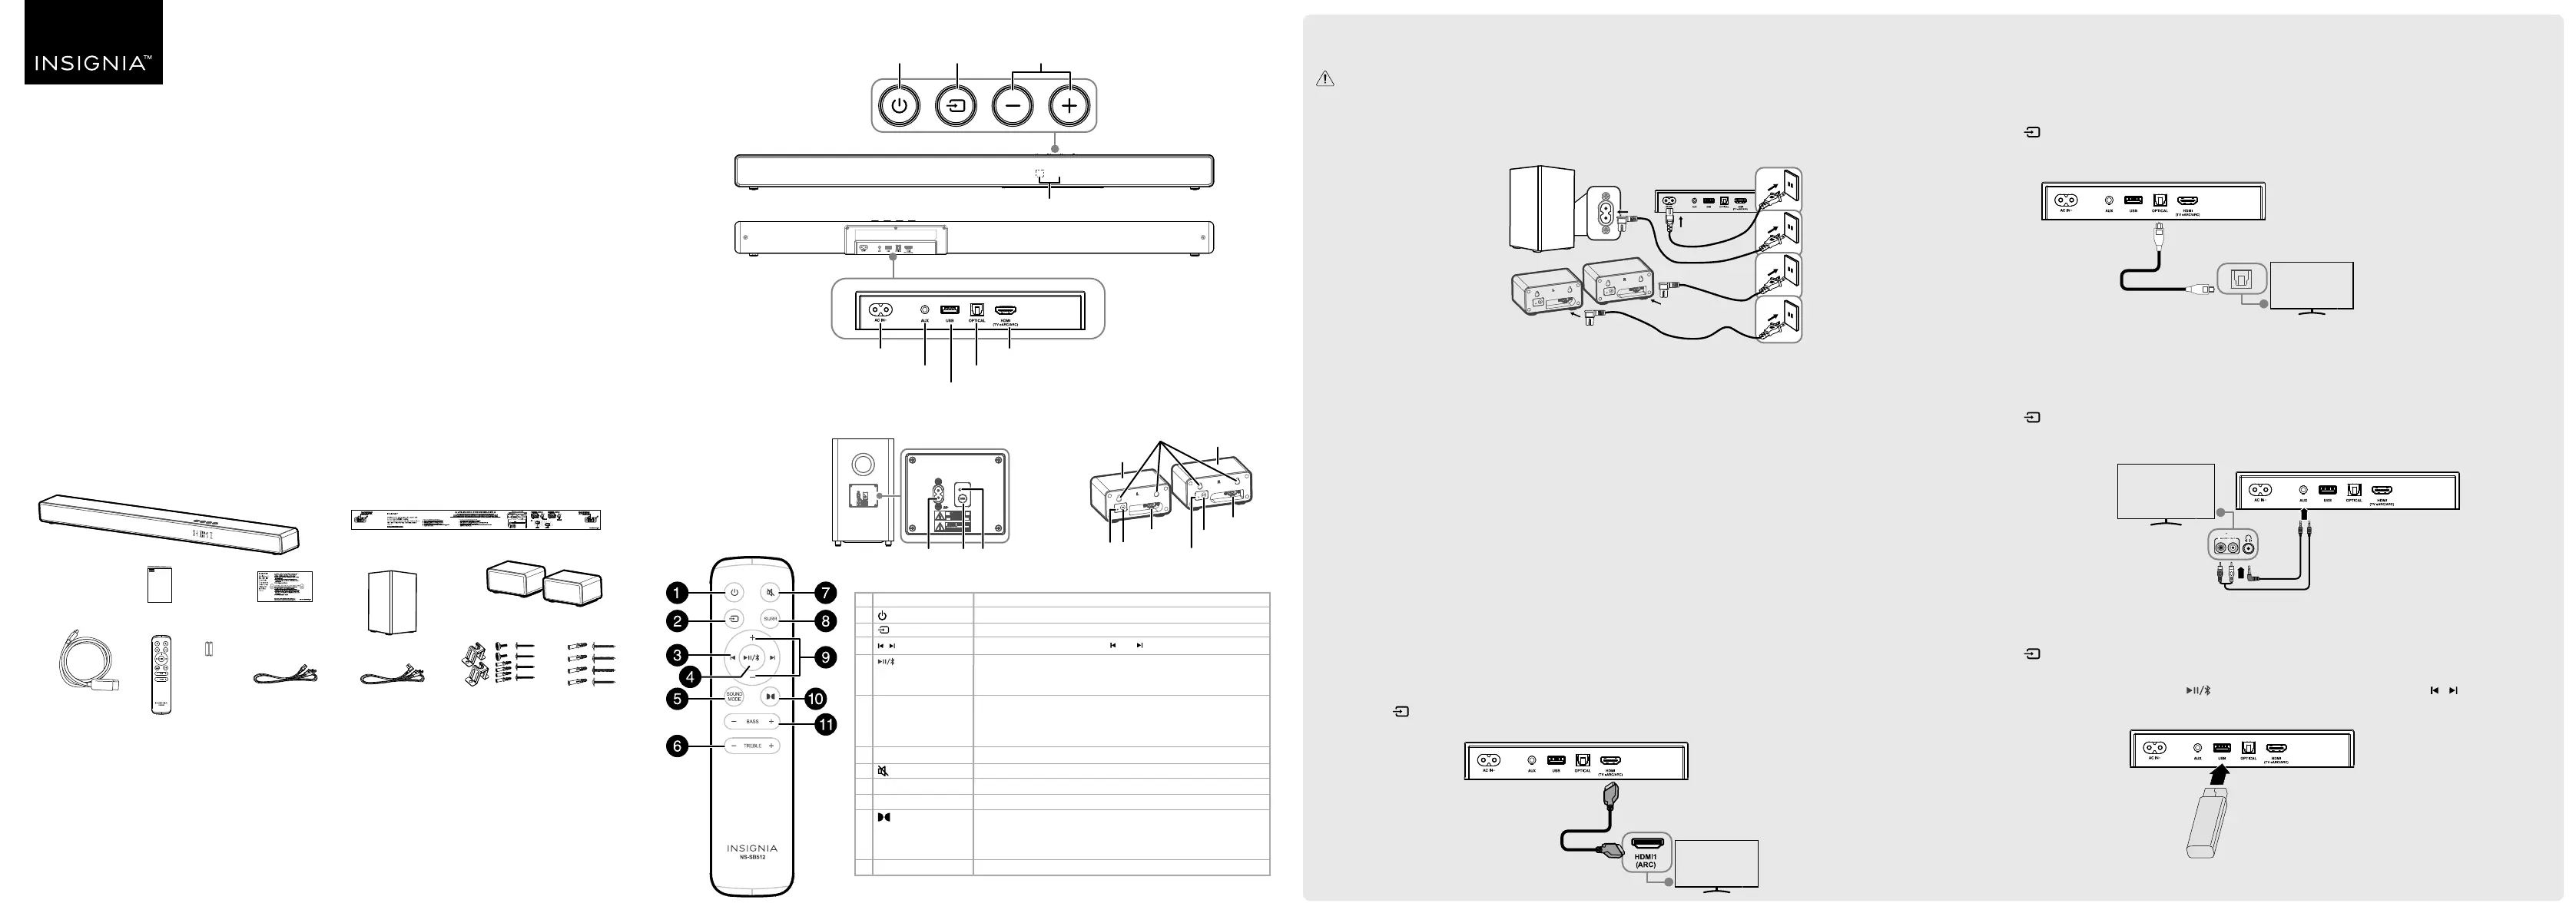
| Model: | NS-SB512 |
Har du brug for hjælp?
Hvis du har brug for hjælp til Insignia NS-SB512 stil et spørgsmål nedenfor, og andre brugere vil svare dig
Soundbar Insignia Manualer
15 November 2025
14 November 2025
13 November 2025
1 Oktober 2025
30 September 2025
29 September 2025

15 Oktober 2024

12 Juli 2024
Soundbar Manualer
- OK
- Klipsch
- Pioneer
- Planet Audio
- BlueAnt
- HP
- Defender
- DS18
- Bigben
- Bauhn
- Martin Logan
- Denon
- SoundTube
- AKAI
- MB Quart
Nyeste Soundbar Manualer

16 November 2025

10 November 2025

4 November 2025

31 Oktober 2025
31 Oktober 2025
29 Oktober 2025

29 Oktober 2025
18 Oktober 2025
15 Oktober 2025

12 Oktober 2025