We would like to thank you for selecting the JK-TR1 by IROX. You are
now the owner of one of the markets highest quality timer. It is the result of
Swiss engineering and is manufactured in one of the best factories in
The JK-TR1 oers absolutely unique features by interlinking two
countdown timers as well as 5 dierent options in the alarm announcement
Please read these instructions carefully to benet fully of all features of
2.2 Keys / Switch / Battery
3. Putting into operation
4.2 Start / Stop / Reset the timer
4.5 Setting an interleave between
4.6 Setting a continuous interleave
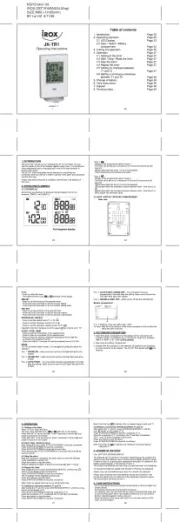
All functions are depicted on the liquid crystal display (LCD) in two
windows (TIMER 1 and TIMER 2).
- Display of the programmed value of timer 1
- The timer can be set up to a maximum of 9 hours 59 minutes and 59
- Indicates when the timer 1 is set to be repeated
- Indicates when the batteries are week
- Display of the programmed value of timer 2
- The timer ca be set up to a maximum of 9 hours 59 minutes and 59
- Indicates when the timer 2 is set to be repeated
- Indicates when the interleave function between timer 1 and timer 2 is
set to repeat the interleave cycle
2.2 KEYS / SWITCH / BATTERY COMPARTMENT
- Press to select the timer
- The selected timer’s icon or will ash on the display.
- Press to set the minutes of the selected timer
- Press and hold 3 seconds to roll the minutes setting
- Press and hold 5 seconds to roll the minutes setting faster
- Press to set the seconds of the selected timer
- Press and hold 3 seconds to roll the seconds setting
- Press and hold 5 seconds to roll the seconds setting faster
- Press to set the repeat timer (T1 or T2 )
- Press to set the interleave function (in T2 )
- Press to set the interleave repeat function (in T2 )
Important note: the interleave functions and can only be set in T2 !
- Press to start the countdown of the selected timer
- Press to stop the countdown of the selected timer
- Press to show the previous setting of the selected timer (after the
countdown has reached 0:00:00)
- Press and hold for 3 seconds to reset the selected timer to 0:00:00
JK-TR1 provides 5 alarm modes. It is managed by sliding the switch for
Pos. 1: – Alarm sound on and the LED light ash above the SOUND ON
Pos. 2: – Alarm sound o and the LED light ash above the SOUND OFF
Pos. 3: – The countdown will start automatically 5 seconds AUTO-START
after the setting. Alarm sound on and the LED light ash above the
Pos. 4: – The countdown will start AUTO-START, SOUND OFF
automatically 5 seconds after the setting. Alarm sound o and the
LED light ash above the display
Pos. 5: – Alarm sound o and the LED light oSOUND & LIGHT OFF
3. PUTTING INTO OPERATION
1. Open the battery compartment of the display device and remove all
insulation strips. If no batteries are in the device, insert the 2 batteries
(AM-4 or ‘AAA’ 1.5 V) in the correct polarity.
2. Now close the battery compartment.
3. Directly after the activation of the batteries, all segments are displayed
for a few seconds on the display. The JK-TR1 then begins with icon
2 x 1.5 batteries of the size AM-4 resp. “AAA”
To open: slide lid in the direction of the arrow (indicated on the lid) after the
Press T1/T2 to select the timer.
The icon of the selected timer ( or )will ash on the display.
Press MIN SET to set the minutes. Press 3 seconds to roll the digit and
press 5 seconds to roll it faster.
Press SEC SET to set the seconds. Press 3 seconds to roll the digit and
press 5 seconds to roll it faster.
4.2 Start / Stop / Reset the timer
After setting the timer, press START/STOP/MEM to start the countdown.
Press START/STOP/MEM to stop the countdown.
Press START/STOP/MEM to show the pre-set value.
Press and hold the START/STOP/MEM for 3 seconds, the timer will be
After the countdown completed, the alarm will be on with the selected
mode (described in section 2.2).
Press any button to stop the alarm.
Without stopping the alarm, it will be o automatically after 1 minute.
After setting the timer, press INTERLEAVE/REPEAT, until the icon
shown on the display of the selected timer.
Press START/STOP/MEM to start the countdown.
The countdown will be repeated continuously.
Press any button to stop the alarm.
Press START/STOP/MEM to stop the countdown
Note: Only one repeat timer can be run at the same time.
4.5 Setting an interleave between T1 and T2
After setting the T1 and T2, press INTERLEAVE/REPEAT, until the icon
shown on the display of T2
Press START/STOP/MEM to start the countdown of T1
Once the countdown of T1 completed, the T2 will start immediately.
Press any button to stop the alarm.
Press START/STOP/MEM to stop the countdown
Note: Even the icon is ashing, the countdown always starts with T1
4.6 Setting a continuous interleave between T1 and T2
After setting the T1 and T2, press INTERLEAVE/REPEAT, until the
icon shown on the display of T2.
Press START/STOP/MEM to start the countdown of T1.
Once the countdown of T1 completed, the T2 will start immediately.
The T1 and T2 will be repeated continuously.
Press any button to stop the alarm.
Press START/STOP/MEM to stop the countdown
Note: Even the icon is ashing, the interleave countdown always
The batteries last for around 8-12 months. Depending on the usage of the
appliance and the batteries used, this time can be slightly shorter or longer.
In order to avoid a surprising and unpleasant interruption of operations, the
battery symbol appears in the window of timer 1.
This means that batteries are becoming too weak and need to be replaced.
To change the batteries, please note Chapter 3 (Putting into operation).
Please only use new batteries and never mix old and new batteries.
Please also remember that used batteries should not be thrown in the
household rubbish bin but handed in at the designated collection points.
The environment will thank you for it!
- Do not expose the device to extreme temperatures or direct sunlight over
- Avoid blows and shocks of any kind to the device.
- For cleaning use a dry soft cloth that you have moistened with water and
a mild cleaning agent. Never use volatile substances such as benzene,
thinner, cleansing agents in spray cans etc.
- When the device is not being used store it in a dry area and out of the