Irox Luna 5-2 Manual

Irox Alarm Luna 5-2

Læs gratis den danske manual til Irox Luna 5-2 (2 sider) i kategorien Alarm. Denne vejledning er vurderet som hjælpsom af 2 personer og har en gennemsnitlig bedømmelse på 5.0 stjerner ud af 1.5 anmeldelser. Har du et spørgsmål om Irox Luna 5-2, eller vil du spørge andre brugere om produktet?

Side 1/2
Bedienungsanleitung
LUNA5-2
LUNA5-2 Funkuhr
Vielen Dank, dass Sie sich für dieses IROX Gerät entschieden
haben.
1. Bevor Sie mit dem Gerät arbeiten
Durch die Beachtung der Bedienungsanleitung vermeiden Sie
auch Beschädigungen des Gerätes und die Gefährdung Ihrer
gesetzlichen Mängelrechte durch Fehlgebrauch.
Für Schäden, die aus Nichtbeachtung dieser Bedienungsanlei-
tung verursacht werden, übernehmen wir keine Haftung.
Beachten Sie besonders die Sicherheitshinweise!
Bewahren Sie diese Bedienungsanleitung gut auf!
2. Einsatzbereich und alle Vorteile Ihres neuen Gerätes auf
einen Blick
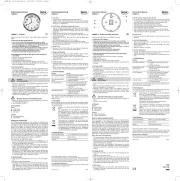
Funkuhr mit leisem Sweep-Uhrwerk
Höchste Genauigkeit
Gut ablesbares, großes Zifferblatt
Sekundenzeiger – stoppt wenn die Batterie schwach wird
Ideal für zuhause, das ro, das Wartezimmer, den Eingangs-
oder Empfangsbereich und als Geschenk
3. Zu Ihrer Sicherheit
Das Produkt ist ausschließlich für den oben beschriebenen Ein-
satzbereich geeignet. Verwenden Sie das Produkt nicht anders,
als in dieser Anleitung dargestellt wird.
Das eigenchtige Reparieren, Umbauen oder Verändern des
Gerätes ist nicht gestattet.
Dieses Gerät ist nicht zur öffentlichen Information geeignet
und nur r den privaten Gebrauch bestimmt.
Vorsicht!
Verletzungsgefahr:
Bewahren Sie das Gerät und die Batterie außerhalb der Reich-
weite von Kindern auf.
Batterien nicht ins Feuer werfen, kurzschließen, auseinander
nehmen oder aufladen. Explosionsgefahr!
Batterien enthalten gesundheitsschädliche Säuren. Um ein Aus-
laufen der Batterien zu vermeiden, sollten schwache Batterien
möglichst schnell ausgetauscht werden. Beim Hantieren mit
ausgelaufenen Batterien chemikalienbeständige Schutzhand-
schuhe und Schutzbrille tragen!
Wichtige Hinweise zur Produktsicherheit!
Setzen Sie das Gerät keinen extremen Temperaturen, Vibratio-
nen und Erschütterungen aus.
Vor Feuchtigkeit schützen.
4. Bestandteile
Tasten
A:
M SET Taste
B:
RESET Taste
C:
REC Taste
Gehäuse
D:
Wandaufhängung
E:
Batteriefach
Empfang der Funkzeit DCF:
Die Zeibertragung erfolgt von einer Cäsium Atom-Funkuhr, die
von der Physikalisch Technischen Bundesanstalt in Braunschweig
betrieben wird. Die Abweichung betgt weniger als 1 Sekunde in
einer Million Jahren. Die Zeit ist kodiert und wird von Main-
flingen in der Nähe von Frankfurt am Main durch ein DCF-77
(77,5 kHz) Frequenzsignal übertragen mit einer Reichweite von
ca. 1.500 km. Ihre Funkuhr empfängt das Signal, wandelt es um
und zeigt immer die exakte Zeit an. Auch die Umstellung von
Sommer- und Winterzeit erfolgt automatisch. Der Empfang ngt
hauptsächlich von der geographischen Lage ab. Im Normalfall
sollten innerhalb des Radius von 1.500 km ausgehend von Frank-
furt bei der Übertragung keine Probleme auftauchen.
Bitte beachten Sie folgende Hinweise:
Es wird empfohlen, einen Abstand von mindestens 1,5 2
Metern zu eventuell störenden Geräten wie Computerbildschir-
men und Fernsehgeräten einzuhalten.
In Stahlbetonbauten (Kellern, Aufbauten) ist das empfangene
Signal natürlicherweise schwächer. In Extremfällen wird emp-
fohlen, das Get in Fensternähe zu platzieren, um das Funk-
signal besser zu empfangen.
Nachts sind die atmosphärischen Störungen meist geringer und
ein Empfang ist in den meisten Fällen glich. Ein einziger
Empfang pro Tag gegt, um die Genauigkeit zu gewährleisten
und Abweichungen unter 1 Sekunde zu halten.
5. Inbetriebnahme
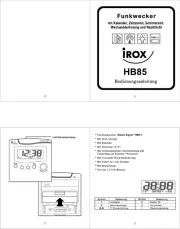
Legen Sie eine neue Batterie 1,5 V AA ein, +/- Pol wie abgebil-
det.
Das Gerät ist jetzt betriebsbereit.
Die Zeiger stellen sich auf 12 h und die Uhr versucht nun, das
Funksignal 3 12 Minuten lang zu empfangen. Wenn der Zeit-
code empfangen wurde, wird die funkgesteuerte Zeit ange-
zeigt. Die Funkuhr empfängt zweimal am Tag (1:00 und 3:00
Uhr morgens) das Signal. hrend des Empfangs bleibt der
Sekundenzeiger auf 12 h stehen.
5.1 REC Taste
Sie können die Initialisierung auch manuell starten.
Drücken Sie für 3 Sekunden die REC Taste. Der Sekundenzeiger
bleibt auf 12 h stehen und die Funkuhr versucht nun, die Funk-
zeit erneut zu empfangen.
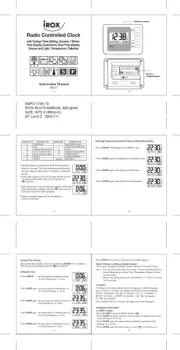
5.2 M SET Taste - Manuelle Einstellung der Uhrzeit
Falls die Funkuhr kein DCF-Signal empfangen kann (z.B. wegen
Störungen, Übertragungsdistanz, etc.), kann die Zeit manuell
eingestellt werden. Die Uhr arbeitet dann wie eine normale
Quarz-Uhr.
Halten Sie die M SET Taste r drei Sekunden gedckt
Halten Sie nun die M SET Taste gedrückt, bis die aktuelle Uhr-
zeit angezeigt wird.
Drücken Sie die M SET Taste nur kurz, rückt der Zeiger eine
Minute vor.
Der Sekundenzeiger bleibt auf 12 Uhr stehen.
Nach 15 Sekunden bewegt sich der Sekundenzeiger weiter.
Bei erfolgreichem Empfang des DCF-Signals wird die manuell
eingestellte Zeit überschrieben
5.3 RESET Taste
Drücken Sie die RESET Taste mit einem spitzen Gegenstand,
wenn die Funkuhr nicht einwandfrei funktioniert.
6. Pflege und Wartung
Reinigen Sie das Gerät mit einem weichen, leicht feuchten
Tuch. Keine Scheuer- oder Lösungsmittel verwenden!
Entfernen Sie die Batterie, wenn Sie das Gerät längere Zeit
nicht verwenden.
Bewahren Sie Ihr Gerät an einem trockenen Platz auf.
6.1 Batteriewechsel
Sobald die Funktionen schwächer werden und wenn der Sekun-
denzeiger auf 12 h stehen bleibt, wechseln Sie bitte die Batte-
rie.
Legen Sie eine neue Batterie 1,5 V AA in das Batteriefach. Ach-
ten Sie auf die richtige Polarität beim Einlegen der Batterie.
7. Fehlerbeseitigung
Problem sung
Keine Zeigerbewegung Batterie polrichtig einlegen
Batterie wechseln
Sekundenzeiger bleibt Funksignalempfang abwarten
stehen Batterie wechseln
Kein DCF Empfang REC Taste für 3 Sekunden drücken
Standort wechseln (Störfaktoren)
Empfangsversuch in der Nacht
abwarten
Uhrzeit manuell einstellen
Unkorrekte Anzeige RESET Taste mit einem spitzen
Gegenstand drücken
Batterie wechseln
Wenn Ihr Gerät trotz dieser Maßnahmen immer noch nicht funktio-
niert, wenden Sie sich an den ndler, bei dem Sie das Produkt
gekauft haben.
8. Entsorgung
Dieses Produkt wurde unter Verwendung hochwertiger Materia-
lien und Bestandteile hergestellt, die recycelt und wiederverwen-
det werdennnen.
Batterien und Akkus rfen keinesfalls in den Haus-
müll!
Als Verbraucher sind Sie gesetzlich verpflichtet,
gebrauchte Batterien und Akkus zur umweltgerech-
ten Entsorgung beim Handel oder entsprechenden
Sammelstellen gemäß nationaler oder lokaler Bestim-
mungen abzugeben.
Die Bezeichnungen für enthaltene Schwermetalle
sind: Cd=Cadmium, Hg=Quecksilber, Pb=Blei
Dieses Gerät ist entsprechend der EU-Richtlinie über
die Entsorgung von Elektro- und Elektronik-Altgerä-
ten (WEEE) gekennzeichnet.
Dieses Produkt darf nicht mit dem Hausmüll entsorgt
werden. Der Nutzer ist verpflichtet, das Altgerät zur
umweltgerechten Entsorgung bei einer ausgewiese-
nen Annahmestelle für die Entsorgung von Elektro-
und Elektronikgeten abzugeben.
9. Technische Daten
Spannungsversorgung: 1 x 1,5V AA Batterie (nicht inklusive)
Gehäuseme: Ø 305 x 45 mm
Gewicht: 762 g (nur Gerät)
OS Technology AG/SA · Dorfstr. 73 · CH-3073mligen
Die technischen Daten entsprechen dem Stand bei Drucklegung und nnen
ohne vorherige Benachrichtigung geändert werden. Die neuesten techni-
schen Daten und Informationen zu Ihrem Produkt finden Sie unter Eingabe
der Artikel-Nummer auf unserer Homepage.
EU-KONFORMITÄTSERKLÄRUNG
Wir erklären hiermit, dass diese Funkanlage die wesentlichen Anforderungen
der R&TTE Direktive 1999/5/EG erfüllt.
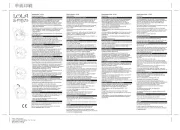
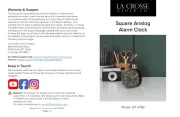
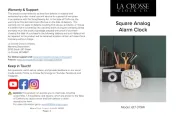
www.irox.com 08/14
Bedienungsanleitung
LUNA5-2
Instruction Manual
LUNA5-2
LUNA5-2 Radio controlled wall clock
Thank you for choosing this instrument from IROX.
1. Before you start using it
Please make sure to read the instruction manual carefully.
Following and respecting the instruction of your manual will
prevent damage to your instrument and loss of your statutory
rights arising from defects due to incorrect use.
We shall not be liable for any damage occurring as a result of
not following these instructions.
Please take particular note of the safety advice!
Please keep this manual for future reference.
2. Field of operation and the benefits of your new instru-
ment at a glance
Radio-controlled clock with silent “Sweep” movement
High precision
Large easy-to-read dial
Second hand – stops when the battery is weak
Ideal for home, office, waiting room, lobby or entrance hall or
as a gift
3. For your safety
This product is exclusively intended for the field of application
described above. It should only be used as described in your
instruction manual.
Unauthorised repairs, modifications or changes to the product
are prohibited.
This product is not to be used for public information; it is only
intended for home use.
Caution!
Risk of injury:
Keep this instrument and the battery out of the reach of child-
ren.
Batteries must not be thrown into a fire, short-circuited, taken
apart or recharged. Risk of explosion!
Batteries contain harmful acids. Low batteries should be
changed as soon as possible to prevent damage caused leaking.
Wear chemical-resistant protective gloves and glasses when
handling leaking batteries.
Important information on product safety!
Do not place the unit near extreme temperatures, vibration or
shock.
Protect it from moisture.
4. Elements
Buttons
A:
M SET button
B:
RESET button
C:
REC button
Housing
D:
Wall mounting hole
E:
Battery compartment
Note for radio-controlled time DCF:
The time base for the radio-controlled time is a caesium atomic
clock operated by the Physikalisch Technische Bundesanstalt
Braunschweig. It has a time deviation of less than one second in
one million years. The time is coded and transmitted from Main-
flingen near Frankfurt via frequency signal DCF-77 (77.5 kHz) and
has a transmitting range of approximately 1,500 km. Your radio-
controlled clock receives this signal and converts it to show the
precise time. Changeover from summer time or winter time is
automatic. The quality of the reception depends mainly on the
geographic location. Normally there should be no reception prob-
lems within a 1,500 km radius around Frankfurt.
Please take note of the following:
The recommended distance from any interfering sources like
computer monitors or TV sets is a minimum of 1.5 - 2 meters.
Within Ferro-concrete rooms (basements, superstructures), the
received signal is naturally weakened. In extreme cases, please
place the unit close to a window.
During night-time, the atmospheric disturbances are usually
less severe and reception is possible in most cases. A single daily
reception is adequate to keep the accuracy deviation below 1
second.
5. Getting started
Insert one new battery AA size 1.5 V with the polarity as indi-
cated.
Your clock is now ready to use.
After the initial setup, the pointers move to 12 o’clock and will
try to receive the radio signal for 3-12 minutes. When the time
code is received, the radio-controlled time will be shown. The
clock receives the signal twice a day (1:00 and 3:00 am). During
the reception the second hand stops at 12 h.
5.1 REC button
Manual initialization can be helpful. Press the REC button for
3 seconds. The second hand stops and the clock will scan the
DCF frequency signal.
5.2 M SET
button
- Manual setting of clock
In case the clock cannot detect the DCF-signal (for example due
to disturbances, transmitting distance, etc.) the time can be set
manually. The clock will then work as a normal quartz clock.
Press and hold M SET button for three seconds.
Hold the button until the desired time is indicated.
Press the button briefly the pointer moves minute by minute.
The second hand stops at 12 o’clock.
After 15 seconds the second pointer is moving forward again.
The manually set time will be overwritten by the DCF time
when the signal is received successfully.
5.3 RESET button
Use a pin to press the RESET button if the unit does not work
properly.
6. Care and maintenance
Clean your instrument with a soft damp cloth. Do not use sol-
vents or scouring agents.
Remove the battery if you do not use the product for a long
period of time.
Keep your clock in a dry place.
6.1 Battery replacement
Change the batteries when the functions of the instrument
become weak and the second hand stops at 12h.
Insert a new battery 1,5 V AA. Make sure the polarities are cor-
rect.
7. Troubleshooting
Problem Solution
No pointer movement Ensure that the battery polarity is
correct
Change the battery
No movement of the Wait for the reception of the radio-
second pointer controlled time
Change the battery
No DCF reception Press the REC button for 3 seconds
Change location (interference!)
Wait for attempted reception
during the night
Set the clock manually
Incorrect display Press the RESET button with a pin
Change the battery
If your device fails to work despite these measures contact the sup-
plier from whom you purchased it.
8. Waste disposal
This product has been manufactured using high-grade materials
and components which can be recycled and reused.
Never dispose of empty batteries and rechargeable
batteries in household waste.
As a consumer, you are legally required to take them
to your retail store or to an appropriate collection site
depending on national or local regulations in order to
protect the environment.
The symbols for the heavy metals contained are:
Cd=cadmium, Hg=mercury, Pb=lead
This instrument is labelled in accordance with the EU
Waste Electrical and Electronic Equipment Directive
(WEEE).
Please do not dispose of this instrument in household
waste. The user is obligated to take end-of-life
devices to a designated collection point for the dis-
posal of electrical and electronic equipment, in order
to ensure environmentally-compatible disposal.
9. Specifications
Housing dimension: Ø 305 x 45 mm
Weight: 762 g (instrument only)
OS Technology AG/SA · Dorfstr. 73 · CH-3073mligen
The technical data are correct at the time of going to print and may change
without prior notice. The latest technical data and information about your
product can be found by entering your product number on our homepage.
DECLARATION OF CONFORMITY
Herewith we declare, that this wireless transmission device does comply with
the essentials requirements of R&TTE Directive 1999/5/EC.
www.irox.com 08/14
Instruction Manual
LUNA5-2
RoHS
E
A
B
D
C
IROX_No. 60.3517_Anl_08_14 28.07.2014 10:20 Uhr Seite 1
Mode d’emploi
LUNA5-2
LUNA5-2 Horloge murale radio-piloe
Nous vous remercions d'avoir choisi l'appareil IROX.
1. Avant d'utiliser l'appareil
Lisez attentivement le mode d'emploi.
En respectant ce mode d'emploi, vous éviterez d'endommager
l'appareil et de perdre vos droits résultant d'un faut pour
cause d'utilisation non-conforme. Nous n'assumons aucune
responsabilité pour des dommages qui auraient été causés par
le non-respect du présent mode d'emploi.
Suivez bien toutes les consignes de sécuri!
Conservez soigneusement le mode d'emploi!
2. Aperçu du domaine d'utilisation et tous les avantages de
votre nouvel appareil
Horloge radio-pilotée avec mouvement silencieux «Sweep»
Haute précision
Grand cadran bien lisible
Aiguille des secondeselle s'arrête lorsque la pile est faible
Idéal pour la maison, le bureau, le hall d’entrée, la salle d’attente
ou la réception ou bien encore comme cadeau
3. Pour votre sécurité
L'appareil est destiné uniquement à l'utilisation décrite ci-des-
sus. Ne l'utilisez jamais à d'autres fins que cellescrites dans le
présent mode d'emploi.
Vous ne devez en aucun casparer,monter ou modifier l'ap-
pareil par vous-me.
Cet appareil ne convient pas pour l'information publique, il est
destiuniquement à un usage privé.
Attention!
Danger de blessure:
Gardez l'appareil et la pile hors de la portée des enfants.
Ne jetez jamais les piles dans le feu, ne les court-circuitez pas,
ne les montez pas et ne les rechargez pas. Risques d'explo-
sion!
Les piles contiennent des acides nocifs pour la santé. Une pile
faible doit être remplae le plus rapidement possible, afin
d'éviter une fuite.
Pour manipuler des piles qui ont coulé, utilisez des gants de
protection chimique spécialement adaptés et portez des lunet-
tes de protection !
Conseils importants de sécuri du produit!
Évitez d’exposer l’appareil à des températures extrêmes, à des
vibrations ou à des chocs.
Progez-le contre l'humidité.
4. Eléments
Touches
A:
Touche M SET
B:
Touche RESET
C:
Touche REC
Boîtier
D:
Œillet de suspension
E:
Compartiment à pile
Remarque pour la ception de l’heure radio DCF:
La transmission de l’heure radio s’effectue via une horloge atomi-
que au sium, exploitée par la Physikalisch Technische Bundes-
anstalt de Braunschweig (Institut ral Physico-Technique de
Braunschweig). L’écart de précision de cette horloge est d'
1 seconde pour un million d’années. L’heure est diffusée à partir
de Mainflingen, près de Francfort sur le Main, par un signal DCF-
77 (77,5 kHz), avec une portée d’environ 1500 km. Votre horloge
radio-pilotée reçoit ce signal, le convertit et affiche ainsi toujours
l’heure exacte. Le passage de l’heure d’hiver à l’heure d’été et
vice-versa s’effectue également en mode automatique. La cep-
tion est essentiellement en fonction de votre position ographi-
que. En règle générale, dans un rayon de 1500 km autour de
Francfort, aucun problème de transmission ne devrait apparaître.
Nous vous prions de respecter les consignes suivantes :
Nous vous recommandons de ménager une distance de 1,5 à 2
m entre l’appareil et d’éventuelles sources de signaux parasites,
comme les écrans d’ordinateur et les postes de télévision.
Dans les timents en béton armé (caves, greniers aménagés),
le signal ru est affaibli. Dans les cas extrêmes, nous vous
conseillons de placer l’appareil près d’une fenêtre pour amélio-
rer la réception du signal radio.
La nuit, les perturbations s’affaiblissent en règle générale, et la
réception est possible en plupart des cas. Un seul créneau de
réception par jour suffit, pour garantir la précision de l’afficha-
ge de l’heure, et pour maintenir d’éventuels écarts en dessous
de 1 seconde.
5. Mise en service
Insérez une nouvelle pile 1,5 V AA, polari +/- comme illustrée
Votre instrument est maintenant prêt à fonctionner.
Après la première mise en service l'horloge s'ajuste à 12 H et
tente de capter le signal radio pendant 3 - 12 minutes. Dès la
réception du code horaire, l’heure radio s’affiche. L'horloge
reçoit deux fois par jour (1:00 et 3:00 heures du matin) le signal.
Pendant laception l’aiguille des secondes s'arrête à 12 h.
5.1 Touche REC
Vous pouvez activer manuellement la réception de l’heure
radio. Appuyez sur la touche REC pour 3 secondes. L’aiguille des
secondes s'arte à 12 h et l’horloge tente alors de capter le
signal radio.
5.2 Touche M SET -glage manuel de l'heure
Si votre horloge radio-pilotée ne peut pas recevoir le signal DCF
(p. ex. en raison de la présence de perturbations, d’une distance
de transmission excessive etc.), vous pouvez procéder à un para-
métrage manuel. L'horloge fonctionne alors comme une horlo-
ge à quartz normale.
Maintenez la touche M SET appuyée pendant 3 secondes.
Maintenez la touche MSET appuyée jusquce que l'heure cor-
recte soit affice.
Appuyez sur la touche M SET brièvement et l’aiguille avance
d’une minute.
L’aiguille des secondes s'arrête à 12 h.
Après 15 secondes l’aiguille des secondes se place de nou-
veau.
L’heure ajuse manuellement sera transcrite en cas la cep-
tion DCF de l’heure réussit.
5.3 Touche RESET
Appuyez sur la touche RESET avec un objet pointu pour remet-
tre et activer nouvellement.
6. Entretien et maintenance
Pour le nettoyage de l'appareil, utilisez un chiffon doux et
humide. N’utilisez aucun agent solvant abrasif! Protégez-le
contre l'humidité.
Enlevez la pile, si vous n’utilisez pas votre horloge pendant une
durée prolongée.
Conservez-la dans un endroit sec.
6.1 Remplacement de la pile
Remplacez la pile, si les fonctions de l'appareil s'affaiblissent et
l’aiguille des secondes s'arrête à 12 h.
Insérez une nouvelle pile 1,5 V AA, polari +/- comme illustrée
7. Dépannage
Problème Solution
Aucun mouvement Contrôlez la bonne polarité de la pile
du pointeur Changez la pile
Aucun mouvement de Attendez que la réception du signal
l’aiguille des secondes radio
Changez la pile
Aucune réception DCF Appuyez sur la touche REC pendant
3 secondes
Changez de lieu (perturbation)
Attendez la réception du signal
de nuit
Paramétrez l’heure manuellement
Affichage incorrecte Appuyez sur la touche RESET avec
un objet pointu
Changez la pile
Si votre appareil ne fonctionne toujours pas malgré ces mesures,
adressez-vous à votre vendeur.
8. Traitement des déchets
Ce produit a été fabriqavec des mariaux et des composants
de haute qualité qui peuvent être recyclés et réutilisés.
Les piles et accus usagés ne peuvent en aucun cas être
jetés dans les ordures ménagères !
En tant qu'utilisateur, vous avez l'obligation légale de
rapporter les piles et accus usagés à votre revendeur
ou de les déposer dans une chetterie proche de
votre domicile conforment à la réglementation
nationale et locale.
Les métaux lourds sont désignés comme suit:
Cd=cadmium, Hg=mercure, Pb=plomb
Cet appareil est conforme aux normes de l'UE relati-
ves au traitement des chets électriques et électroni-
ques (WEEE).
L'appareil usane doit pas être je dans les ordures
ménagères. Lutilisateur s’engage, pour le respect de
l’environnement, à déposer l’appareil usa dans un
centre de traitement agréé pour les chets électri-
ques et électroniques.
9. Caractéristiques techniques
Alimentation: Pile 1 x 1,5V AA (non incluse)
Mesure de boîtier: Ø 305 x 45 mm
Poids: 762 g (appareil seulement)
OS Technology AG/SA · Dorfstr. 73 · CH-3073mligen
Les spécifications techniques de ce produit ont éactualisées au moment de
l'impression et peuvent être modifiées, sans avis préalable. Les dernières don-
nées techniques et les informations concernant votre produit peuvent être
trouvées en entrant le numéro de l'article sur notre site.
EU-DECLARATION DE CONFORMITE
Nous déclarons que cet appareil émetteur cepteur d'ondes radio répond
aux exigences essentielles de la directive R&TTE 1999/5/CE.
www.irox.com 08/14
Mode d’emploi
LUNA5-2
Istruzioni per l’uso
LUNA5-2
LUNA5-2 – Orologio a muro radiocontrollato
Vi ringraziamo per aver scelto l'apparecchio IROX.
1. Prima di utilizzare l'apparecchio
Leggete attentamente le istruzioni per l'uso.
Seguendo le istruzioni per l'uso, eviterete anche di danneggia-
re il dispositivo e di pregiudicare a causa di un utilizzo scorret-
to, i diritti del consumatore che vi spettano per legge.
Decliniamo ogni responsabilità per i danni derivanti dal manca-
to rispetto delle presenti istruzioni per l'uso.
Prestate particolare attenzione alle misure di sicurezza!
Conservate con cura queste istruzioni per l'uso!
2. Tutte le applicazioni e tutti i vantaggi del vostro nuovo
apparecchio
Orologio radiocontrollato con meccanismo d’orologeria silen-
zioso “Sweep”
Massima precisione
Quadrante grande ben leggibile
Lancetta dei secondi – si ferma quando la batteria è debole
Ideale per casa, ufficio, ingresso, sala d'attesa o come regalo
3. Per la vostra sicurezza
Il prodotto è adatto esclusivamente agli utilizzi di cui sopra.
Non utilizzate il prodotto in maniera diversa da quanto descritto
in queste istruzioni.
Non sono consentite riparazioni, alterazioni o modifiche non
autorizzate del dispositivo.
Questo apparecchio non è adatto per dimostrazioni pubbliche ma
è destinato esclusivamente ad un uso privato.
Avvertenza!
Pericolo di lesioni:
Tenere la batteria e l’apparecchio lontani dalla portata dei
bambini.
Non gettare le batterie nel fuoco, non polarizzarle in maniera
scorretta, non smontarle e non cercare di ricaricarle. Pericolo di
esplosione!
Le batterie contengono acidi nocivi per la salute. Sostituire quan-
to prima le batterie quasi scariche, in modo da evitare che si
scarichino completamente. Quando si maneggiano batterie esau-
rite indossare sempre guanti resistenti alle sostanze chimiche e
occhiali di protezione.
Avvertenze sulla sicurezza del prodotto!
Non esporre l'apparecchio a temperature estreme, vibrazioni e
urti.
Proteggere dall’umidità.
4. Componenti
Tasti
A:
Tasto M SET
B:
Tasto RESET
C:
Tasto REC
Contenitore
D:
Sistema di montaggio a parete
E:
Vano batteria
Informazioni dell’ora radiocontrollata DCF:
Il segnale orario è fornito dall'orologio atomico al cesio dell'isti-
tuto di metrologia ”Physikalisch Technische Bundesanstalt” di
Braunschweig (Germania), che presenta una deviazione di meno
di un secondo in un milione di anni. L'ora è codificata e viene
trasmessa da Mainflingen vicino a Francoforte con un segnale a
frequenza DCF-77 (77,5 Khz), ed p2-ha un raggio di trasmissione di
circa 1.500 km. L’orologio radiocontrollato riceve il segnale, lo
converte per visualizzare l'ora precisa sia con l'ora legale sia con
l'ora solare. La qualità della ricezione dipende molto dalla posi-
zione geografica. In condizioni normali non dovrebbero esserci
problemi di ricezione entro un raggio di trasmissione di 1.500 km
da Francoforte.
Siete pregati di osservare le indicazioni elencate qui di seguito:
La distanza raccomandata da qualsiasi fonte di interferenza
come monitor di computer o televisori è di almeno 1,5 – 2 m.
All'interno di strutture in cemento armato (seminterrati, sovra-
strutture) la ricezione del segnale è naturalmente più debole. In
casi estremi si consiglia di sistemare l'unità vicino ad una fine-
stra per ottenere una migliore ricezione del segnale.
Durante le ore notturne, le interferenze dovute ad agenti
atmosferici sono normalmente meno influenti e la ricezione è
possibile nella maggior parte dei casi. Una singola ricezione
giornaliera è sufficiente a garantire la precisione e a mantenere
la deviazione al di sotto di un secondo.
5. Messa in funzione
Inserire una nuova batteria 1,5 V AA, osservando la corretta
polarità.
L'apparecchio è ora pronto per l'uso.
Le lancette del quadrante dell'orologio si imposta sulle 12.00 e
l'orologio inizia di ricevere il segnale radio per 3-12 minuti. Se
è stato ricevuto il codice dell'ora, viene visualizzata l'ora radio-
controllata. L'orologio riceve due volte al giorno (alle 1:00 e
alle 3:00 del mattino) il segnale. Durante la ricezione la lancetta
dei secondi si ferma sulle 12.00.
5.1 Tasto REC
È possibile avviare l’inizializzazione anche in modo manuale.
Premete il tasto REC per 3 secondi. La lancetta dei secondi si
imposta sulle 12.00 e l’orologio inizia a ricevere il segnale radio.
5.2 Tasto M SET - Impostazione manuale dell’ora
Nel caso in cui lorologio non riesca a ricevere il segnale DCF (a
causa di disturbi, distanza di trasmissione ecc.), l'ora può essere
impostata manualmente. L'orologio funziona come un normale
orologio al quarzo.
Tenere premuto per 3 secondi il tasto M SET.
Tenere premuto M SET il tasto fino a che viene visualizzata l'ora
corretta.
Premete il tasto M SET brevemente, la lancetta avanza di un
minuto.
La lancetta dei secondi si ferma sulle 12.00.
Dopo 15 secondi la lancetta dei secondi si muove in avanti.
In caso di corretta ricezione, l'ora impostata in modo manuale
viene sostituita.
5.3 Tasto RESET
Premere il tasto RESET con un oggetto appuntito, se l’orologio
non funziona perfettamente.
6. Cura e manutenzione
Per pulire l'apparecchio utilizzare solo un panno morbido leg-
germente inumidito. Non usare solventi o abrasivi.
Rimuovere la batteria, se non si utilizza l'apparecchio per un
periodo prolungato.
Collocare il dispositivo in un luogo asciutto.
6.1 Sostituzione della batteria
Cambiare la batteria se le funzioni del dispositivo sono più
deboli e/o la lancetta dei secondi si ferma a 12 ore.
Inserire una batteria nuova tipo AA da 1,5 V. Accertarsi di aver
rispettato la corretta polari.
7. Guasti
Problema Risoluzione del problema
Nessun movimento Inserite la batteria con le polari
di lancette giuste
Sostituite la batteria
Nessun movimento di Attendere la ricezione del segnale
lancetta dei secondi radio
Sostituite la batteria
Nessuna ricezione DCF Premete il tasto REC per 3 secondi
Spostate l’apparecchio (fattori di
interferenza!)
Attendete il tentativo notturno di
ricezione
Impostate l'ora manualmente
Indicazione non corretta
Premere il tasto RESET con un
oggetto appuntito
Sostituite la batteria
Qualora il vostro apparecchio continui a non funzionare nonostante
queste procedure, rivolgetevi al rivenditore presso il quale lo avete
acquistato.
8. Smaltimento
Questo prodotto è stato realizzato utilizzando materiali e compo-
nenti di alta qualità che possono essere riciclati e riutilizzati.
È assolutamente vietato gettare le batterie (ricaricabili
e non) tra i rifiuti domestici.
In quali di consumatori, siete tenuti per legge a
consegnare le batterie usate al negoziante o ad altri
enti preposti al riciclo in conformità alle vigenti dispo-
sizioni nazionali o locali, ai fini di uno smaltimento
ecologico.
Le sigle dei metalli pesanti contenuti sono:
Cd=cadmio, Hg=mercurio, Pb=piombo
Questo apparecchio è etichettato in conformi alla
Direttiva UE sullo smaltimento delle apparecchiature
elettriche ed elettroniche (WEEE).
Questo prodotto non deve essere smaltito insieme ai
rifiuti domestici. Il consumatore è tenuto a consegna-
re il vecchio apparecchio presso un punto di raccolta
per lo smaltimento di apparecchiature elettriche ed
elettroniche ai fini di uno smaltimento ecologico.
9. Dati tecnici
Alimentazione: Batteria 1 x 1,5V AA (non inclusa)
Dimensioni esterne: Ø 305 x 45 mm
Peso: 762 g (solo apparecchio)
OS Technology AG/SA · Dorfstr. 73 · CH-3073mligen
I dati tecnici corrispondono allo stato del prodotto al momento della stampa e
possono cambiare senza preavviso. È possibile trovare dati tecnici e informazio-
ni aggiornate sul prodotto inserendo il numero di articolo sul nostro sito.
DICHIARAZIONE DI CONFORMITÀ ’UE
Con la presente dichiariamo che questo impianto radio adempie alle prescri-
zioni sostanziali della direttiva R&TTE 1999/5/CE.
www.irox.com 08/14
Istruzioni per l’uso
LUNA5-2
RoHS
E
A
B
D
C
IROX_No. 60.3517_Anl_08_14 28.07.2014 10:20 Uhr Seite 2


Produkt Specifikationer

Mærke: Irox
Kategori: Alarm
Model: Luna 5-2

Har du brug for hjælp?

Hvis du har brug for hjælp til Irox Luna 5-2 stil et spørgsmål nedenfor, og andre brugere vil svare dig


Alarm Irox Manualer

Irox

Irox HB85 Manual

10 Juli 2025
Irox

Irox H186 Manual

10 Juli 2025
Irox

Irox Luna 5-2 Manual

10 Juli 2025
Irox

Irox GO2 Manual

10 Juli 2025
Irox

Irox TIME ON 81 Manual

10 Juli 2025
Irox

Irox HB13P Manual

10 Juli 2025
Irox

Irox ORA-2 Manual

10 Juli 2025
Irox

Irox ORBIT 2 Manual

10 Juli 2025
Irox

Irox TRAXEL-X Manual

9 Marts 2025

Alarm Manualer

Nyeste Alarm Manualer