JWIN JT-P10 Manual
JWIN
Ikke kategoriseret
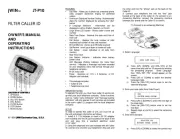
JT-P10

| Mærke: | JWIN |
| Kategori: | Ikke kategoriseret |
| Model: | JT-P10 |
Har du brug for hjælp?
Hvis du har brug for hjælp til JWIN JT-P10 stil et spørgsmål nedenfor, og andre brugere vil svare dig
Ikke kategoriseret JWIN Manualer
1 Juli 2025
Ikke kategoriseret Manualer
- Kool-It
- Crosley
- Weihrauch Sport
- Inverto
- Advantix
- SoundPEATS
- Kelvinator
- EMG
- Dell
- Scytek
- J.P. Instruments
- Contour Design
- Lumu
- Stokke
- Magic Care
Nyeste Ikke kategoriseret Manualer

2 Januar 2026

2 Januar 2026

2 Januar 2026

2 Januar 2026

2 Januar 2026

2 Januar 2026

2 Januar 2026

2 Januar 2026

2 Januar 2026

2 Januar 2026