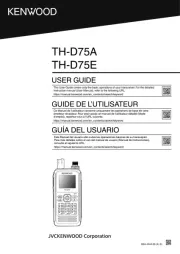
This user guide only describes the basic operation of
your radio. For detailed instructions on how to use your
radio, please refer to the URL or QR code.
https://manuals.jvckenwood.com/download/files/B5K-1239-00.pdf
We are grateful for you have chosen KENWOOD for your General Mobile
Radio Service (GMRS)/ Family Radio Service (FRS)applications.
The RBRC Recycle seal found on lithium-ion (Li-ion) KENWOOD
battery packs indicates ’s voluntary participation in an KENWOOD
industry program to collect and recycle Li-ion batteries after their
operating life has expired. The RBRC program is an alternative to
disposing Li-ion batteries with your regular refuse or in municipal
waste streams, which is illegal in some areas.
For information on Li-ion battery recycling in your area, call (toll free)
1-800-8-BATTERY (1-800-822-8837).
KENWOOD’s involvement in this program is part of our commitment to
preserve our environment and conserve our natural resources.
The title to and ownership of copyrights for rmware embedded in KENWOOD
product memories are reserved for JVCKENWOOD Corporation.
◆Government law prohibits the operation of unlicensed radio transmitters
within the territories under government control.
ation is punishable by ne and/or imprisonment.
efer service to qualied technicians only.
Safety: It is important that the operator is aware of, and understands,
hazards common to the operation of any transceiver.
◆ The listed ranges are based on eld testing and may vary with your
Observe the following precautions to prevent re, personal injury, and
• Do not charge the transceiver and battery pack when they are wet.
e that there are no metallic items located between the transceiver and the
• Do not use options not specied by KENWOOD.
If the die-cast chassis or other tr
ansceiver part is damaged, do not touch the
• If a headset or headphone is connected to the transceiver, reduce the
transceiver volume. Pay attention to the volume level when turning the squelch
ophone cable around your neck while near machinery that
• Do not place the transceiver on unstable surfaces.
e that the end of the antenna does not touch your eyes.
ansceiver is used for transmission for many hours, the radiator
and chassis will become hot. Do not touch these locations when replacing the
ays switch the transceiver power o before installing optional accessories.
• When water gets into the microphone opening or the speaker grill, the voice
level may become low or distorted. Lightly shake the transceiver to remove the
water from the speaker and/or microphone before operating the transceiver.
ger is the device that disconnects the unit from the AC mains line. The
AC plug should be readily accessible.
• To dispose of batteries, be sure to comply with the laws and regulations in your
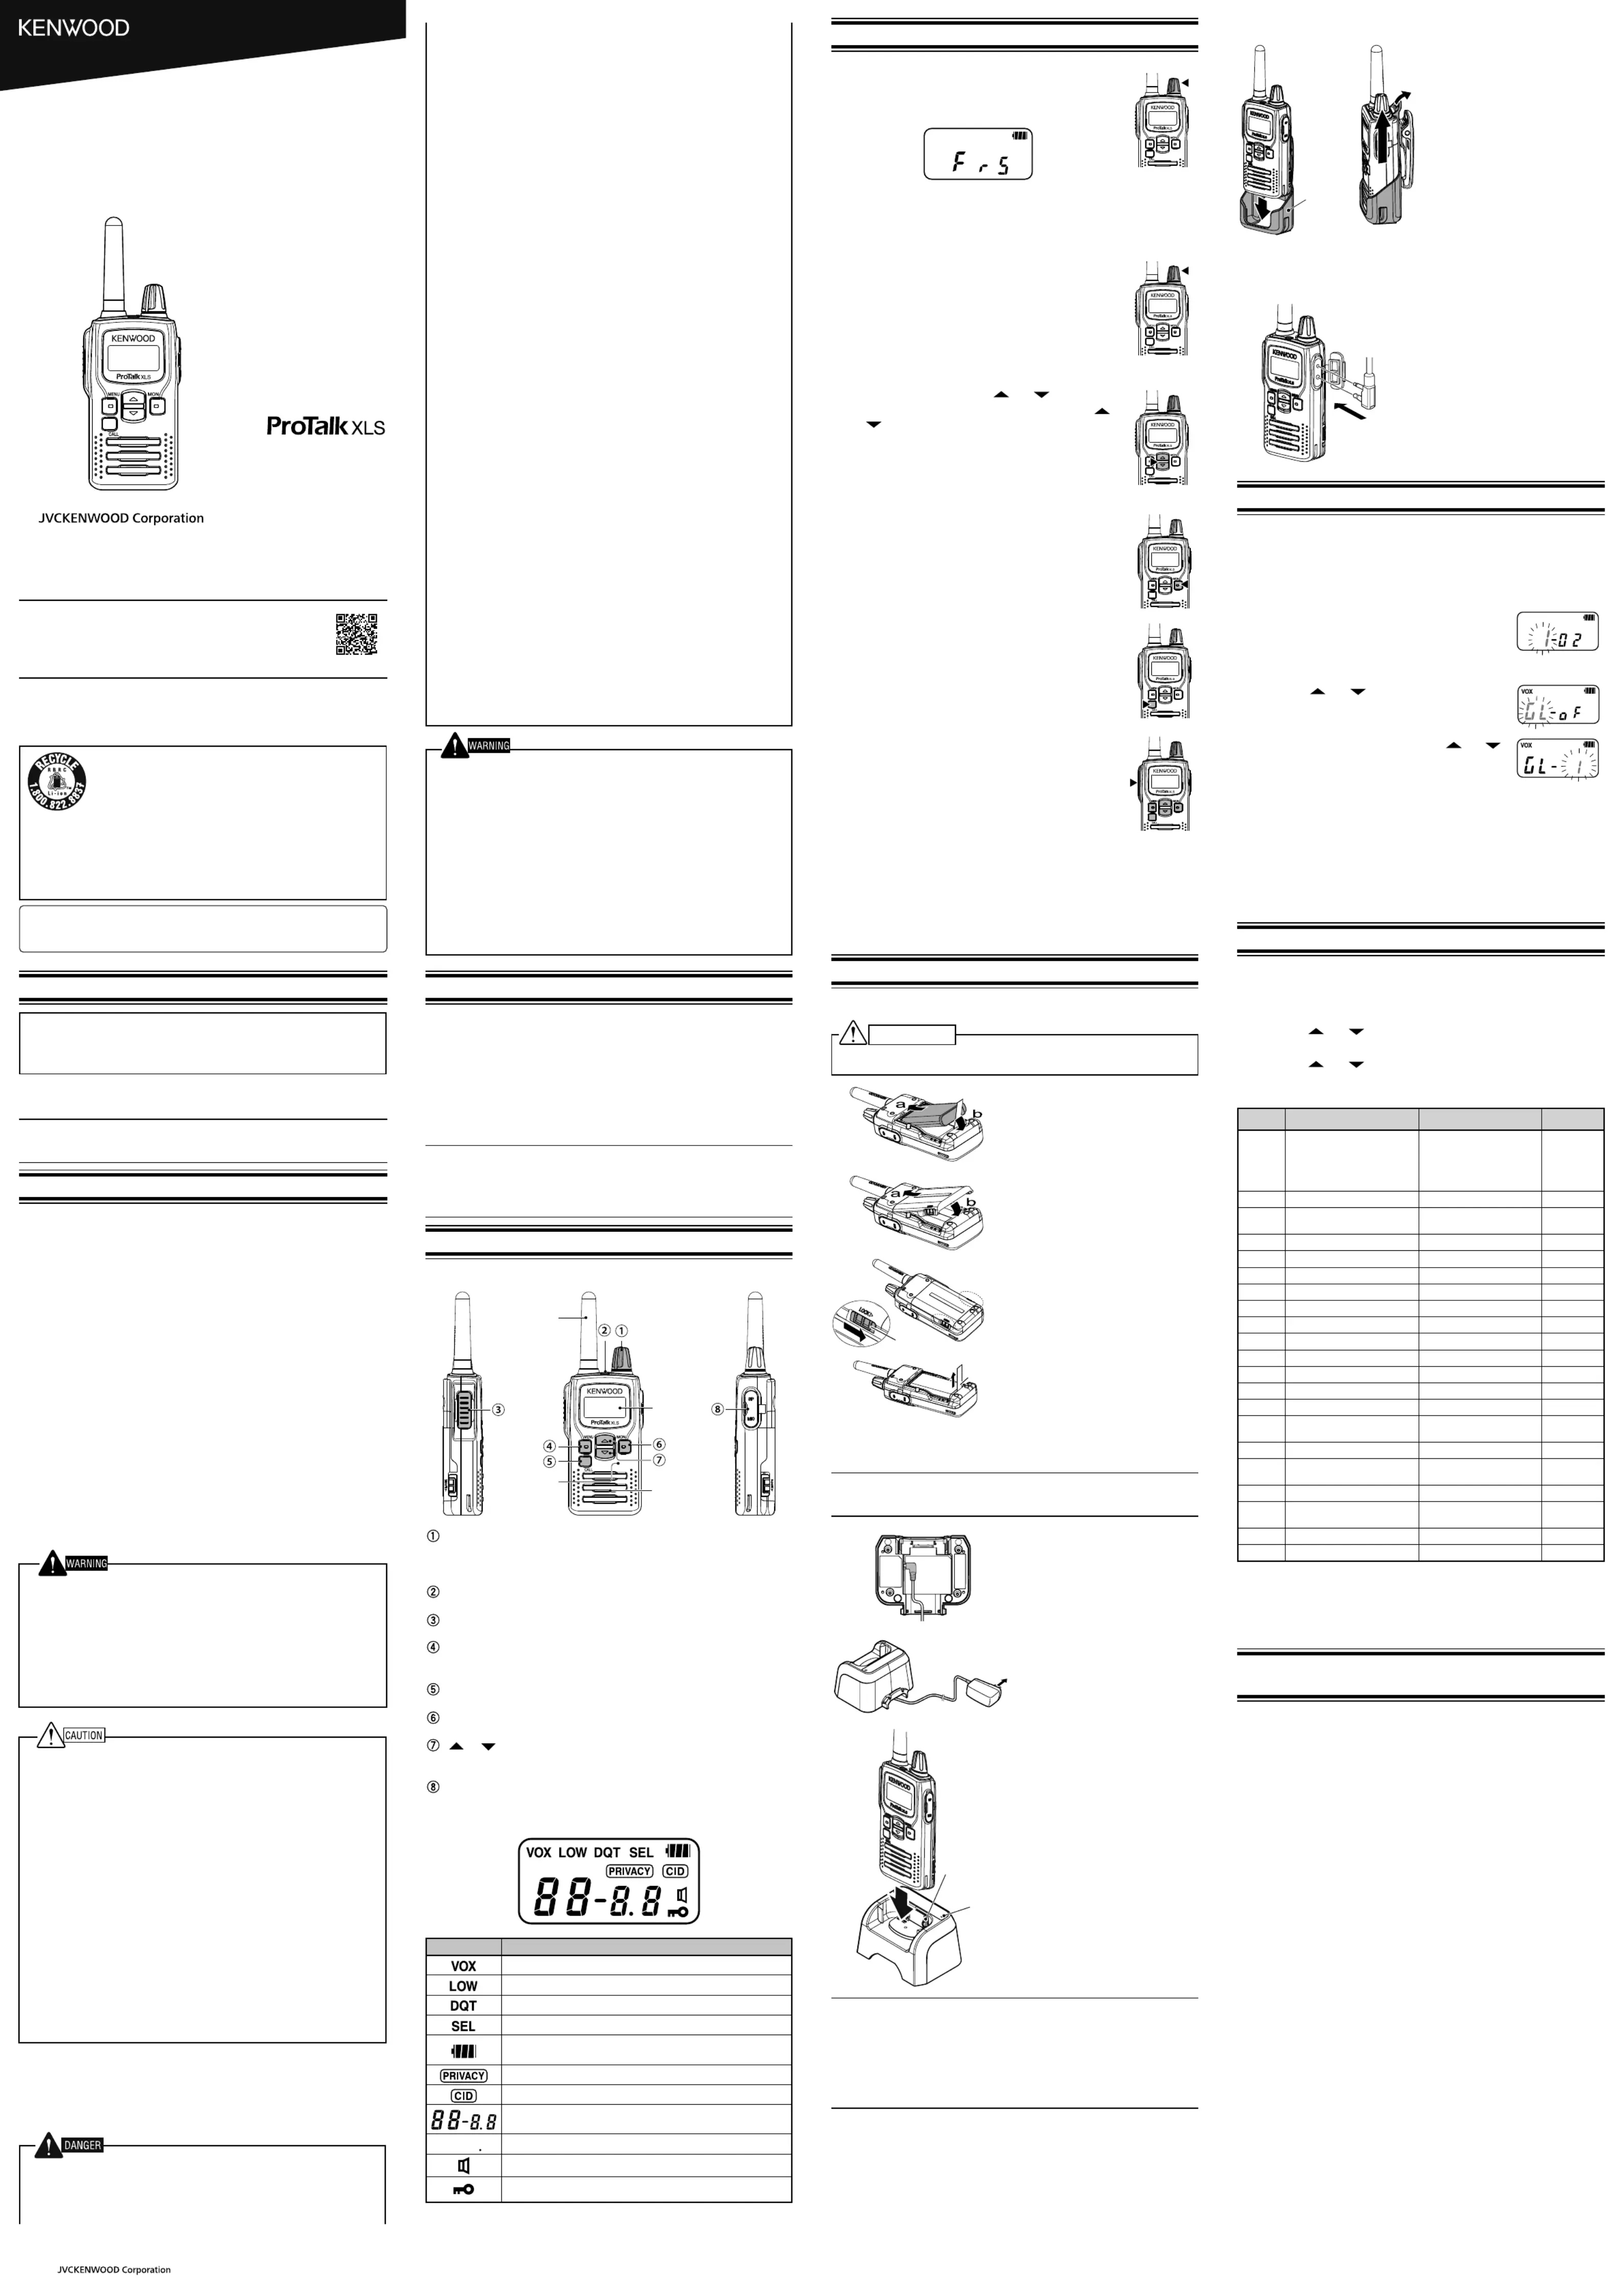
Turn the Power switch/ Volume control clockwise to switch the
Power On Tone sounds and all segments are displayed. “FrS”
appears for 2 seconds, then channels are displayed.
Turn the Power switch/ Volume control counterclockwise
until it clicks at the OFF Position.
Rotate the Power switch/ Volume control to adjust
the volume. Clockwise increases the volume and
counterclockwise decreases it.
• Set your desired volume level by rotating the Power
ct a channel by pressing the [
A conrmation tone sounds each time you press the [ ]
• When you receive a call on your selected channel, you
will hear audio from the speaker and the LED will light
1 Press the button to make sure the channel is not [MON]
2 Press and release the button to alert the other [CALL]
parties that you are beginning a Call.
• A call alert tone will sound on the other party’s
3 [PTT] Press and hold the switch, then speak into the
speaker area to transmit.
• The LED lights red while transmitting.
• For best sound quality, speak into the speaker area
in your normal speaking voice while holding the
transceiver approximately 1.5 inches (3 to 4 cm) from
elease the [PTT] switch when you have nished
The Time-out Timer prevents callers from using a channel for an extended
duration for 60 seconds. If you continuously transmit for the duration,
transmission will stop and an alert tone will sound. To stop the tone, release
INSTALLING/ REMOVING THE BATTERY PACK
Do not short the battery terminals or dispose of the battery by re. Never attempt to
remove the casing from the battery pack.
1 Align the battery pack with the
grooves on the back of the
transceiver and insert it. ( a → b)
ay attention to the position of
notch of the battery pack.
Align and insert the battery cover to the
groove on the back of the transceiver,
and then close it. (a → b)
• When closing the battery cover,
insert the ribbon inside.
the Lock lever (both sides) to
• There will be feedback in the form
o remove the battery pack,
release the lock on the battery
cover, then remove the battery
cover and pull the ribbon upwards.
CHARGING THE BATTERY PACK
The battery pack is not charged at the factory; charge it before use.
ays switch OFF a transceiver equipped with a battery pack before
inserting the transceiver into the charger.
1 Connect the DC plug of the AC
adapter to the DC IN jack on the
2 Plug the AC adapter into an AC
transceiver equipped with a
battery pack into the charging
• Make sure the metal contacts
securely with the charger
the indicator ashing green.
Remove the battery pack or the
transceiver from the charging slot
◆When the indicator blinks red, the battery pack is either defective or the
battery pack contacts are not properly mated with those of the charger.
◆The ambient temperature should be between 5°C and 40°C while
charging is in progress. Charging outside this range may not fully charge
◆The battery pack life is over when its operating time decreases even
though it is fully and correctly charged. Replace the battery pack.
INSTALLING THE BELT CLIP HOLSTER
1 Installing the transceiver on the
to the rear side, remove the lock
and pull out the transceiver.
INSTALLING THE OPTIONAL SPEAKER/ MICROPHONE
1 SP/MIC Open the tabs on the side of
t the accessory’s plugs into the
from the transceiver, be sure to cover
the SP/MIC jacks with the attached
tabs, in order to keep dust and dirt
Using the VOX feature, you can operate the transceiver hands-free. In order
to use this feature, however, you must use an optional headset; VOX will
not function with the built-in microphone. For best operation conditions,
we recommend you use an optional headset with both an ear piece and a
microphone on a boom that rests in front of your mouth.
1 Enter the Setting Mode.
• Press and hold the button then power [MENU]
ON. Keep holding the button for 1 sec. [MENU]
Key On Tone sounds and transceiver goes into
2 [ ] [ ] Press the or button to select “GL ”.
Press the button then press the or [MENU] [ ] [ ]
button to select “ GL- 1 ” (VOX gain level 1) to “ GL- 5 ”
4 To exit VOX, set GL to “oF” (VOX function o) in Setting Mode.
1 To transmit, speak into the headset microphone.
You do not need to press the switch; the transceiver automatically [PTT]
detects your voice and begins transmitting. The LED lights red.
o stop transmitting, stop speaking.
Transmission will continue momentarily after you stop speaking. You can
select the delay time as described on VOX Delay Time.
Many function on this transceiver are selected or set via menus instead of
1 With the transceiver power OFF, press and hold the button while [MENU]
turning the transceiver power ON (for 1 second).
] [ ] or button to select setting item.
ess the button to go into data setting.[MENU]
] [ ] or button to select setting data.
ess [MENU]the button again to go back to setting item selection.
Display Setting Item Setting Range Default
Ct Incoming Call Notication O/ On O
CS Call Alert Side Tone OnO/ On
rt Mode Reset Timer O / 10 / 30 sec 10 sec
to Time-out Timer 1/ 2/ 3 to 10 min 1 min
bL Busy Channel Lockout O/ CO/ CQ/ IQ O
Lt BackLight A (Auto) O/ On/ A (Auto)
bt Battery Level Indicator OnO/ On
bS Battery Saver O/ On O
SC Scan Function O/ On O
Sq Squelch Level 0/ 1/ 2/ 3/ 4/ 5 2
SE Mic Sense no (Normal)/ HI (High)
GL VOX Gain Level O/ 1 to 5 O
0.3/ 0.5/ 1.0/ 1.5/2.0/ 3.0
CO VOX Cancel Operation *
Po Selectable Power On Tone Type 1 to 3 1
: If Call Key is set to O, this menu is skipped.
: If VOX Gain Level is set to O, this menu is skipped.
: When Channel Frequency Setting is set from F0 to other than F0 in
Setting Mode, each channel setting is set to Default and QT/DQT is set
RADIO FREQUENCY ENERGY SAFETY
This device contains licence-exempt transmitter(s)/receiver(s) that comply
with Innovation, Science and Economic Development Canada’s licence-
exempt RSS(s). Operation is subject to the following two conditions:
device may not cause interference.
2. This device must accept any interference, including interference that may
cause undesired operation of the device.
RF Exposure Compliance and Control Guidelines and
For body-worn operation, this radio has been tested and meets the ISED RF
exposure guidelines when used with accessories supplied or designated for
this product. Use of other accessories may not ensure compliance with ISED
Hold the transmitter approximately 25 mm from your face and speak in a
normal voice, with the antenna pointed up and away.
Transmit no more than the rated duty factor of 50% of the time. To transmit
(talk), push the Push-To-Talk (PTT) button. To receive calls, release the PTT
button. Transmitting 50 % of the time, or less, is important because this radio
generates measurable RF energy exposure only when transmitting (in terms
of measuring for standards compliance).
• Do not short-circuit the battery!
Do not join the + and – terminals using any form of metal (such as a paper clip or
wire). Do not carry or store the battery pack in containers holding metal objects
(such as wires, chain-necklaces or hairpins). If the battery pack is short-circuited,
excessive current will ow and the battery may generate heat or smoke, rupture,
or burst into ame. It will also cause metal objects to heat up.
• Do not incinerate or apply heat to the battery!
If the insulator is melted, the gas release vent or safety function is damaged, or
the electrolyte is ignited, the battery may generate heat or smoke, rupture, or
•
reaching over 80°C/ 176°F)!
If the polymer separator is melted due to high temperature, an internal short-
circuit may occur in the individual cells and the battery may generate heat or
smoke, rupture, or burst into ame.
• Do not immerse the battery in water or get it wet by other means!
If the battery’s protection circuit is damaged, the battery may charge at extreme
current (or voltage) and an abnormal chemical reaction may occur. The battery
may generate heat or smoke, rupture, or burst into ame.
•
If the battery’s protection circuit is damaged, the battery may charge at extreme
current (or voltage) and an abnormal chemical reaction may occur. The battery
may generate heat or smoke, rupture, or burst into ame.
•
If the battery is charged in unspecied conditions (under high temperature over
the regulated value, excessive high voltage or current over regulated value,
or with a remodeled charger), it may overcharge or an abnormal chemical
reaction may occur. The battery may generate heat or smoke, rupture, or burst
• Do not pierce the battery with any object, strike it with an instrument, or step
This may break or deform the battery, causing a short-circuit. The battery may
generate heat or smoke, rupture, or burst into ame.
• Do not jar or throw the battery!
An impact may cause the battery to leak, generate heat or smoke, rupture, and/
or burst into ame. If the battery’s protection circuit is damaged, the battery may
charge at an abnormal current (or voltage), and an abnormal chemical reaction
may occur. The battery may generate heat or smoke, rupture, or burst into
• Do not use the battery pack if it is damaged in any way!
The battery may generate heat or smoke, rupture, or burst into ame.
• Do not solder directly onto the battery!
If the insulator is melted or the gas release vent or safety function is damaged,
the battery may generate heat or smoke, rupture, or burst into ame.
•
When charging a reversed battery, an abnormal chemical reaction may occur. In
some cases, an unexpected large amount of current may ow upon discharging.
The battery may generate heat or smoke, rupture, or burst into ame
• Do not reverse-charge or reverse-connect the battery!
The battery pack has positive and negative poles. If the battery pack does
not smoothly connect with a charger or operating equipment, do not force it;
check the polarity of the battery. If the battery pack is reverse-connected to the
charger, it will be reverse-charged and an abnormal chemical reaction may
occur. The battery may generate heat or smoke, rupture, or burst into ame.
• Do not touch a ruptured and leaking battery!
If the electrolyte liquid from the battery gets into your eyes, wash your eyes with
fresh water as soon as possible, without rubbing your eyes. Go to the hospital
immediately. If left untreated, it may cause eye-problems..
•
If the battery pack has not nished charging even after the regulated time has
passed, stop it. The battery may generate heat or smoke, rupture, or burst into
• Do not place the battery pack into a microwave or high pressure container!
The battery may generate heat or smoke, rupture, or burst into ame.
•
If the battery pack is leaking (or the battery emits a bad odor), immediately
remove it from ammable areas. Electrolyte leaking from the battery can easily
catch on re and may cause the battery to generate smoke or burst into ame.
• Do not use an abnormal battery!
If the battery pack emits a bad odor, appears to have dierent coloring, is
deformed, or seems abnormal for any other reason, remove it from the charger
or operating equipment and do not use it. The battery may generate heat or
smoke, rupture, or burst into ame.
UNPACKING AND CHECKING EQUIPMENT
Carefully unpack the transceiver. If any of the items listed below are missing
or damaged, le a claim with the carrier immediately.
• Li-ion Battery Pack (KNB-81L) 1 ................................................
.................................................. 1
......................................................... 1
ter (KBH-23) 1 ......................................................
..............................................................................1
er/ microphone jack, waterproof performance is guaranteed by
securing the supplied cap. Waterproof performance will not be guaranteed
by connecting an optional speaker/ microphone, etc.
efer to “PREPARATION” for accessory installation instructions.
Power switch/ Volume control
urn clockwise to switch ON the transceiver. To switch OFF the
transceiver, turn counterclockwise until a click sounds. Rotate to adjust
Indicates the transceiver status.
Press and hold, then speak into the microphone to transmit.
Press to perform various functions. Press and hold while switching the
power ON to enter Setting Mode.
Press before making a call to alert the other party members.
Press to monitor the current channel for activity.
Press to change the operating channel, to select a menu in Setting
Mode, and to perform other functions.
Insert the speaker/ microphone or headset plug into this jack.
Appears when VOX is activated.
Appears when using low transmit power.
Appears when the channel is set up with a DQT code.
Displays the approximate battery power remaining. Blinks
when the battery power is low, while transmitting.
Appears when Privacy Talk is activated.
Displays the channel number along with its QT/DQT setting
(if any). Also displays various menus and menu settings.
Appears when compander is activated.
Appears while monitoring a channel.
Appears when the transceiver buttons have been locked.
Turn the transceiver power o in the following locations:
• In explosive atmospheres (inammable gas, dust particles, metallic
powders, grain powders, etc.).
While taking on fuel or while park
ed at gasoline service stations.
• Near explosives or blasting sites.
• In aircraft. (Any use of the transceiver must follow the instructions and
regulations provided by the airline crew.)
• Where restrictions or warnings are posted regarding the use of radio
devices, including but not limited to medical facilities.
• Near persons using pacemakers.
• Do not modify the transceiver for any reason.
• Do not place the transceiver on or near airbag equipment while the vehicle
is running. When the airbag inates, the transceiver may be ejected and
strike the driver or passengers.
ansmit while any metallic parts are exposed from the antenna
covering. Transmitting at such a time may result in a high-frequency burn.
• If an abnormal odor or smoke is detected coming from the transceiver, switch the
transceiver power o immediately, remove the battery pack from the transceiver,
and contact your KENWOOD dealer.
• Use of the transceiver while you are driving may be against trac laws. Please
check and observe the vehicle regulations in your area.
• Do not expose the transceiver to extremely hot or cold conditions.
y the battery pack with metal objects, as they may short the
• Danger of explosion if the battery is incorrectly replaced; replace only with
• When operating the transceiver in areas where the air is dry, it is easy to
build up an electric charge (static electricity). When using an earphone
accessory in such conditions, it is possible for the transceiver to send
an electric shock through the earphone and to your ear. Do not use an
earphone/microphone accessory in areas where static electricity can be
cial strap to the transceiver, ensure that the strap
is durable. In addition, do not swing the transceiver around by the strap; you
may inadvertently strike and injure another person with the transceiver.
Information concerning the battery pack:
The battery pack includes ammable objects such as organic solvent.
Mishandling may cause the battery to rupture producing ames or extreme
heat, deteriorate, or cause other forms of damage to the battery. Please
observe the following prohibitive matters.
• Do not disassemble or reconstruct battery!
The battery pack has a safety function and protection circuit to avoid danger. If
they suer serious damage, the battery may generate heat or smoke, rupture, or