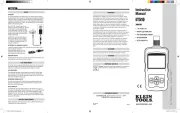
Klein Tools ET900 Manual
Klein Tools
Måleudstyr
ET900
Læs gratis den danske manual til Klein Tools ET900 (3 sider) i kategorien Måleudstyr. Denne vejledning er vurderet som hjælpsom af 19 personer og har en gennemsnitlig bedømmelse på 3.7 stjerner ud af 10 anmeldelser. Har du et spørgsmål om Klein Tools ET900, eller vil du spørge andre brugere om produktet?
Side 1/3

ENGLISH
1. Power source INPUT (USB-A)
2. Load OUTPUT (USB-A)
3. Mode button
4. LCD display
A. DC voltage
B. DC current
C. Capacity/charge delivered (mAh)
D. Energy delivered (Wh)
E. Resistance (Ω)
F. Elapsed Time (Hour:Min:Sec)
G. Memory Location ( , , etc)M:1 M:2
H. Memory Clear/Reset ("CLR")
NOTE: No user-serviceable parts inside.
FIG. 1
FIG. 2
32 4 1
ET900
INSTRUCTION MANUAL - USB DIGITAL METER - TYPE A
Default Screen
##.## V
#.## A
###### mAh ####Wh
###:##:## ###.#Ω
E
D
A
C
B
F
Memory Screen
##.## V CLR
#.## A
###### mAh ####Wh
###:##:## ###.#Ω
A
F
D
C
B
E
H
G
OPERATING INSTRUCTIONS
MONITORING MODE
NOTE: The input plug must be connected to a powered USB
device before the downstream device is connected to the
output port.
"Downstream device" refers to any device that has
the ability to draw current over USB power source.
1. Connect the input connector to the USB port to be monitored.
• The display will turn on with Klein Tools logo screen and move
quickly to the Default Screen (FIG 2).
• If the source port has power, it will only display a live voltage
reading within the operating range, 3-20V DC.
NOTE: Most USB
ports deliver ~5V DC.
2. Connect the device being charged to the output port of the
ET900. The display will show actual readings (FIG. 2).
NOTE: "mAh" resets only when source is disconnected.
CLEANING
Be sure the tester is disconnected from both the input and
output port. Use clean, dry, soft lint-free cloth to wipe down
the entire unit.
•
Do NOT use abrasive cleaners or solvents.
STORAGE
Do not expose to high temperatures or humidity. After a period
of storage in extreme conditions exceeding the limits mentioned
in the General Specifications section, allow the tester to return to
normal operating conditions before using.
DISPOSAL / RECYCLE
Do not place equipment and its accessories in the trash.
Items must be properly disposed of in accordance with
local regulations. Please see www.epa.gov/recycle for
additional information.
CUSTOMER SERVICE
KLEIN TOOLS, INC.
450 Bond Street, Lincolnshire, IL 60069 1-800-553-4676
customerservice@kleintools.com www.kleintools.com
WARNINGS
T
o ensure safe operation and service of the tester, follow these
instructions. Failure to observe these warnings can result in
severe injury or death.
• NOTThis tester will display current below 50 mA, even if it is
allowing this to pass through.
NOTE: The display will show
zero current.
• DO NOT use with ports that operate outside of the rated voltage
and current .
• Before each use verify tester operation by measuring a known
voltage or current.
• NEVER use on a circuit with voltage or current that exceeds the
maximums specified for this device. Use caution when working
with voltages above 25V AC RMS or 60V DC. Such voltages
pose a shock hazard.
Voltage above 24V DC will damage
product.
Display will read "OVERLOAD" in this condition and
output port will be disabled.
• DO NOT use during electrical storms or in wet weather.
• DO NOT use if tester appears to be damaged.
• Always adhere to local and national safety codes. Use personal
protective equipment to prevent shock and arc blast injury
where hazardous live conductors are exposed.
CAUTION
• DO NOT attempt to repair this tester. there are no serviceable parts.
• DO NOT modify this tester in any way.
• DO NOT expose to extremes in temperature or high humidity.
• NOTThis tester will be able to monitor a source port if any of
the following conditions occur:
• The USB port or plug is not properly connected.
• The source device shuts down. Some portable storage
batteries have auto-shutdown or standby modes to save
power if no load is detected from downstream device.
SYMBOLS ON TESTER
Important information:
It is important that
users of this tester read,
understand, and follow
all warnings, cautions,
safety information,
and instructions in this
manual before operating
this tester. Failure to
follow instructions
could result in death or
serious injury.
Warning – Risk of electric shock
Read instructions
This product has been independently
tested by Intertek and meets applicable
published standards
Conformité Européenne: Conforms with
European Economic Area directives
UKCA - UK Conformity Assessment
USB
GENERAL SPECIFICATIONS
The Klein Tools ET900 is a USB digital meter for USB-A (Type-A) ports. It
accurately and reliably measures and displays the USB port voltage, current,
capacity, energy and resistance simultaneously. It can function with any USB-A
port that has the ability to deliver power. It requires no batteries, as it draws
power from the power source.
• Measurement Range:
Voltage: 3 to 20V DC, +/-1% (+/-2 Bytes) accuracy
Current: 0.05 to 3A, +/-1% (+/-2 Bytes) accuracy
Charge delivered: 99,999mAh MAX*
Energy delivered: 999Wh MAX*
Resistance: 400Ω MAX
Elapsed Time: Up to 999 hours, 59 min, 59 sec*
*Based on display layout
• Operating and Storage Altitude: Up to 6562 ft. (2000 m)
• Operating and Storage Temp: ° ° ° °14 to 122 F (-10 to 50 C)
• Relative Humidity: <95% non-condensing
• Dimensions: Tester: 2.84" × 1.25" × 0.565" (72 × 32 × 14 mm)
Cable: Approx. 4" (100 mm)
• Weight: 1.1 oz. (31 g)
• Pollution degree: 2
• Drop Protection: 6.6 ft. (2 m)
• Ingress Protection: IP20
• Compatibility: Qualcomm Quick Charge® Compatible
• Standards:
Conforms to UL STD. 61010-1, 61010-2-030.
Certified to CSA STD. C22.2 No. 61010-1,
61010-2-030.
Specifications subject to change.
FUNCTION BUTTONS (FIG. 1)
MODE BUTTON
3
(Screen Toggle/Data Storage/Memory reset)
The Mode button serves three purposes:
1. Switch between screens (FIG. 2):
From the default screen, pressing and releasing once will switch to the
Memory Screen.
2. Data/Memory Storage:
To record a reading during live monitoring event, press and hold the Mode
button for 3 seconds. Release the button after the memory location (i.e. M:1)
flashes momentarily on the screen. The next set of readings will be stored at
the next available location until all 10 memory locations are used.
NOTE: Once
all 10 locations are used, subsequent readings will overwrite them, beginning
with M:1. When in the Memory screen, if the Mode button is not NOTE:
pressed within 3 seconds, the display will return to the Default screen.
3. Memory Recall/Reset:
When in the Memory Screen, repeated pressing will cycle through all 10
memory locations, beginning with M:1. You must scroll through all 10
locations to exit.
NOTE: If no data has been stored into memory, pressing
the Mode button will do nothing. The ET900 will only display memory
locations containing stored data.
To reset or erase all data in memory, press and hold the Mode button
for 5 seconds from the Memory screen until the letters flash in the CLR
upper right corner (FIG. 2). All data in memory will be erased in all 10
memory locations.
BASED ON: 1330562 Rev 09/21 E

ESPAÑOL
1. ENTRADA de fuente de energía (USB-A)
2. SALIDA de carga (USB-A)
3. Botón de modo
4. Pantalla LCD
A. Voltaje CD
B. Corriente CD
C. Capacitancia/Carga suministrada (mAh)
D. Energía suministrada (Wh)
E. Resistencia (Ω)
F. Tiempo transcurrido (Hora:Min:Seg)
G. Ubicación de memoria ( , , etc.)M:1 M:2
H. Limpiar/reiniciar memoria (" ")CLR
NOTA: No contiene en su interior
piezas que el usuario pueda reparar.
ET900
MANUAL DE INSTRUCCIONES - MULTÍMETRO DIGITAL USB - TIPO A
FIG. 1
FIG. 2
32 4 1
Pantalla predeterminada
##.## V
#.## A
###### mAh ####Wh
###:##:## ###.#Ω
E
D
A
C
B
F
Pantalla de memoria
##.## V CLR
#.## A
###### mAh ####Wh
###:##:## ###.#Ω
A
F
D
C
B
E
H
G
INSTRUCCIONES DE OPERACIÓN
MODO DE SUPERVISIÓN
NOTA: El conector de entrada debe estar conectado a un dispositivo USB
con alimentación antes de conectar el dispositivo de descarga al puerto
de salida. “Dispositivo de descarga” hace referencia a cualquier dispositivo
que tenga la capacidad de consumir corriente por una fuente de energía USB.
1. Conecte el conector de entrada al puerto USB a supervisar.
• La pantalla se encenderá con el logotipo de Klein Tools y cambiará
directamente a la pantalla predeterminada (FIG. 2).
• Si el puerto de fuente tiene energía, solo va mostrar una lectura de
voltaje en tiempo real dentro del rango de operación, de 3 a 20V CD.
NOTA: La mayoría de puertos USB suministran ~5V CD.
2. Conecte el dispositivo que está siendo cargado al puerto de salida del
ET900. La pantalla mostrará lecturas en tiempo real (FIG. 2).
3. El usuario puede supervisar en la pantalla predeterminada o en la pantalla
aumentada. La información mostrada será diferente (FIG. 2).
NOTA: "mAh" se reinicia únicamente cuando se desconecta la fuente.
LIMPIEZA
Asegúrese de que el probador está desconectado de los puertos de entrada
y de salida. Utilice paño limpio y seco que no deje pelusas para limpiar toda
la unidad.
•
NO utilice solventes ni limpiadores abrasivos.
ALMACENAMIENTO
No lo exponga a la humedad ni a altas temperaturas. Luego de un período
de almacenamiento en condiciones extremas que sobrepasen los límites
mencionados en la sección Especificaciones generales, deje que el probador
vuelva a las condiciones de funcionamiento normales antes de utilizarlo.
ELIMINACIÓN/RECICLAJE
No arroje el equipo ni sus accesorios a la basura. Los
elementos se deben eliminar correctamente de acuerdo con las
regulaciones locales. Visite www.epa.gov/recycle para obtener
másinformación.
SERVICIO AL CLIENTE
KLEIN TOOLS, INC.
450 Bond Street, Lincolnshire, IL 60069 1-800-553-4676
customerservice@kleintools.com www.kleintools.com
ADVERTENCIAS
Para garantizar un funcionamiento y servicio seguros del probador, siga
estas instrucciones. El incumplimiento de estas advertencias puede
provocar lesiones graves o la muerte.
• NOEste probador mostrará corriente por debajo de 50mA, inclusosi
permite que pase.
NOTA: La pantalla mostrará cero corriente.
• NO utilice el probador con puertos que funcionan fuera del voltaje y la
corriente nominal.
• Antes de cada uso, compruebe el funcionamiento del probador midiendo
unvoltaje o corriente conocida.
• NUNCA utilice el probador en un circuito con voltaje o corriente que supere los
valores máximos especificados para este dispositivo. Proceda con precaución
cuando trabaje con voltajes superiores a 25V CA RMS o 60 V CD. Esos
voltajes implican un riesgo de choque eléctrico.
Un voltaje superior a los 24 V
CD dañará el product. En la pantalla aparecerá “OVERLOAD” (sobrecarga) en
esta condición y se desactivará el puerto de salida.
• NO lo utilice durante tormentas eléctricas o en clima húmedo.
• NO utilice el probador si en apariencia está dañado.
• Cumpla siempre con los códigos de seguridad locales y nacionales. Utilice
equipo de protección personal para prevenir lesiones por choque y arco
eléctrico en los lugares donde haya conductores activos peligrosos expuestos.
PRECAUCIÓN
• NO intente reparar el probador. No contiene piezas que se puedan reparar.
• NO modifique el probador de ningún modo.
• NO exponga el probador a condiciones de temperatura extrema o de
humedad alta.
• NOEl probador podrá supervisar un puerto de fuente si ocurre alguna de
lassiguientes condiciones:
• El puerto USB o el conector no está conectado correctamente.
• El dispositivo fuente se apaga. Algunas baterías de almacenamiento
portátil tienen modos de apagado automático o de espera para ahorrar
energía si no se detecta carga desde el dispositivo de descarga.
SÍMBOLOS DEL PROBADOR
Información importante:
es importante que el
usuario de este probador
lea, comprenda y respete
todas las advertencias,
precauciones, instrucciones
e información de seguridad
incluidas en este manual,
antes de poner en
funcionamiento el probador.
No seguir estas instrucciones
puede dar lugar alesiones
graves o mortales.
Advertencia: riesgo de choque eléctrico.
Lea las instrucciones
Este producto p2-ha sido probado de manera
independiente por Intertek y cumple con las
normas publicadas vigentes
Conformité Européenne: Cumple con las
normas del Área Económica Europea
UKCA - conformidad evaluada por el
Reino Unido
USB
BOTONES DE FUNCIONES (FIG. 1)
BOTÓN DE MODO
3
(Alternador de pantalla/Almacenamiento de datos/
Reinicio de memoria)
El Botón de modo sirve para tres propósitos:
1. Alternar entre pantallas (FIG. 2):
Desde la pantalla predeterminada, al presionar y soltar una vez cambiará a la
Pantalla de memoria.
2. Almacenamiento de datos/memoria:
Para grabar una lectura durante un evento de supervisión en tiempo
real, mantenga presionado el Botón de modo por 3segundos. Suelte el
botón después de que la ubicación de memoria (es decir, ) parpadee M:1
momentáneamente en la pantalla. El siguiente conjunto de lecturas se
almacenará en la siguiente ubicación disponible hasta que se utilicen todas las
10 ubicaciones de memoria.
NOTA: Cuando se utilicen las 10 ubicaciones de
memoria, las próximas lecturas las sobrescribirán, empezando por M:1.
NOTA:
En la pantalla Memoria, si el Botón de modo no se presiona en
3segundos, la pantalla regresará al modo predeterminado.
3. Recuperación/Reinicio de la memoria:
En la Pantalla de memoria, presione repetidamente para desplazarse por
las 10ubicaciones de memoria, comenzando con M:1. Debe desplazarse
por las 10ubicaciones para salir.
NOTA: si no se han almacenado datos en
la memoria, al presionar el Botón de modo no ocurrirá nada. El ET900 solo
mostrará ubicaciones de memoria que tengan datos almacenados.
Para reiniciar o borrar todos los datos en la memoria, mantenga presionado
el Botón de modo por 5segundos desde la Pantalla de memoria hasta que
parpadeen las letras CLR en la esquina superior derecha (FIG. 2). Todos los
datos en la memoria se borrarán de las 10ubicaciones de memoria.
ESPECIFICACIONES GENERALES
El modelo ET900 de Klein Tools es un multímetro digital USB para puertos
USB-A (Tipo A). Mide y muestra de forma precisa y fiable el voltaje, la corriente,
la capacitancia, la energía y la resistencia de un puerto USB, de manera
simultánea. Funciona con cualquier puerto USB-A que tenga la capacidad de
suministrar energía. No necesita baterías p2-ya que usa energía de la fuente.
• Rango de medición:
Voltaje: 3 a 20V CD, con precisión de +/-1% (+/-2bytes)
Corriente: 0,05 a 3A, con precisión de +/-1% (+/-2bytes)
Carga entregada: 99999mAh MÁXIMO*
Energía entregada: 999Wh MÁXIMO*
Resistencia: 400Ω MÁXIMO
Tiempo transcurrido: Hasta 999horas, 59minutos, 59segundos*
*Basados en el diseño de la pantalla
• Altitud para correcto funcionamiento y almacenamiento: hasta 6562pies (2000m)
• Temperatura de funcionamiento y almacenamiento: ° °14°F a 122 F (-10°C a 50 C)
• Humedad relativa: <95% sin condensación
• Dimensiones: Probador: 2,84" × 1,25" × 0,565" (72× 32× 14 mm)
Cable: Aprox. 4" (100mm)
• Peso: 1,1oz (31g)
• Grado de contaminación: 2
• Protección ante caídas: 6,6' (2m)
• Protección contra el ingreso de objetos sólidos y líquidos: IP20
• Compatibilidad: Compatible con Quick Charge
®
de Qualcomm
• Normas: Cumple con las normas UL 1010-1, 61010-2-030.
Certificado según las normas CSA C22.2 n.°61010-1,
61010-2-030.
Especificaciones sujetas a cambios.
BASADO EN: 1330562 Rev 09/21 E
Produkt Specifikationer
Mærke: | Klein Tools |
Kategori: | Måleudstyr |
Model: | ET900 |
Har du brug for hjælp?
Hvis du har brug for hjælp til Klein Tools ET900 stil et spørgsmål nedenfor, og andre brugere vil svare dig
Måleudstyr Klein Tools Manualer
1 Januar 2025
28 December 2024
21 September 2024
21 September 2024
3 September 2024
3 September 2024
3 September 2024
3 September 2024
3 September 2024
3 September 2024
Måleudstyr Manualer
- Pioneer
- BJZ
- Sekonic
- Senseca
- Continental Edison
- Eberle
- Panasonic
- Lanaform
- Trotec
- Pancontrol
- Megger
- SensoProtect
- Angler
- HT Instruments
- Mitutoyo
Nyeste Måleudstyr Manualer
3 April 2025
3 April 2025
3 April 2025
3 April 2025
3 April 2025
3 April 2025
3 April 2025
3 April 2025
3 April 2025
3 April 2025