Knog PWR Trekker Manual
Knog
Lommelygte
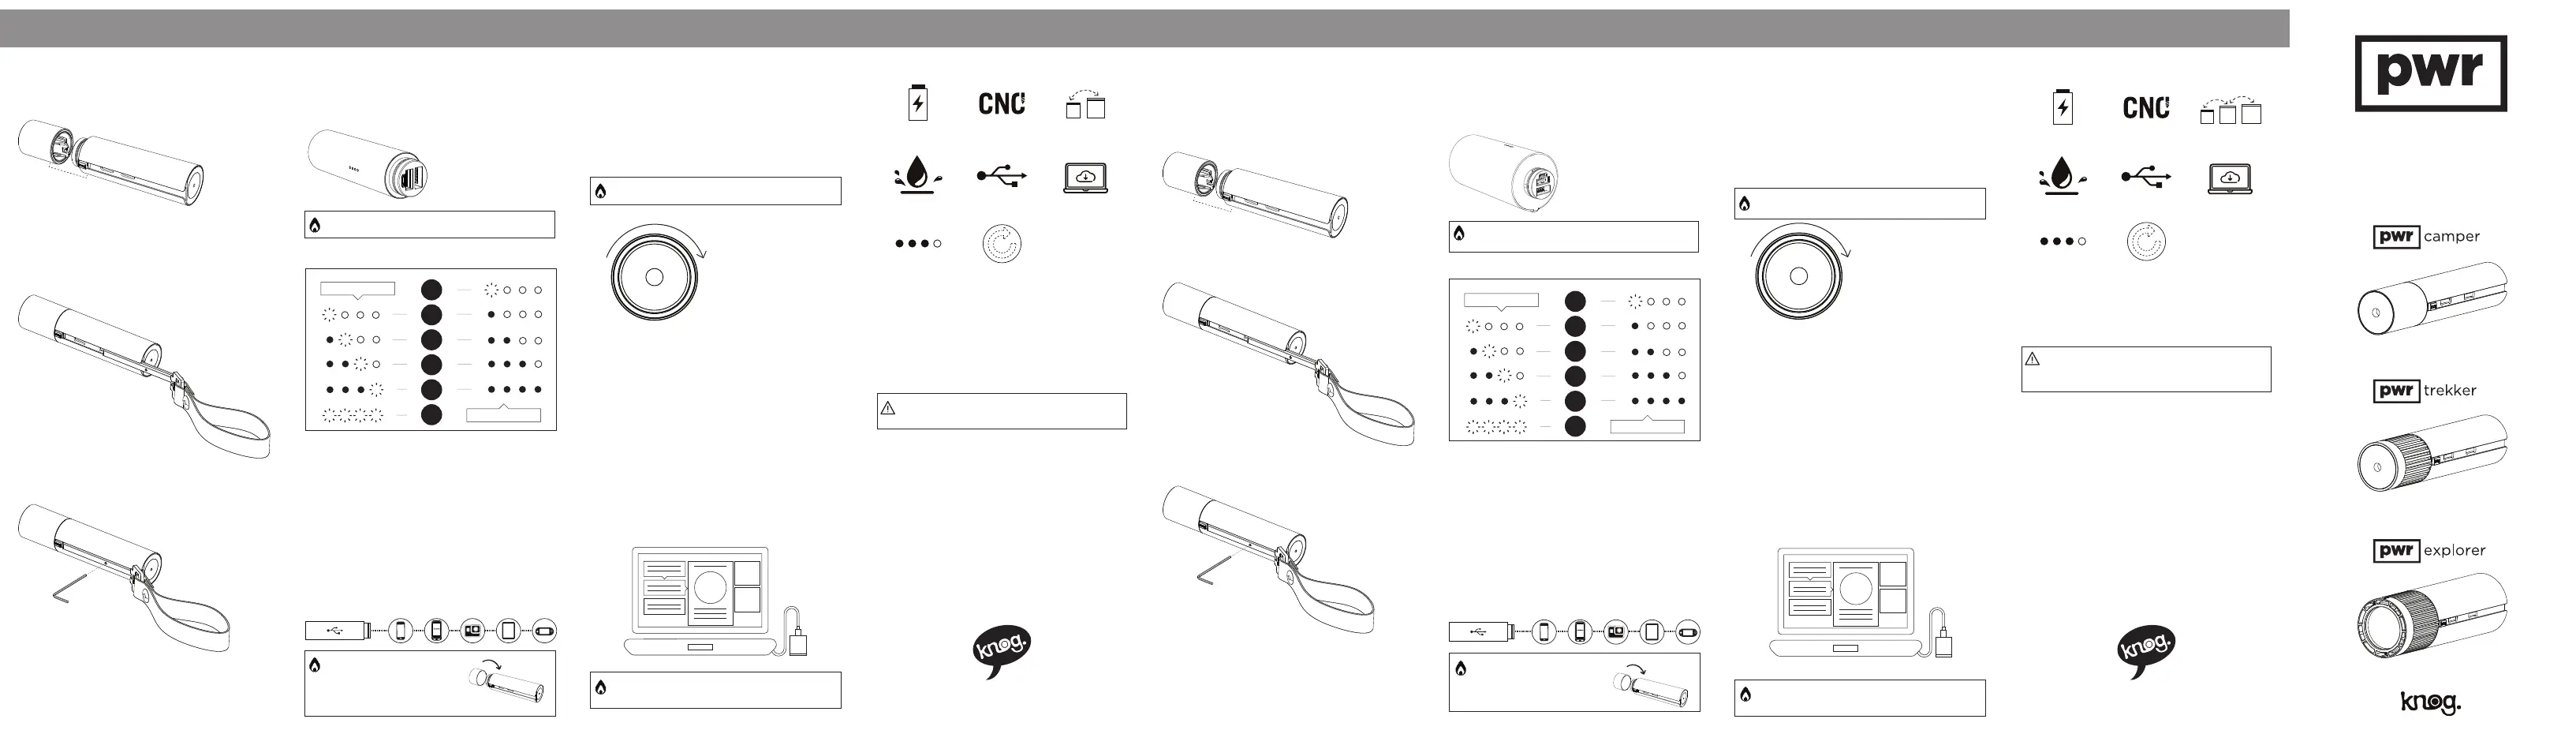
PWR Trekker
| Mærke: | Knog |
| Kategori: | Lommelygte |
| Model: | PWR Trekker |
| Type: | Forlys |
| Bredde: | 37 mm |
| Dybde: | 37 mm |
| Højde: | 137 mm |
| Vægt: | 260 g |
| Produktfarve: | Sort |
| Strømkilde type: | USB |
| Lysstrøm: | 900 lm |
| USB-opladning: | Ja |
| USB opladningsstik: | Ja |
Har du brug for hjælp?
Hvis du har brug for hjælp til Knog PWR Trekker stil et spørgsmål nedenfor, og andre brugere vil svare dig
Lommelygte Knog Manualer
2 September 2024

2 September 2024

2 September 2024

2 September 2024

2 September 2024

2 September 2024

2 September 2024

2 September 2024

2 September 2024

2 September 2024
Lommelygte Manualer
- Beghelli
- FoxFury
- SureFire
- SuperNova
- Brennenstuhl
- Coast
- Rocktrail
- Stanley
- Graphite
- Hoover
- Barska
- Parkside
- Casalux
- Nebo
- NEO Tools
Nyeste Lommelygte Manualer

18 December 2025

18 December 2025

17 December 2025

17 December 2025

17 December 2025

17 December 2025

17 December 2025

17 December 2025

17 December 2025

17 December 2025