La Crosse Technology 30451 Manual


Læs gratis den danske manual til La Crosse Technology 30451 (2 sider) i kategorien Clockradio. Denne vejledning er vurderet som hjælpsom af 45 personer og har en gennemsnitlig bedømmelse på 4.8 stjerner ud af 23 anmeldelser. Har du et spørgsmål om La Crosse Technology 30451, eller vil du spørge andre brugere om produktet?

Side 1/2
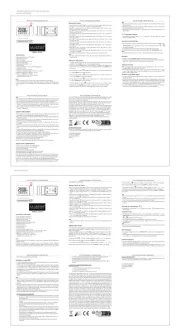
MULTI COLOR ALARM CLOCK
Model: 30451
DC: 053018
POWE R UP
1. Insert the 120 volt power cord into an outlet, then
into your clock.
Optional: Insert one 9 volt battery for backup.
2. 12:00 will flash as an indication to set the time.
TIME S ETTIN G
1. Slide the TIME\AL\CALENDAR\AL.ON/AL.OFF
set switch to TIME position.
2. Press the HOUR \ MONTH button to set the hour.
The PM indicator will light when the hour is
advanced into the PM time.
3. Press the MINUTE \ DATE button to set the
minutes.
4. Slide the TIME\AL\CALENDAR\AL.ON/AL.OFF
set switch to AL.OFF after setting your time.
T IME ALARM
1. Slide the TIME\AL\CALENDAR\AL.ON/AL.OFF
set switch to AL position.
2. Press the HOUR \ MONTH button to set the
hour. The PM indicator will light when the hour
is advanced into the PM.
3. Press MINUTE \ DATE button to set the minutes.
4. Slide the TIME\AL\CALENDAR\AL.ON/AL.OFF
set switch to AL. OFF after setting your alarm
time.
SNOOZE
1. Press the SNOOZE button when the alarm
sounds will stop the alarm and the alarm will
sound again in 5 minutes. The “Zz ” icon will
appear on the display.
2. The snooze function can be repeated many
times.
Page | 2 Page | 3
ALARM ON/OFF
1. Slide the TIME\AL\CALENDAR\AL.ON/AL.OFF
set switch to AL.ON position to choose alarm
ON. The alarm indicator will light up.
2. Slide the TIME\AL\CALENDAR\AL.ON/AL.OFF
set switch to the AL. OFF position to turn the
alarm OFF. The alarm indicator will disappear.
YEAR
HOUR
MONTH
MIN
DATE
CA
LE
N
D
A
R
AL. OFF
AL. ON
AL
TIMEREDG REEN BLUE
SN OOZE
PM
AM
SUNM ON
DATEMONTH
TUEW ED THUF RI SAT
RED Backlight Button
GREEN Backlight Button
BLUE Backlight Button
TIME \ AL \ CALENDAR \ AL. ON \ AL. OFF Switch
CAL ENDAR SETTING
1. Slide the TIME\AL\CALENDAR\AL.ON/AL.OFF
set switch to CALENDAR position. The Year , Month,
& Date digits will begin to ash on the display
2. Press the HOUR \ MONTH button to set the Month.
3. Press the MINUTE \ DATE button to set the Date.
4. Press the 12/24 \ YEAR button to set the Year.
5. Slide the TIME\AL\CALENDAR\AL.ON/AL.OFF
set switch to AL.OFF position after set the Calendar.
This equipment has been tested and found to comply with the limits
for a Class B digital device, pursuant to part 15 of the FCC Rules.
These limits are designed to provide reasonable protection against
harmful interference in a residential installation. This equipment
generates, uses and can radiate radio frequency energy and, if not
installed and used in accordance with the instructions, may cause
harmful interference to radio communications. However, there is no
guarantee that interference will not occur in a particular installation.
If this equipment does cause harmful interference to radio or
television reception, which can be determined by turning the
equipment off and on, the user is encouraged to try to correct the
interference by one or more of the following measures:
Reorient or relocate the receiving antenna.
Connect the equipment into an outlet on a circuit different from
that to which the receiver is connected.
Increase separation between equipment & receiver.
Consult the dealer or an experienced radio/TV technician for help.
This device must not be co-located or operating in conjunction with
any other antenna or transmitter.
Operation is subject to the following two conditions:
(1) This device may not cause harmful interference, and
(2) This device must accept any interference received, including
interference that may cause undesired operation.
Caution!
The manufacturer is not responsible for any radio or TV interference
caused by unauthorized changes or modifications to this equipment.
Such changes or modifications could void the user authority to
operate the equipment.
All rights reserved. This manual may not be reproduced in any
form, even in part, or duplicated or processed using electronic,
mechanical or chemical process without the written permission of
the publisher.
This booklet may contain errors or misprints. The information it
contains is regularly checked and corrections are included in
subsequent editions. We disclaim any responsibility for any technical
error or printing error, or their consequences. All trademarks and
patents are recognized.
FCC STATEMENT
Equity provides a 2-year limited warranty on this product from
the date of consumer purchase against defects for material and
workmanship. During this period such defects will be repaired, or
the product will be replaced at Equity’s option, without charge. This
warranty does not cover damage caused by misuse or negligence.
ALL IMPLIED WARRANTIES, INCLUDING BUT NOT LIMITED TO
IMPLIED WARRANTIES OR FITNESS AND MERCHANTABILITY, ARE
LIMITED IN DURATION TO A PERIOD ENDING TWO YEARS FROM
DATE OF PURCHASE.
Some states do not allow limitations on how long an implied
warranty lasts so the above limitation may not apply to you. This
warranty gives you specific legal rights and you may also have other
rights which vary from State to State.
If your product is not working properly, please send:
Your product. A letter explaining the problem and $5.00 for postage
and handling to:
Equity by La Crosse
Warranty Department
2830 26th St S.
La Crosse, WI 54601
www.lacrossetechnology.com/support
WARRANTY AND SUPPORT
• Always purchase the correct size and grade of battery most suitable
for intended use.
• Clean the battery contacts and also those of your clock prior to battery
installation.
• Ensure the battery is installed with correct polarity (+ and -).
• Remove battery from equipment when it is not used for an extended
period of time.
• Promptly remove an expired battery.
WARNING: TO REDUCE THE RISK OF FIRE OR ELECTRICAL SHOCK, DO
NOT EXPOSE THIS APPLIANCE TO RAIN OR MOISTURE.
Caution: To prevent electrical shock do not use this (polarized) plug with an
extension cord, receptacle, or other outlet unless the blades can be fully
inserted to prevent blade exposure.
CARE & MAINTENANCE
BATTERY BACKUP
Power: 120V power cord
Requires one 9V battery for back-up not included
POWER REQUIREMENTS
Page | 5 Page | 6
Page | 4
• Insert one “9V” battery into the battery compartment on the
back of the clock. The battery will keep the time settings until the
power is restored.
• The LED display will not light-up and the alarm will not sound.
• Replace with new battery when the battery symbol appears. on
the display.
Made in China Printed in China
WARNING: This product can expose you to chemicals including
styrene, which is known in the State of California to cause
cancer. For more information go to: www.P65Warnings.ca.gov
Red Button
RE D
GREEN
BLUE
AQUA
PURPLE
VIOLET
YELL OW
Green Button Blue Button
SELECT DISPLAY COLOR
1. Press the RED, GREEN and BLUE buttons
according to the chart to select desired color.


Produkt Specifikationer

Mærke: La Crosse Technology
Kategori: Clockradio
Model: 30451

Har du brug for hjælp?

Hvis du har brug for hjælp til La Crosse Technology 30451 stil et spørgsmål nedenfor, og andre brugere vil svare dig