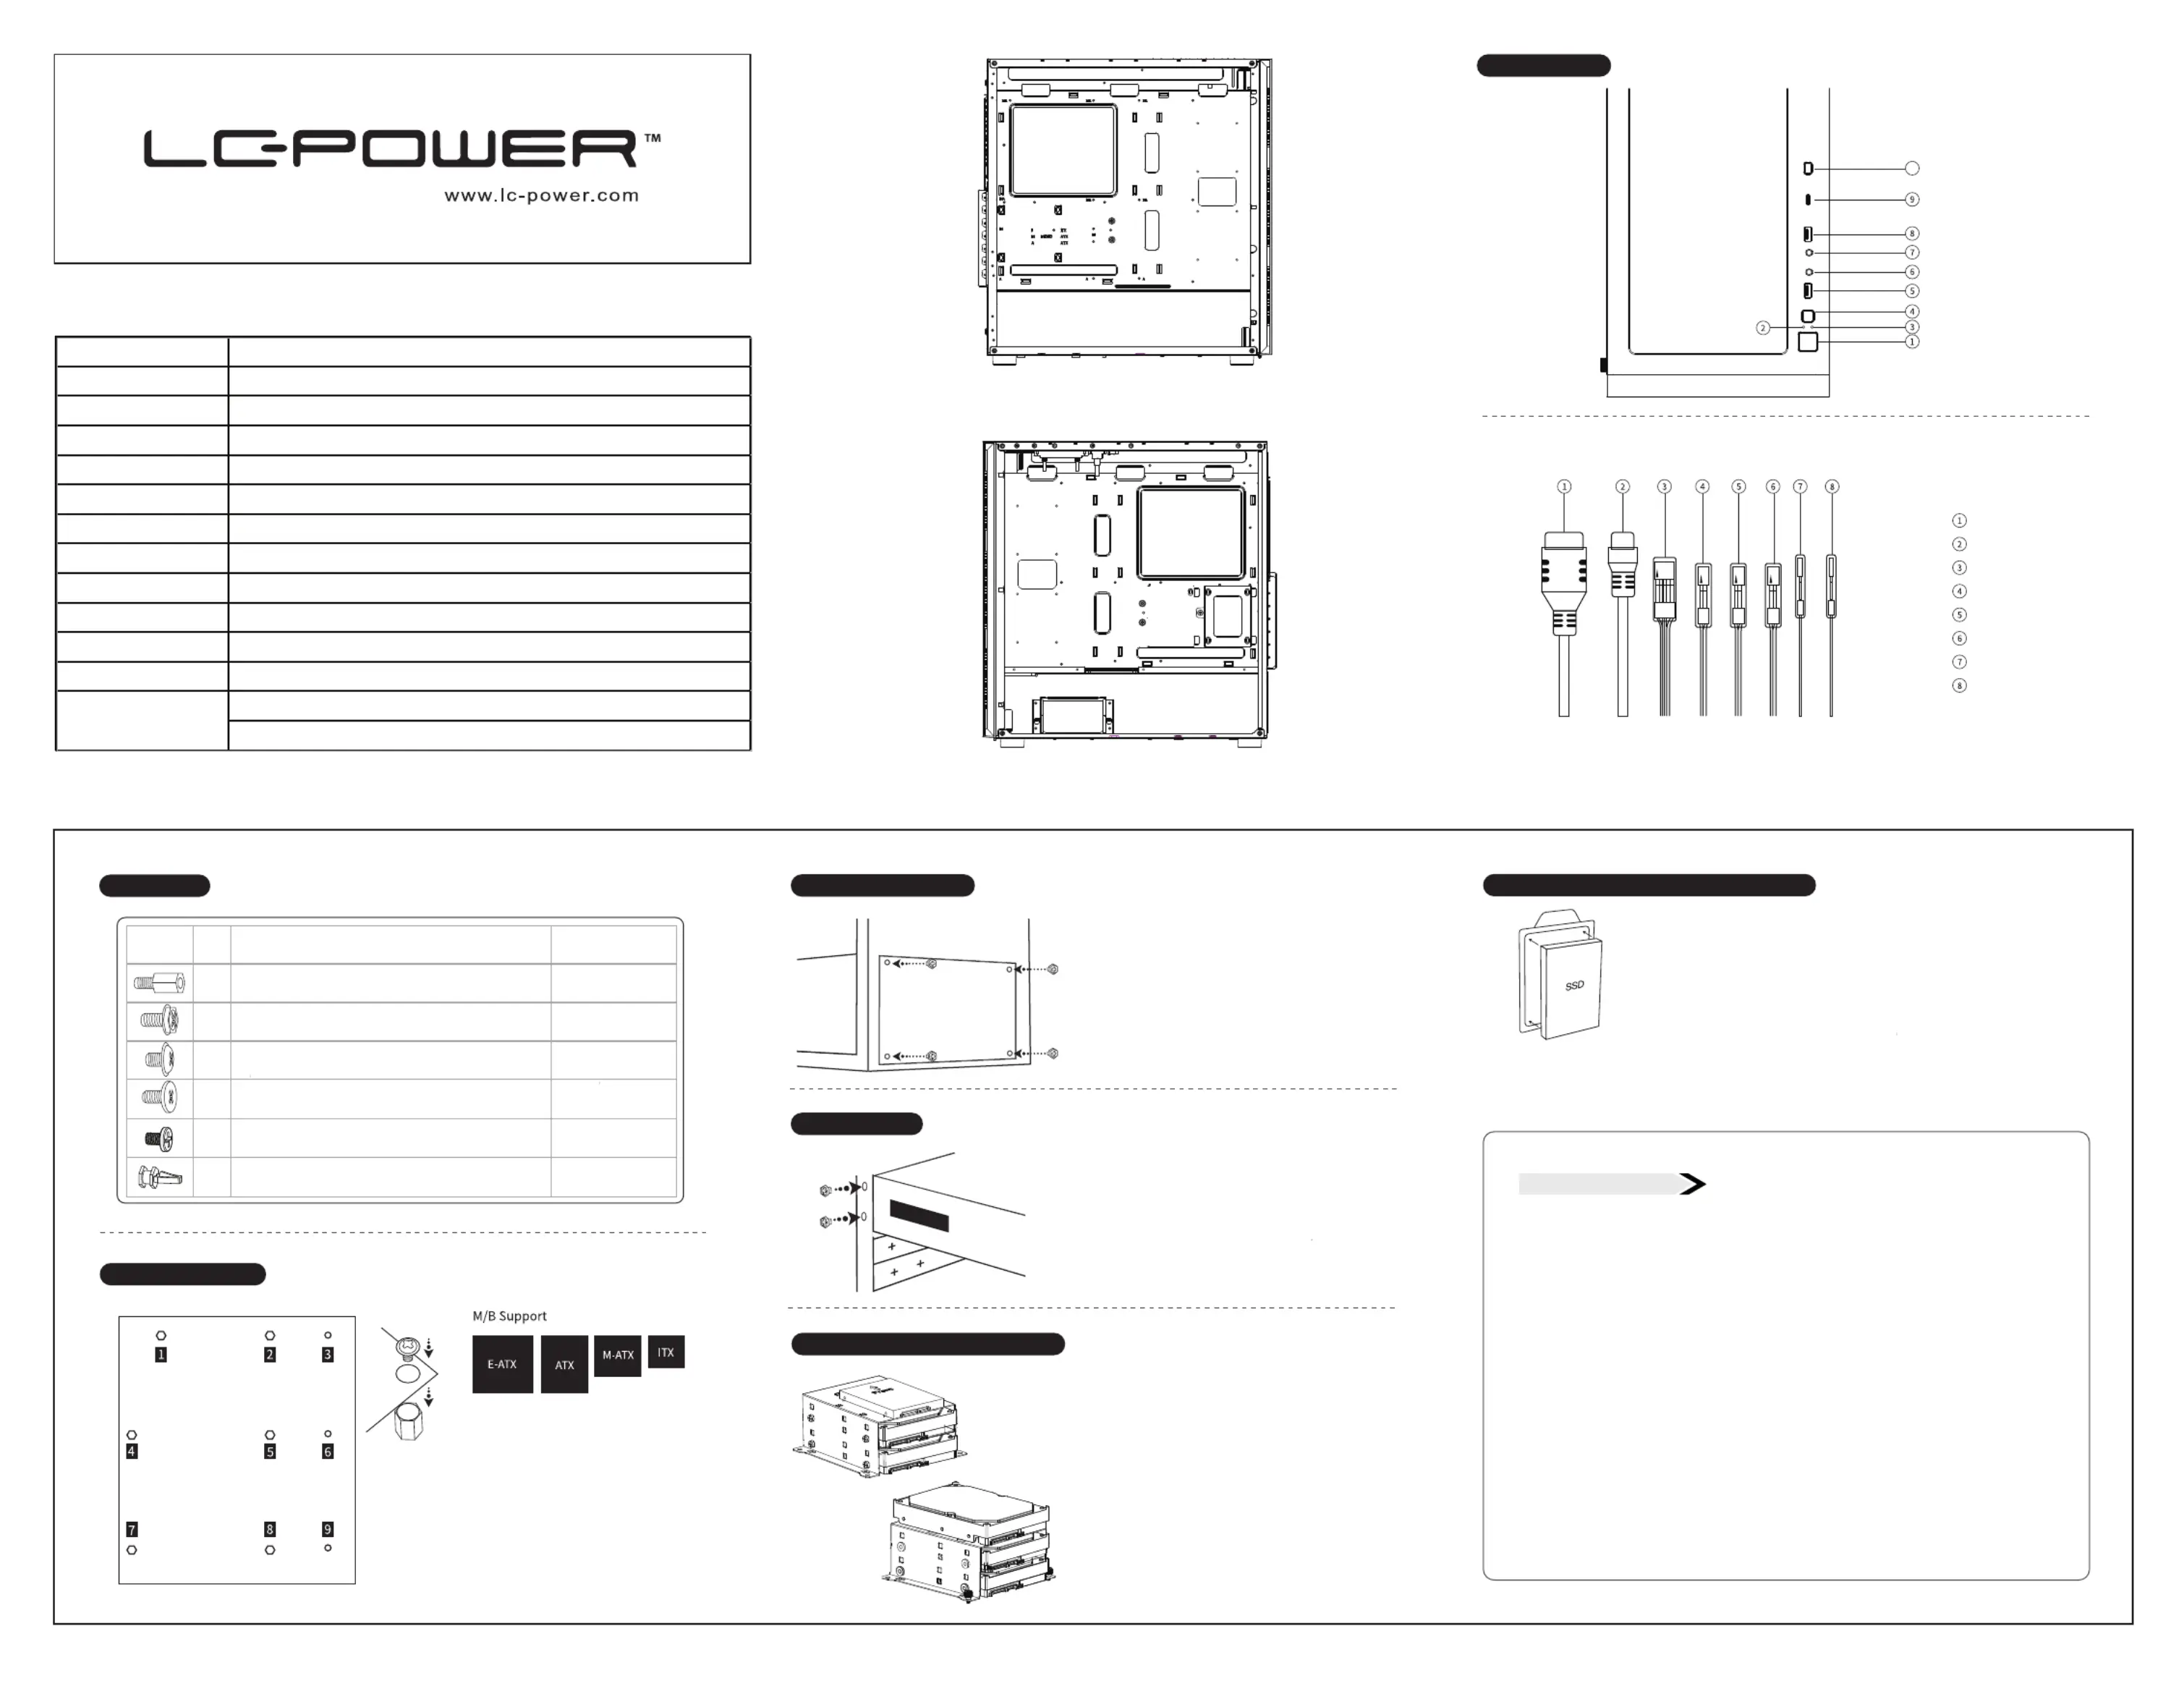
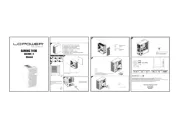
LC-Power Gaming 810W Manual

LC-Power Computertaske Gaming 810W

Læs gratis den danske manual til LC-Power Gaming 810W (1 sider) i kategorien Computertaske. Denne vejledning er vurderet som hjælpsom af 10 personer og har en gennemsnitlig bedømmelse på 4.7 stjerner ud af 5.5 anmeldelser. Har du et spørgsmål om LC-Power Gaming 810W, eller vil du spørge andre brugere om produktet?

Side 1/1
10
Mainboard installa on
1. Open the le side panel, install the I/O shield
2

to the mainboard model.
3. Insert the mainboard and se ure with s rews t pe 3 
USB-A (3.2 Gen. 1x1)
HD Audio
Power Switch
Reset Switch
HDD LED
Power LED +
Power LED -
Accessories
pe
Des rip on Quan t
1 Mainboard stando s 3 p s
2 S rews for power suppl PSU / GPU / PCI slot  p s
3 S rews for mainboard / 2,5" SSD 18 p s
4
5
S rews for 3,5" HDD 9 p s
 2 p s
 3 p s
USB-A (3.2 Gen. 1x1)
Power Button
HDD LED
RESET Button
Power LED
Headphone
Microphone
USB-C (3.2 Gen. 2x2)
LED Button
User Interface
HDD/SSD installa on in HDD/SSD bracket
1. Remove the ri ht side panel
2. Remove the HDD/SSD braket out of the ase bo om 
and slide the HDD tra out of the bra ket
3. Se ure the HDD or SSD to the tra s with s rews pe 4 or  pe 3
4. Install the HDD/SSD braket bak to
5. Se ure the HDD bra ket with thumb s rews
SSD installa on behind main board plate (op onal)
1. Remove ri ht side panel and nd the SSD bra kets
2. Remove the SSD brakets b unse ure the s rew
3. Se ure the SSD at the ba k side of mainboard  with 4 s rews pe 3 
4. Se ure the SSD bra ket with thumb s rew
Service & notes
Avoid direct sunlight d a an high t atemper ure environment, k p the case far ee away from fire and heat sources.
Keep it in dry places, keep it away from corrosiveness causing materials.
The product has a two year warranty period from the date of purchase, service issues will be handled by your dealer.
If the case is damaged due to improper operation, the warranty period expires immediately.
Check www.lc-power.com or contact us by e-mail at: service@lc-power.com.
Silent Power Electronics GmbH
Formerweg 8, 47877 Willich, Germany
www.lc-power.com / service@ ower.comlc-p / su orpp t@lc er.com-pow
GPU installaon
1. Remove metal plates on PCI slots
2. 
3. 

Power Supply installa on
1. Open the ri ht side panel
2. he fan of the PSU, then slide 
in the PSU into the power ompartment.
3. Se ure the PSU with 4 s rews t pe 2
* Please refer to the power suppl manual
for the power able onne on method.
Model G
M/B Type Support EA, A  , Mi ro A , Mini I
Internal Bays  3,5’’ HDD & 2,5’’ SSD
Front I/O Panel    US 2 , HD Audio, Power S Reset S LED S 
Front Cooling Fan 3 12 mm/14 mm fan or 1 24 /28 /3 mm water oolin radiator 
Rear Cooling Fan 1 12 mm fan or 1 12 mm water oolin radiator 
Top Cooling Fan 3 12 mm or 2 14 mm fan or 1 24 /28 /3 mm water oolin radiator   
PCI Slot  + 2 ver a  
Graphic Card Length up t
o 4 mm 
CPU Cooler Height up to 155 mm
Supported Power Supply A PSU
Cable management behind , up to 18 mm
4 2 5 48 mm front pane   
4 2 5 4 mm ludin front pane    
Dimension


Produkt Specifikationer

Mærke: LC-Power
Kategori: Computertaske
Model: Gaming 810W

Har du brug for hjælp?

Hvis du har brug for hjælp til LC-Power Gaming 810W stil et spørgsmål nedenfor, og andre brugere vil svare dig