Leisure NHL2 Manual
Leisure
Køkkenvask
NHL2
| Mærke: | Leisure |
| Kategori: | Køkkenvask |
| Model: | NHL2 |
| Bredde: | 980 mm |
| Dybde: | 508 mm |
| Produktfarve: | Sort |
| Første skål, dybde: | 180 mm |
| Anden skål, dybde: | 114 mm |
| Første skål, dimensioner (BxL): | 350 x 433 mm |
| Anden skål, dimensioner (BxL): | 154 x 298 mm |
| Antal vaskeskåle: | 2 skåle |
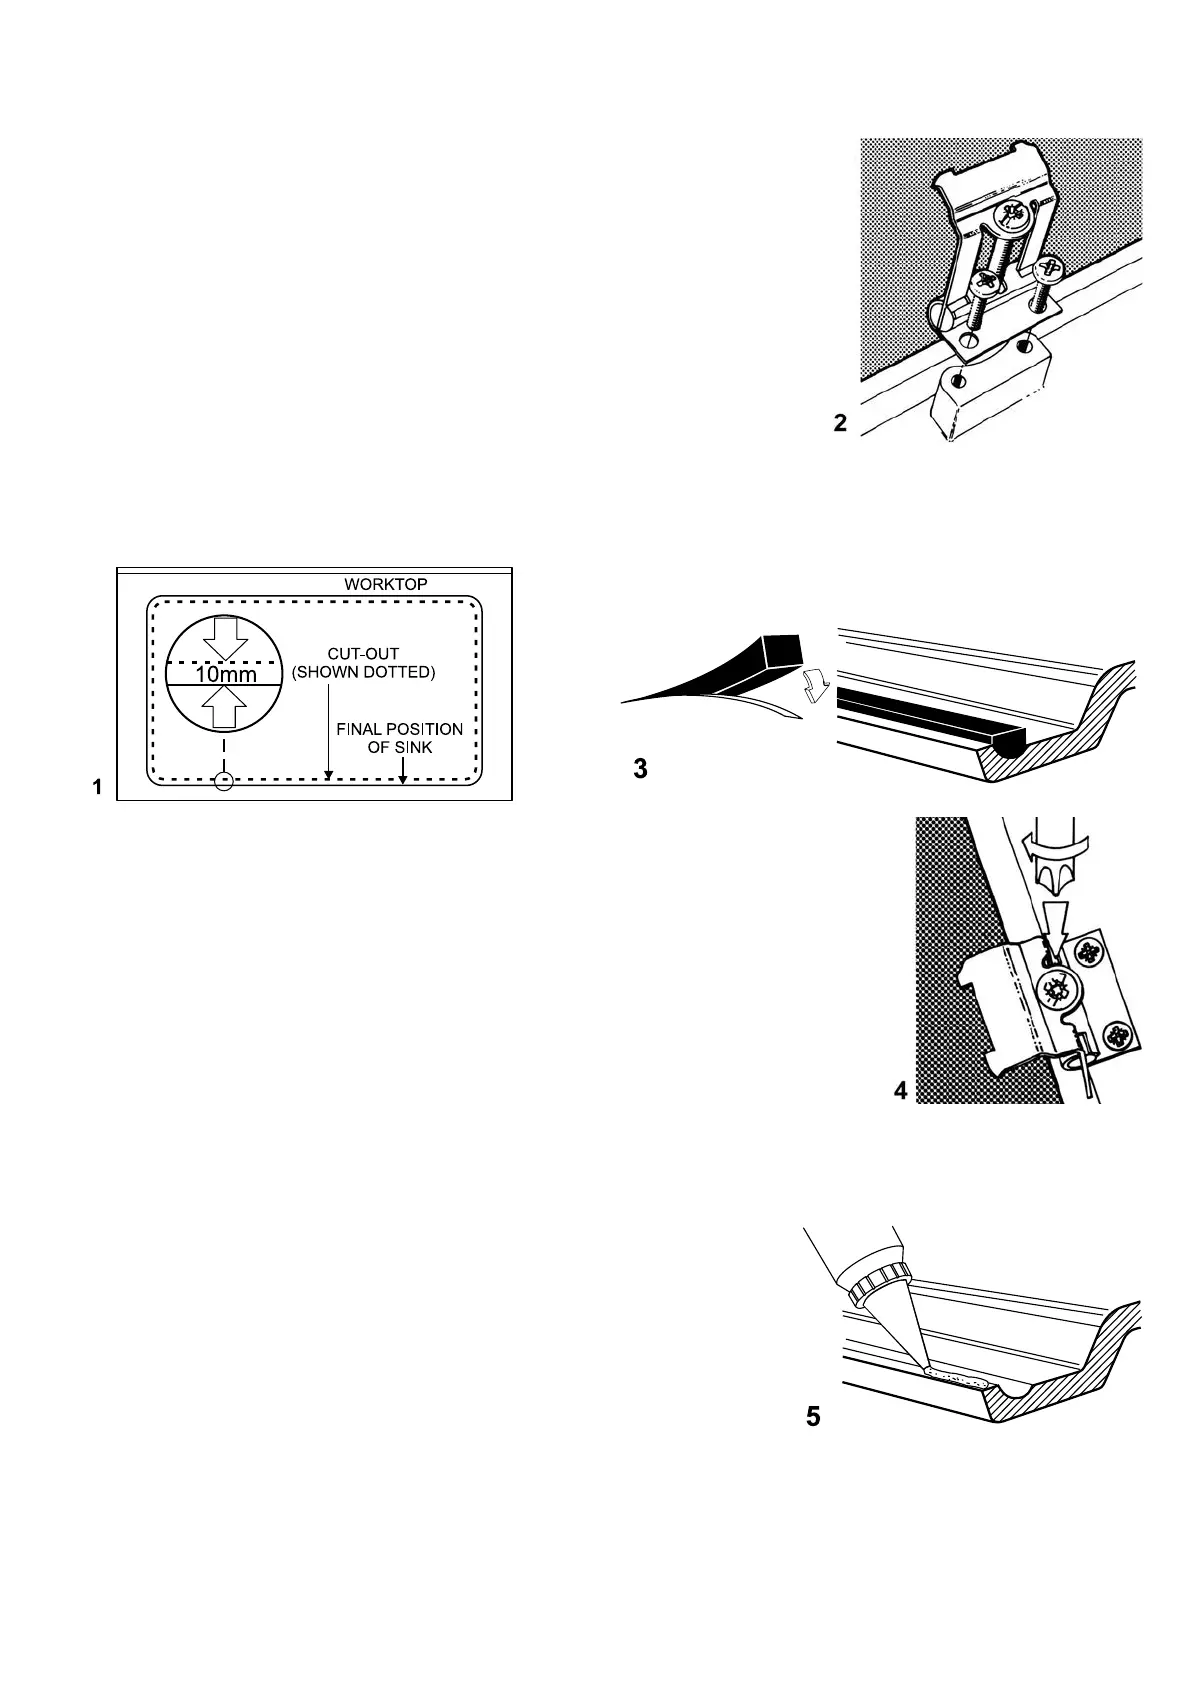
| Vask, type: | Top-monteret vask |
| Vask form: | Rektangulær |
| Facon på første vask: | Rektangulær |
| Facon på anden vask: | Rektangulær |
| Vandhane, hul: | Ja |
| Drænebræt: | Ja |
| Antal huller til haner: | 2 |
| Størrelse på vandhane: | 35 mm |
Har du brug for hjælp?
Hvis du har brug for hjælp til Leisure NHL2 stil et spørgsmål nedenfor, og andre brugere vil svare dig
Køkkenvask Leisure Manualer

2 Juli 2024

2 Juli 2024

2 Juli 2024

2 Juli 2024

2 Juli 2024

2 Juli 2024

2 Juli 2024

2 Juli 2024

2 Juli 2024

2 Juli 2024
Køkkenvask Manualer
- Stern-Williams
- IMC/Teddy
- Artusi
- Klarstein
- Concept
- Kernau
- Seima
- Blaupunkt
- CDA
- Deante
- BLANCO
- Franke
- Delta
- Fulgor Milano
- T&S
Nyeste Køkkenvask Manualer

23 December 2025

15 December 2025

10 December 2025

6 December 2025

30 November 2025

29 November 2025
13 November 2025
11 November 2025
11 November 2025
3 November 2025