Lelit PL042EMI Manual

Lelit Kaffemaskine PL042EMI

Læs gratis den danske manual til Lelit PL042EMI (4 sider) i kategorien Kaffemaskine. Denne vejledning er vurderet som hjælpsom af 27 personer og har en gennemsnitlig bedømmelse på 3.5 stjerner ud af 14 anmeldelser. Har du et spørgsmål om Lelit PL042EMI, eller vil du spørge andre brugere om produktet?

Side 1/4
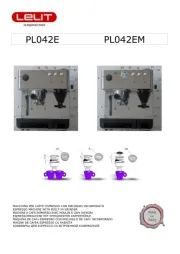
PL042EMI
ESPRESSO MACHINE WITH BUILT-IN GRINDER
Pag. 2
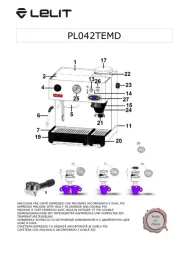
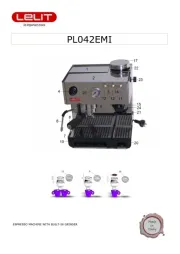
COMPONENTS :
1. Cold water tank
2. Cup warmer
3. Steam/coffee pilot light
4. Steam/hot water knob
5. Strainer holder retaining ring
6. Steam/hot water tube
7. Removable cup rest
8. Strainer holder
9. Single cup strainer
10. Two cup strainer
11. On/off switch
12. Steam switch
13. Coffee/hot water switch
14. Indicator light: machine on
15. Coffee press
17. Coffee beans container
18. Filter for pods
19. Removable water drainage tray
20. Removable ground coffee tray
21. Ground coffee switch
22. Grinding degree scale
23. Grinding regulation knob
24. Ground coffee distributor
25. Manometer
USER INSTRUCTIONS
Starting the machine:
1. Remove the machine from its packing and make sure all packing parts have been taken off (including the
protection bags).
2. Lay the machine on a flat and steady surface far away from hot places and from the water taps.
3. Remove the water tank cover on the back of the machine and take out the water tank (1) paying attention not
to damage the water tubes inside it.
4. Fill the tank (1) with cold water.
5. Replace the water tank back in the machine and check that the water tubes are not bent and that the filter is
well set on one of them.
6. Plug in the machine in the mains. Make sure that the wall socket is of the right voltage.
7. Place the filter holder (8) under the brewing group (5) and turn it from the left to the right. Leave it there so
that it can get warm and it gets ready for use.
8. Switch the machine on by pressing the on/off switch (11). The built-in light (14) comes on to confirm the power
supply.
9. Open the steam/hot water knob (4).
10. Press the steam switch (12) and the coffee/hot water switch (13).
11. When water comes out of the steam spout (6), press the coffee/hot water switch (13) and the steam switch
(12) again and close the steam/hot water knob (4).
12. After completing all these operations, leave the machine on.
Grinding adjustment:
13. As a reference for the grinding degree, a grinding degree scale (20) has been placed on the coffee beans
container (19): “7.6.5.4.3.2.1”
14. By taking as a point of reference the tally mark in the machine frame and by turning grinding regulation knob
(23), the grinding degree scale will turn accordingly.
15. Choose higher degrees to get coarse-ground coffee, or smaller degrees to get fine-ground coffee.
16. A correct grinding degree (taking into consideration the various coffee blends) is essential to get a good cup of
coffee. We suggest degree 3 to get a medium grinding.
Preparing an espresso coffee:
17. Check that the tank (1) contains water.
18. Press the on/off switch (11). The light (14) and the pilot light (3) will come on. Do this operation only if the
machine is off. If it’s on pass to the following point.
19. As soon as the pilot light (3) goes off, the machine is ready for use.
20. Place the single cup strainer (9) or the two cup strainer (10) in the strainer holder (8) as described in point 4.
21. Drop the bean coffee in the bowl (17)
22. Press the button (21) with the strainer holder (8) to activate the coffee grinder. When you have got the desired
coffee quantity, take the strainer holder (8) off.
23. Pack the coffee in the strainer against the press (15).
24. Insert the strainer holder (8) in the retaining ring (5) and turn it hard to the right; place the cups on the
removable cup rest (7).
25. Press the coffee/hot water switch (13).
26. When you have got the right quantity of coffee, press the switch coffee/hot water again (13).
27. Remove the strainer holder (8) and throw away the coffee grounds.
Preparing an espresso with the use of coffee pods:
28. Check that the water tank (1) has been filled in with water.
29. Press the on/off switch (11): the indicator light: machine on (14) and the indicator light: steam/coffee ready (3)
will come on. Do this operation only if the machine is off. If it’s on pass to the following point.
30. As soon as the indicator light: steam/coffee ready (3) goes off, the machine is ready for use.
31. Fit the pod filter (18) into the filter holder (8) that has been warmed up by leaving it attached to the brewing
group as described in point 4.
32. Open the single packed pod not damaging the pod.
33. Place the pod in its filter (18).


Produkt Specifikationer

Mærke: Lelit
Kategori: Kaffemaskine
Model: PL042EMI
Bredde: 330 mm
Dybde: 250 mm
Højde: 370 mm
Vægt: 10200 g
Produktfarve: Rustfrit stål
Kontroltype: Buttons, Rotary
Indbygget skærm: Ja
Skærmtype: Analog
Produkttype: Espressomaskine
Strøm: 1200 W
Placering af apparat: Bordplade
Antal tude: 2
Vandtank volumen: 2.7 L
Kaffetype: Coffee beans, Ground coffee
Kaffemaskine type: Vejledning
Maksimalt driftstryk: 15 bar
Indbygget kværn: Ja
Fremstilling af Espresso: Ja
Fremstilling af Cappuccino: Ja
Volumen i kopper: 2 kopper
Vandmåler: Ja
Damprør: Ja
Flere drikkevarer: Ja

Har du brug for hjælp?

Hvis du har brug for hjælp til Lelit PL042EMI stil et spørgsmål nedenfor, og andre brugere vil svare dig


Kaffemaskine Lelit Manualer
Lelit

Lelit Anita PL42TEMD Manual

26 September 2025
Lelit

Lelit PL042EM Manual

13 September 2024
Lelit

Lelit Elizabeth PL92T Manual

3 September 2024
Lelit

Lelit PL042TEMD Manual

21 August 2024
Lelit

Lelit PL41PLUS Manual

19 August 2024
Lelit

Lelit Anna PL41LEM Manual

18 August 2024
Lelit

Lelit PL042EMI Manual

18 August 2024

Kaffemaskine Manualer

Nyeste Kaffemaskine Manualer

Capresso

Capresso Steam PRO Manual

27 September 2025
Capresso

Capresso Perk Manual

27 September 2025
Capresso

Capresso On-the-Go 425 Manual

26 September 2025
Caffitaly

Caffitaly S14 Manual

26 September 2025
Caffitaly

Caffitaly Diadema S16 Manual

26 September 2025
Caffitaly

Caffitaly S01HS Manual

26 September 2025
Caffitaly

Caffitaly S9001 Manual

26 September 2025
Egro

Egro Next Manual

25 September 2025
Ufesa

Ufesa Bellagio Manual

24 September 2025